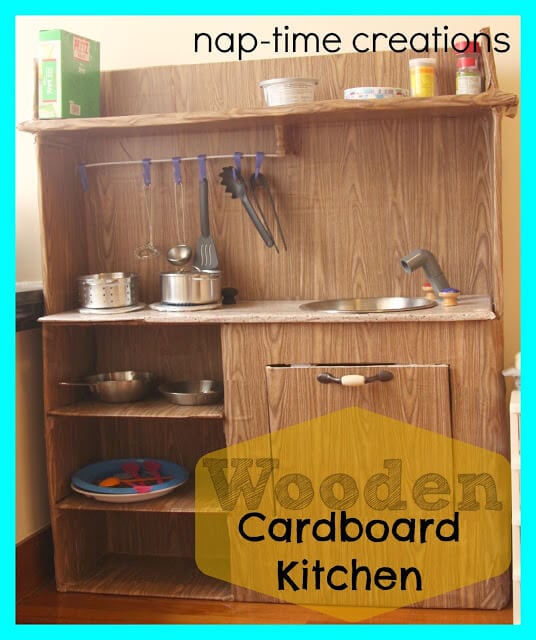
I had read about how some people covered the cardboard in contact paper to reinforce it, and I went to the store looking for something cutesy… I was thinking maybe black and white checked or even red. BUT… then I saw the wood and granite style paper and I KNEW that was what I wanted! Check it out!
I am SOOO happy with how it turned out. I will say upfront… I am not an expert at putting on the contact paper! Yikes! That stuff is sticky! You will notice wrinkles in my pictures and I just want to get it out there, that I know…. I know! But, onto happier topics…. I didn’t make a complete tutorial, but I will show you some of the details from along the way.
This is how it looked before the cover..WOW, what a difference, huh?
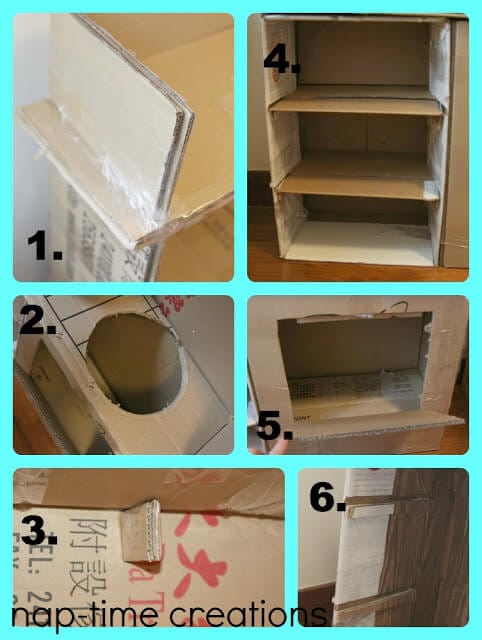
I used some glue (to hold big parts together) and LOTS and lots of clear packing tape. Like rolls and rolls!
1. the top shelf is notched to the sides and supported in the middle with a brace (#3).
2. The hole for the sink opens to the oven underneath.
3. The brace for the top shelf is stuck through the back wall and glued and taped into place.
4. the shelves and double layer cardboard from an additional box and stuck into the top flaps (slots cut) that are pushed down into the box. After I covered with the contact paper, I actually glued the shelves in the slots. (#6)
5. The oven door is just cut from the box. I had to cut the door a little smaller after because when the paper is on the opening was not big enough. The base of the oven has a lift in it to bring the bottom up to the level of the door.
6. The shelf supports.
What my craft room/office looked like for a weekend!
We have already enjoyed it!
The wire for hanging is a real sturdy wire clothes hanger cut. I then stuck it into the cardboard on the side and the middle brace and held it in with glue.
The burners are cardboard covered in tinfoil with a picture of a burner frame (from google images) printed out and glued on top. I then covered the whole thing with clear contact paper. The dishes and utensils are from IKEA. The knobs and cheap wooden ones, painted and held in place through the counter with a screw. Yes, they really turn! The sink is a bowl set into the counter and glued in place.
I made the faucet by taking two pieces of plastic pipe… I then rolled up a piece of cardboard cereal box and shoved it inside to stabilize pieces. I used hot glue to hold in all in place. I cut a small cycle in the countertop, inserted the straight end and glued in place.
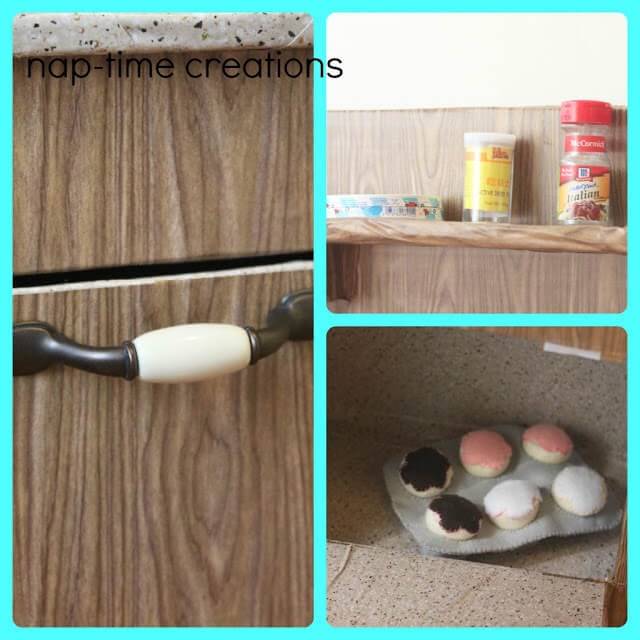
The handle on the oven is a real cabinet handle from Lowes. I’ve been saving empty food bottles and containers for this as well. I’m gluing on the tops to avoid all the small pieces. I used the granite paper to line the oven.
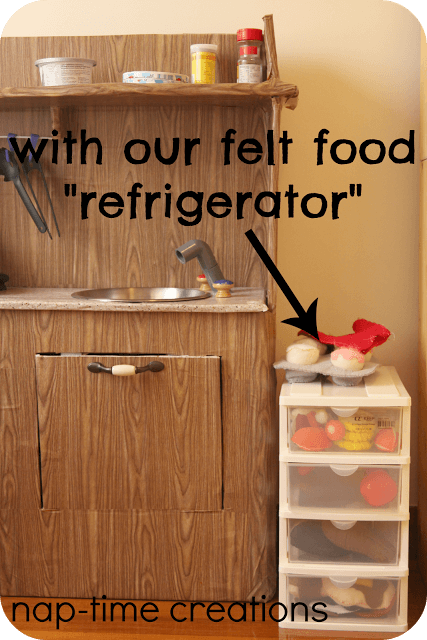
We keep our felt food in this little plastic drawer set and my boys call it a refrigerator!
So excited about our new toy and I keep cranking out the felt food so another update on that will be posted soon! I’m hoping the boys will have as much fun playing with this cardboard kitchen as I had making it!
Follow along here: Facebook * Pinterest
Shared here:
Domesblissity-Thriving on Thursdays
Pinworthy Project Party-Just the Four of us
Looking forward to seeing you around the blog…. don’t be a stranger!








melissa says
SO cute Emily!!!! Love, love, love it!
Amber @ Defrump Me says
It looks adorable! I love it. I found you at Bear Rabbit Crafts link-up.
The Paines says
Great post! Glad that you were able to get some “nap timing” done with while the ones slept. The kitchen is so creative!
toady mama says
Looks super fun!
Terry says
Cute!
Angela at A Typical English Home says
How clever! My boys have an amazing wooden kitchen so I wont be trying this personally, but I thought it was a brilliant idea so I’ve pinned it to inspire others. (I’m also your newest follower on Pinterest).
Our Pinteresting Family says
That is so adorable! I love it. Megan
Reduce, Reuse, Renewed says
Wow! That is dedication! Great idea, too, on the reuse of cardboard. 🙂
Audra @ renewedprojects.blogspot.com
Kirstin @ Hello Kirsti says
Soo cute!! Great to see a ‘boy’ kitchen for once =)
Evelyn says
This is so smart aka clever. Great idea and love the burners:) I am looking forward to seeing the felt food
Thank you for sharing at Freedom Fridays Blog Hop
Hope your weekend is great:)
Maysem says
Wow! That looks amazing! I want to play too;) It reminds of the big dollhouse my sister and I made when were children… I loved that house. I’m sure your boys are loving their new kitchen:)
Heidi@OneCreativeMommy.com says
Fantastic job! I love the “felt food refrigerator!” (Have you seen my Felt Food Roundup? I’d love for you to add your projects.) Thanks for joining the party at One Creative Weekend! I hope to see you back today.
Madame Doizan says
Just found you through a search engine. The kitchen’s great for a boys and girls. We sell the contact paper at Home Depot…
Alt-J This Is All Yours leaked album says
Hello, I think your site might be having browser compatibility issues.
When I look at your website in Chrome, it looks fine but when opening in Internet Explorer, it has some overlapping.
I just wanted to give you a quick heads up! Other then that, excellent blog!
Flowers Drew says
I really liked this post you’ve authored. The particular last time
I have read something both equally good was along with this post in https://notequaeler.ch/. Thank a person for
you deep knowledge of the subject and for sharing it with us all.
The chinese language of this article is usually amazing.
Keep upwards the good function!