


inside: Create beautiful scrappy Christmas potholders with this sewing tutorial. Use up scraps of fabric to add flare to your kitchen this holiday season. Simple sewing tutorial.
**Updated 12/2023**
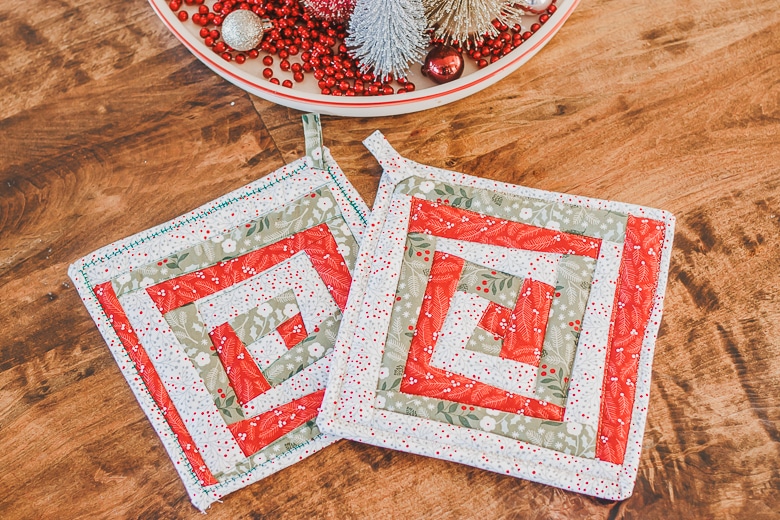
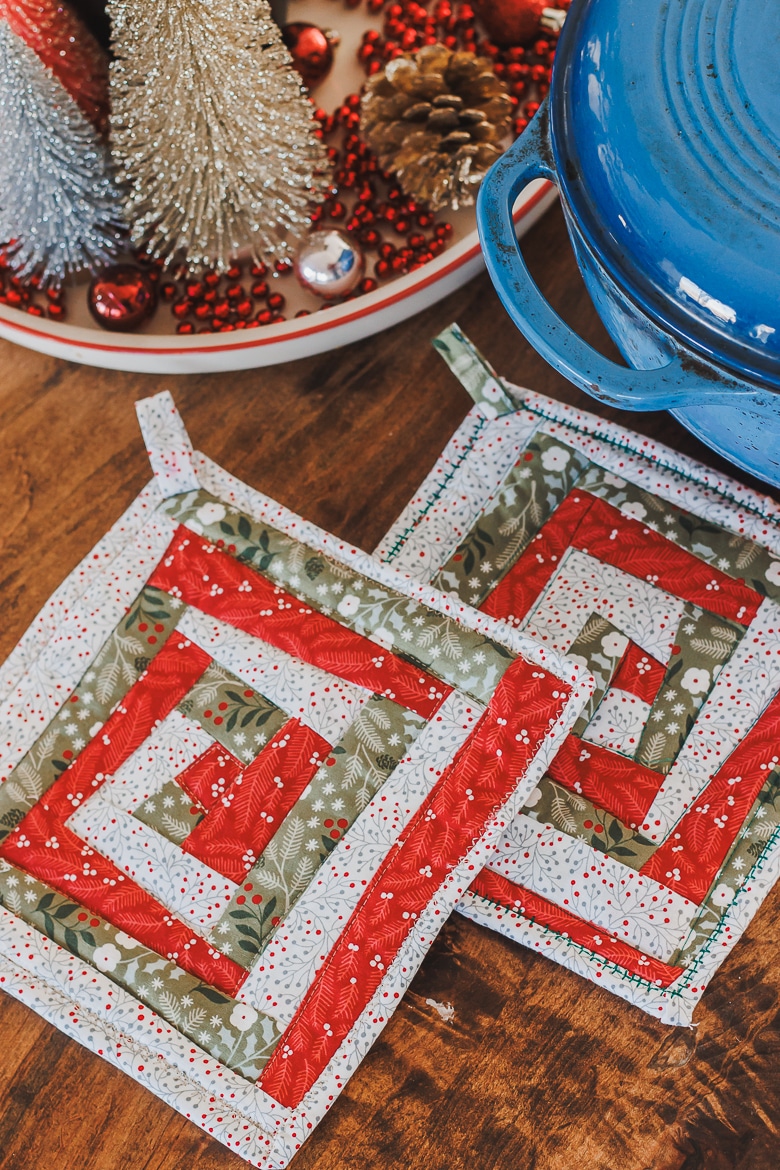
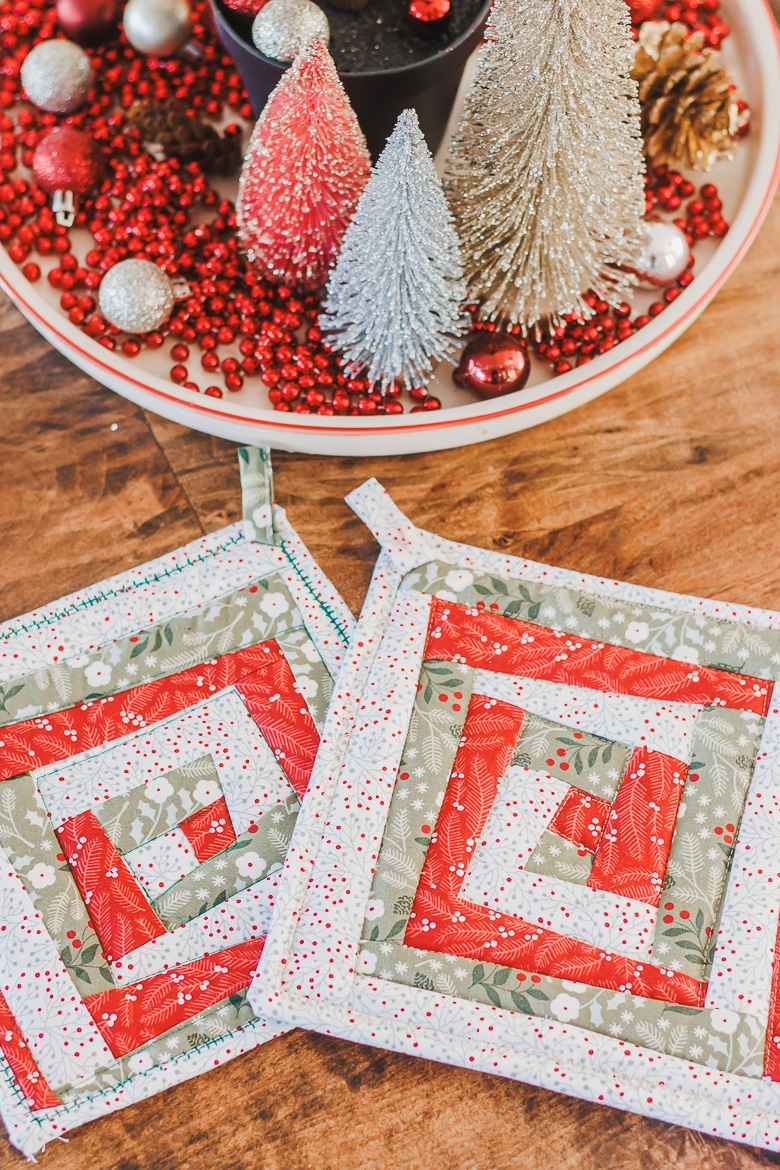
Scrappy Christmas Potholder
Ahhh these turned out just so pretty! I’m so pleased with the re-make of this tutorial. You can still see my original potholders below, but I really wanted to make some new ones. I no longer have any of the original {from 2012!} as I gave them all away as gifts the year I sewed them.
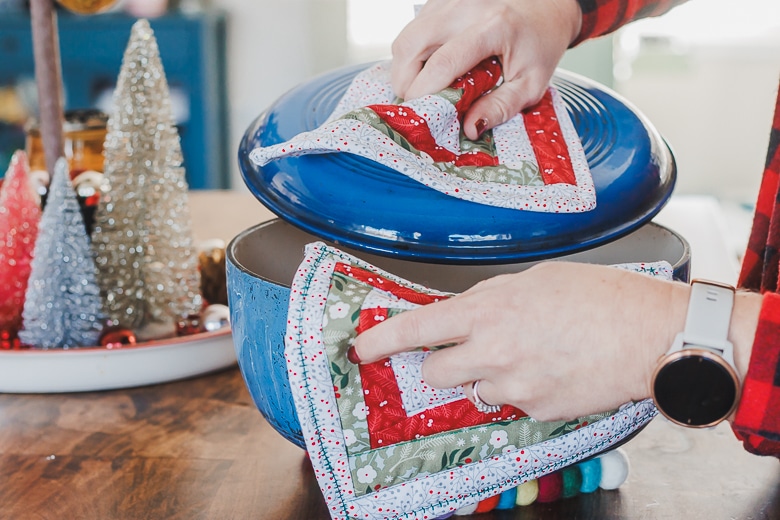
I use these potholders all December and really want to make some for other seasons/holidays as well.
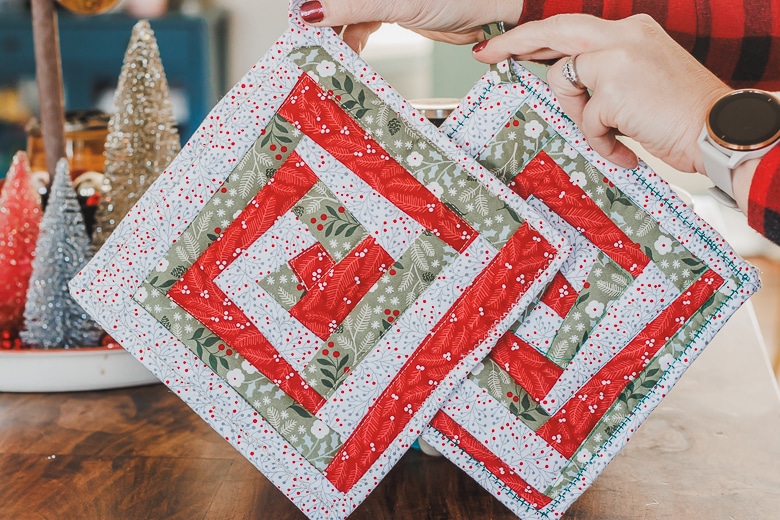
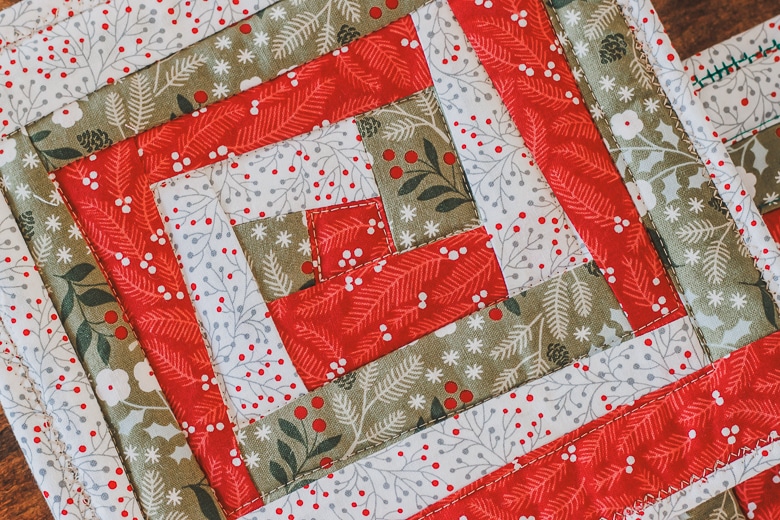
These potholders are so pretty! {it’s all about the fabric!} You can see how I choose to do my top-stitching in this photo, but you can stitch your layers together however you want.
Let’s get started with the Christmas potholders tutorial!
Potholders Sewing tutorial-
Potholder sewing supplies
- Scraps of fabric {Christmas or other}
- At least 1 larger square per potholder {8.5″ x 8.5″}
- Insulbrite thermal batting
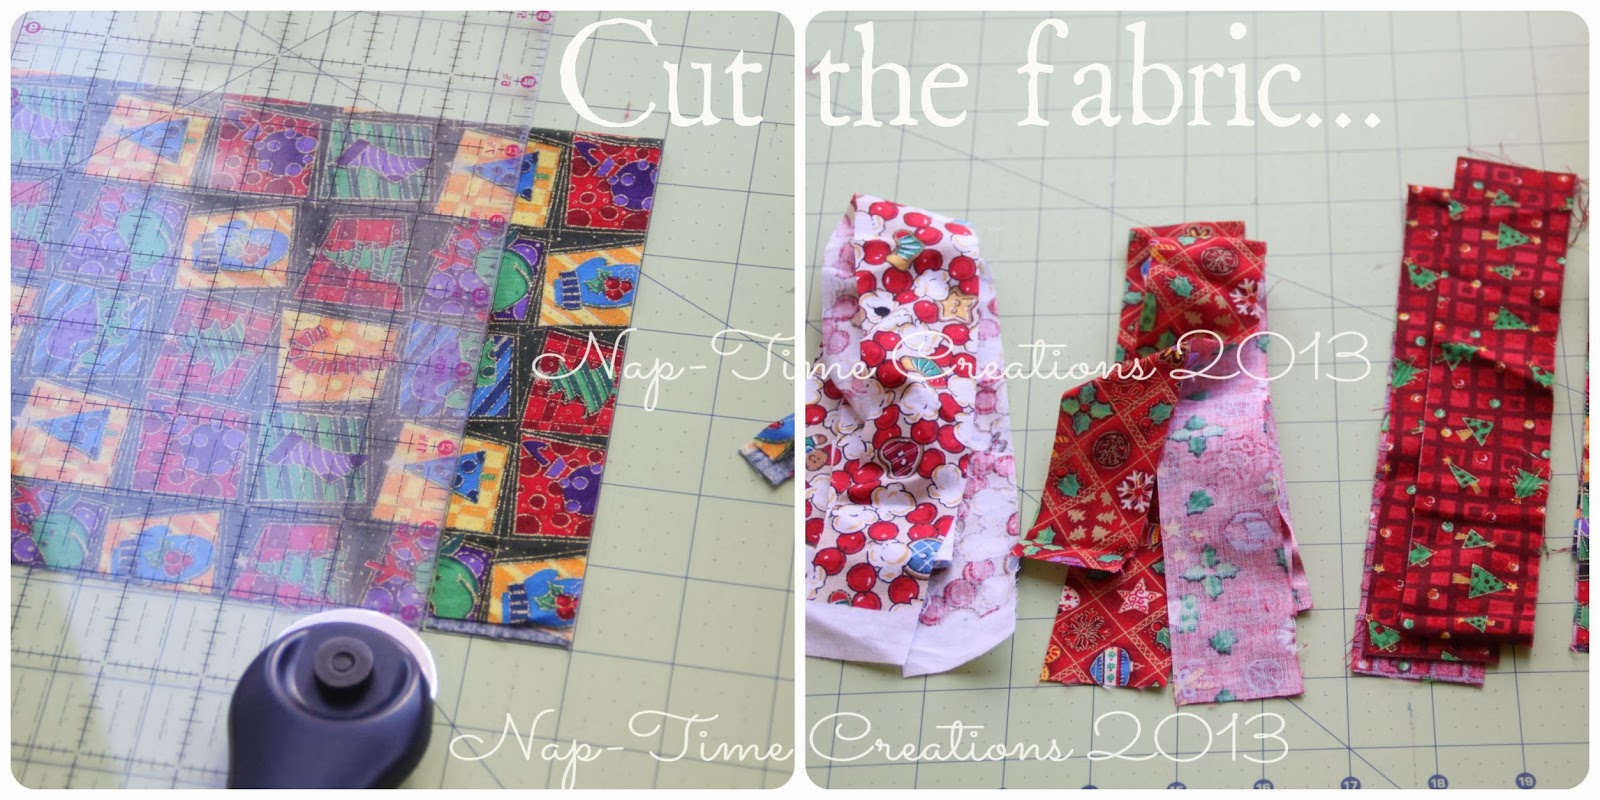
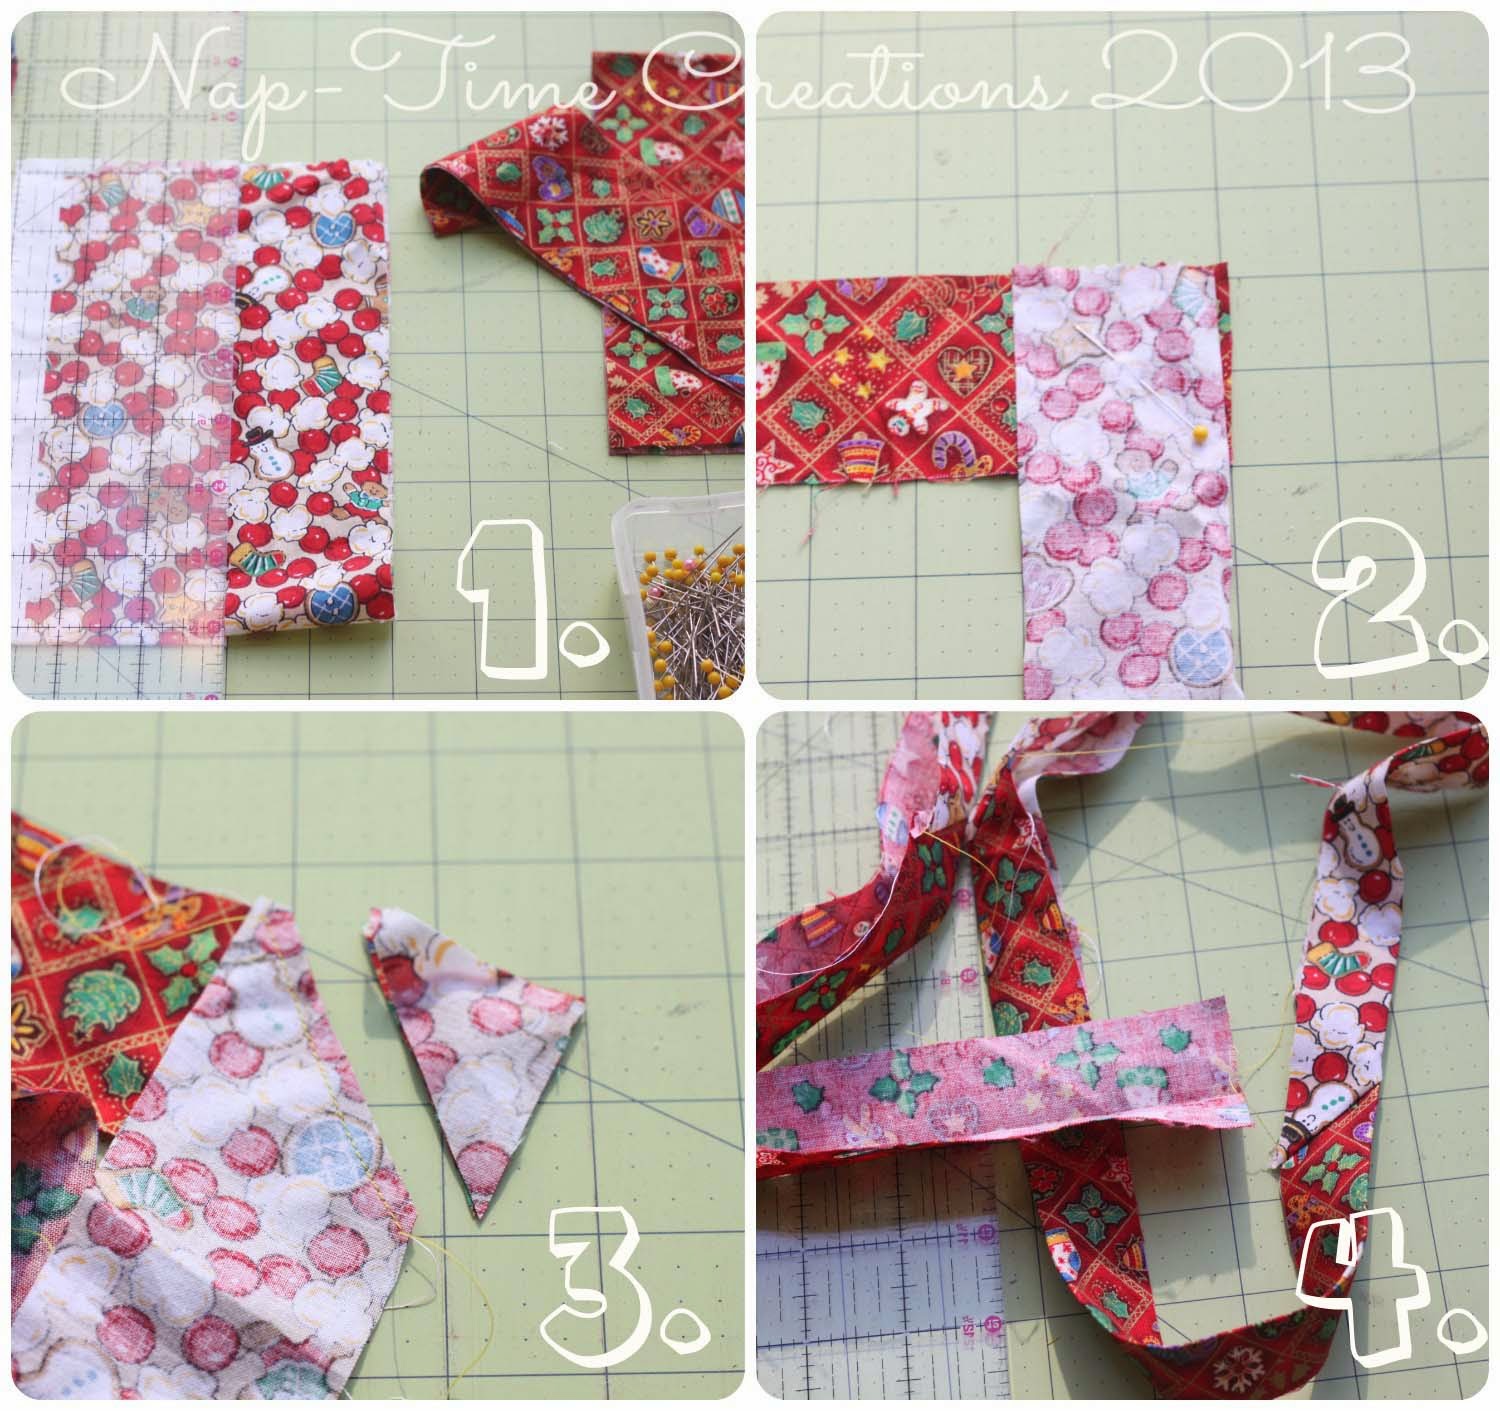
I used scraps for todays quilted potholder pattern. You can also use larger pieces of fabric. You will need to be able to cut 1 1/2 inch wide strips. They don’t have to be very long, although you will need some the length of the potholder {around 8 inches} so…
You will need
3/4 yard of fabric, assorted colors, cut into 1 1/2″ strips. I used four colors.
Cut one 8×8″ square, fabric of your choice for the back.
36″ of of 2″ wide fabric strip for binding {more on that later}
Batting, cut in 8″ squares
Here are my cut fabric piles.
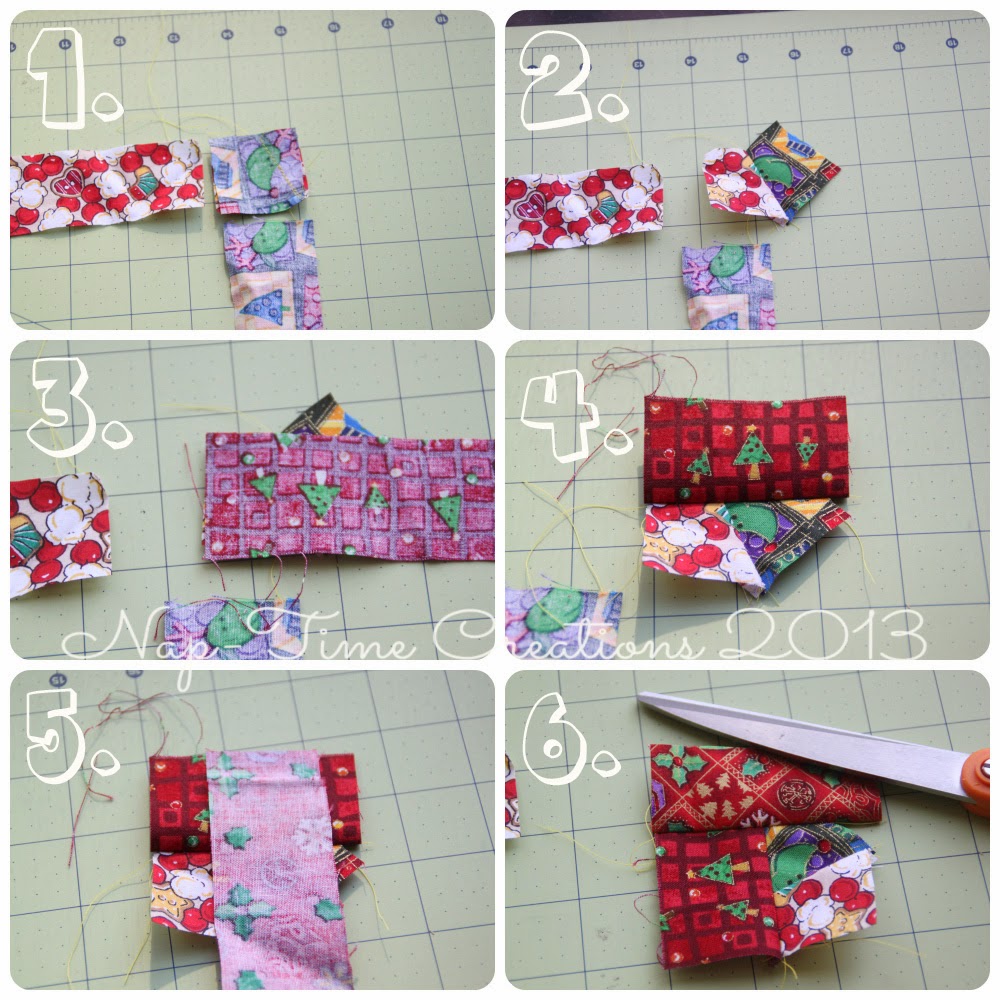
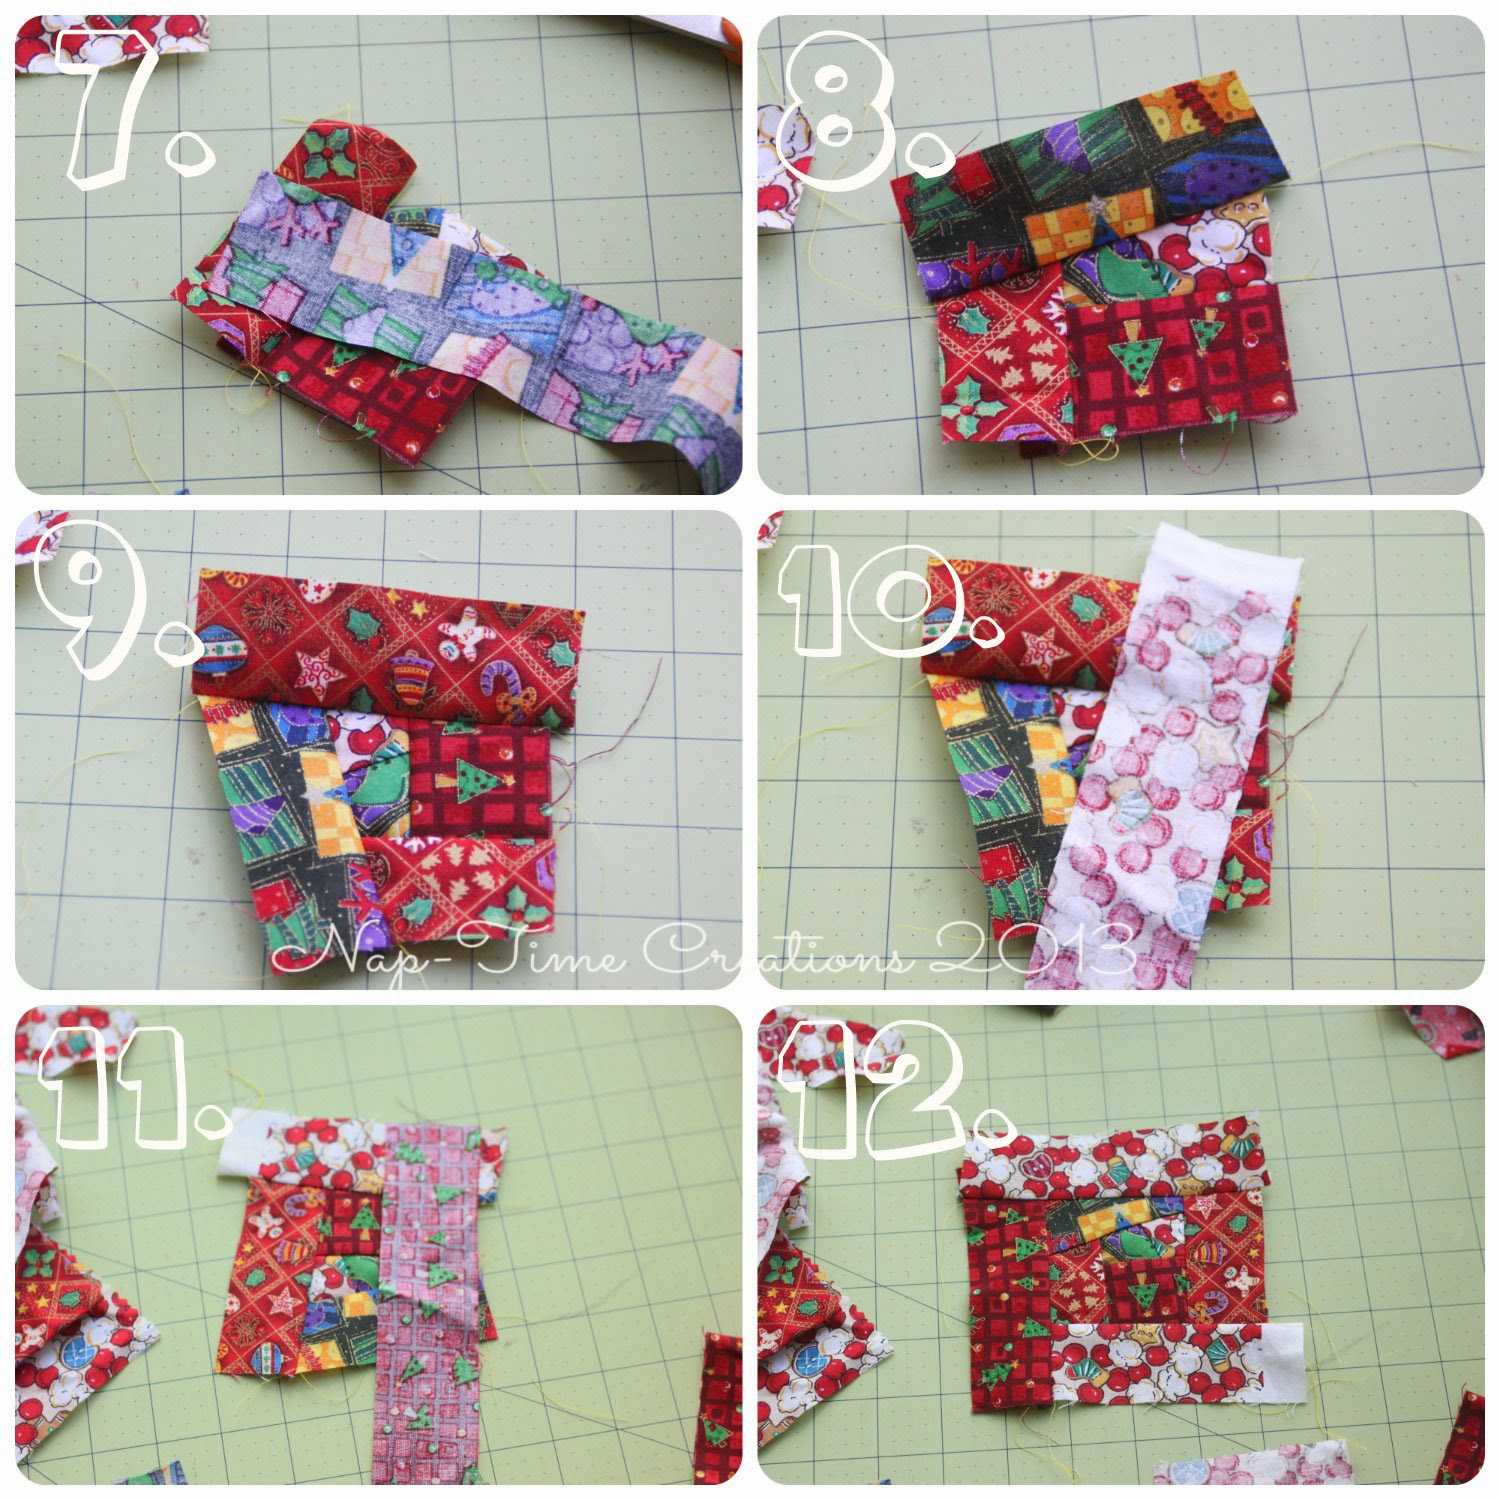

Next we need to create the binding. 1. cut 2″ long strips. You can use all one color or more if desired. 2. Sew the strips together {if you need} so you have the length of the perimeter of the potholder 8×4=32 + some extra I would have at least 36 inches of binding. Sew together at a right angle to minimize the fabric thickness of the binding. {a straight seam creates a big bunch of fabric in one place, this technique spreads out the seam.} 3. Clip the seams and iron in half length wide wrong sides together. 4. my ironed binding ready to sew on the potholder.
See this binding tutorial for more tips.
Okay, now for the exciting part! lets put it all together. You can buy insulated batting specifically for potholders… I didn’t have any, so I just used four layers of my regular blanket batting {it seemed to keep the heat off my hand in my test sessions!} Lay your 8×8″ square right side down, add the batting, then top with the quilted square right side up. {1}. 2. Pin, Pin, Pin!!! Use lots of pins to hold it all together and everything in place. 3. Sew/quilt the potholder. I sew along all the seams, but you can do whatever you want. 4. It should look similar to this when finished. All sewn together. Trim the edges.

Lets add the binding now. Start along one side and pin to the first corner, leave a bit of a tail {don’t sew from the start of the binding fabric}When you get to the corner sew to almost the end of the side, stop, pull your fabric out from the machine {dont take it all the way out and cut the thread as I did the the photo} Make a 90 angel with the binding, fold it down and continue sewing. This will give you enough fabric to make a nice corner on both sides. When you get all the way back around you should have two tails.
1. With right sides together pinch the tails together so the edges are flat on the potholder. You want to find where to sew them together to finish the binding. 2. I often fold my project in half to help pin and sew a straight line. Sew where you pinched and pinned. 3. You should now have a completed edge. Sew to the potholder. 4. Trim all the threads from the quilting and binding. 5. this is my back. 6. fold the binding back over and hand-stitch to the back of the potholder.
You did it!!! I love my Christmas Potholders! Now, make several more and give them to all your friends for Christmas!


Other fun quilty Christmas Projects


SpellBee says
These scrappy Christmas potholders sound like a fun project! I love how you can use up leftover fabric. It’s like giving new life to old scraps. I once made something similar with fabric remnants and it was so satisfying. Do you think it would work with non-Christmas fabrics too, like just using bright colors for a pop in the kitchen year-round? And how do you decide which scraps to pair together for the best look?