
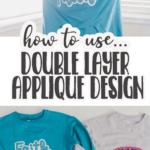
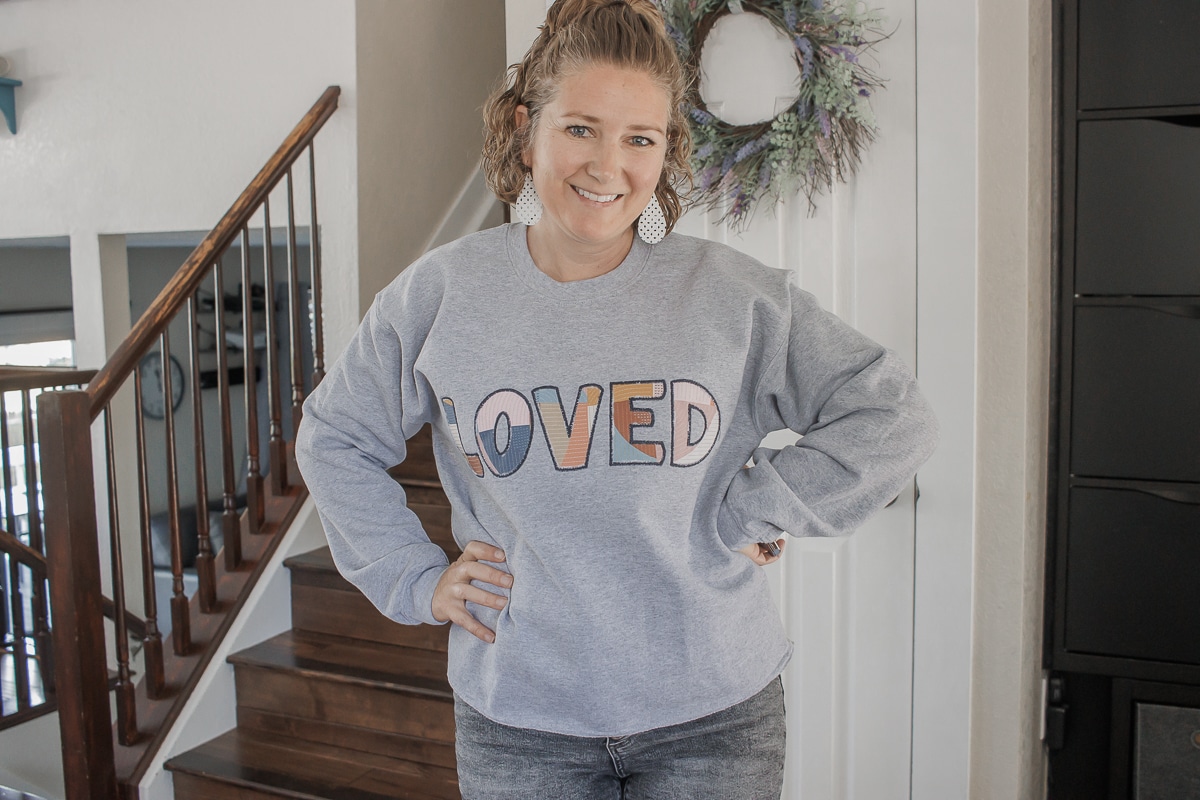
Inside: learn how to use a satin stitch double layer applique design to create beautiful applique shirts. Use two layers of glitter heat transfer to embroider amazing works and designs to sew custom clothing.
Double layer glitter vinyl applique


Other amazing sweatshirt projects to make-
Here are some photos of other fun sweatshirt projects. Check out the links below the photos for more details!


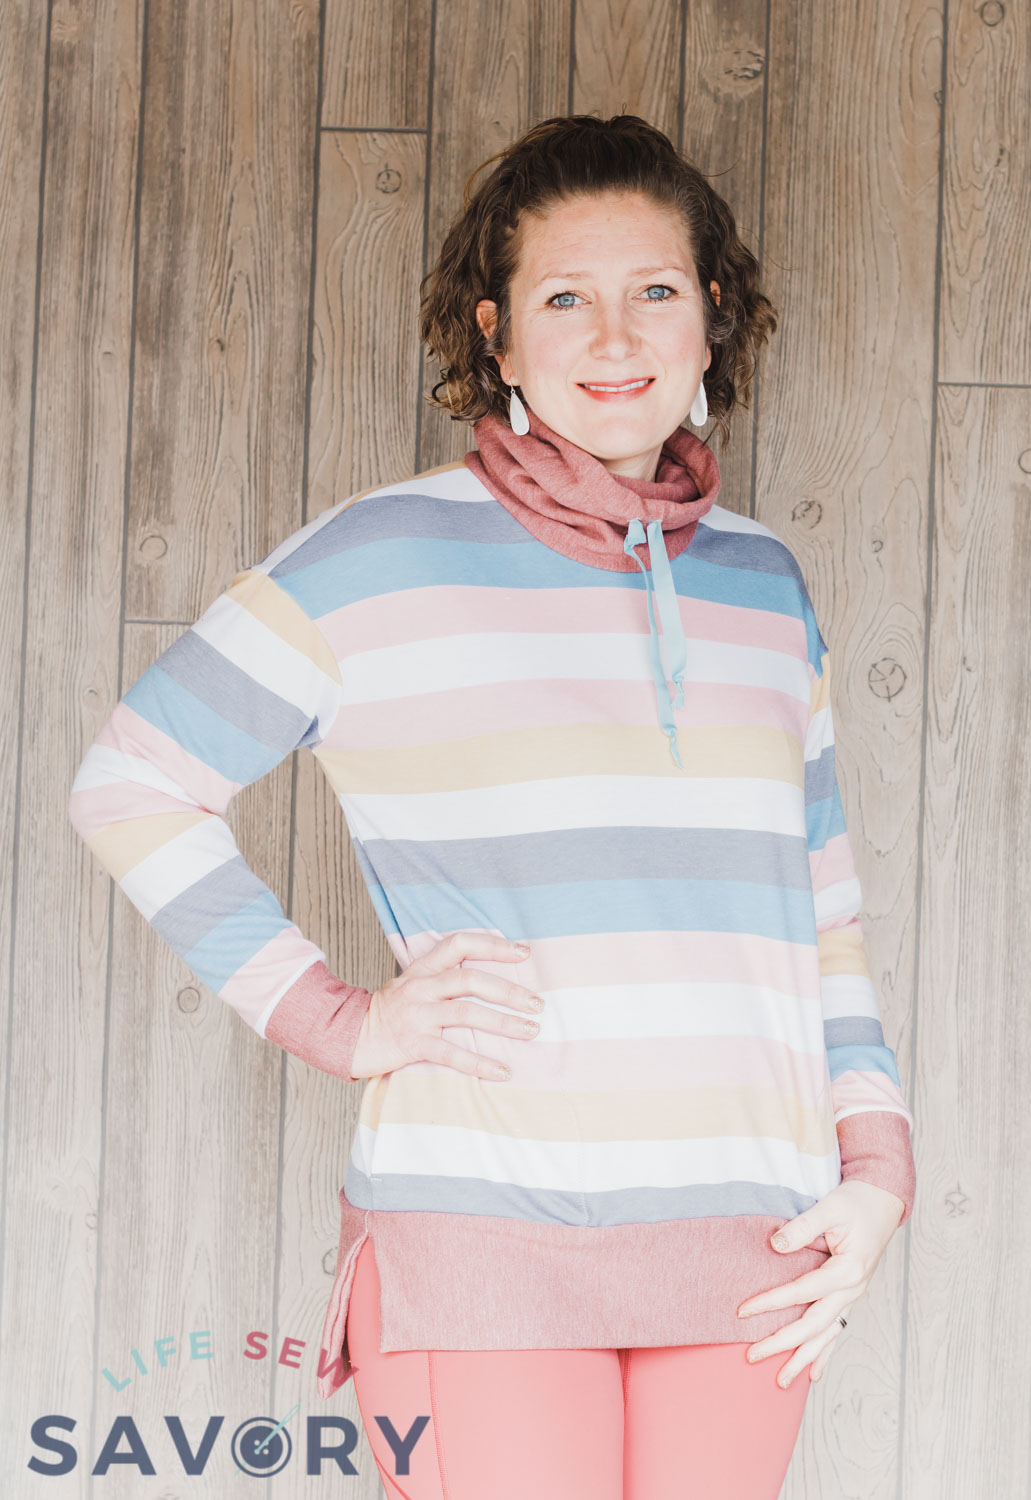
- Reef Sweatshirt and a list of 25+ sweatshirt patterns
- Christmas sweatshirts
- Girls tunic sweatshirt free sewing pattern
- Gathered shoulder sweatshirt dress
- Raglan Sweatshirt
- Womens tunic sweatshirt
- Reverse Applique sweatshirt
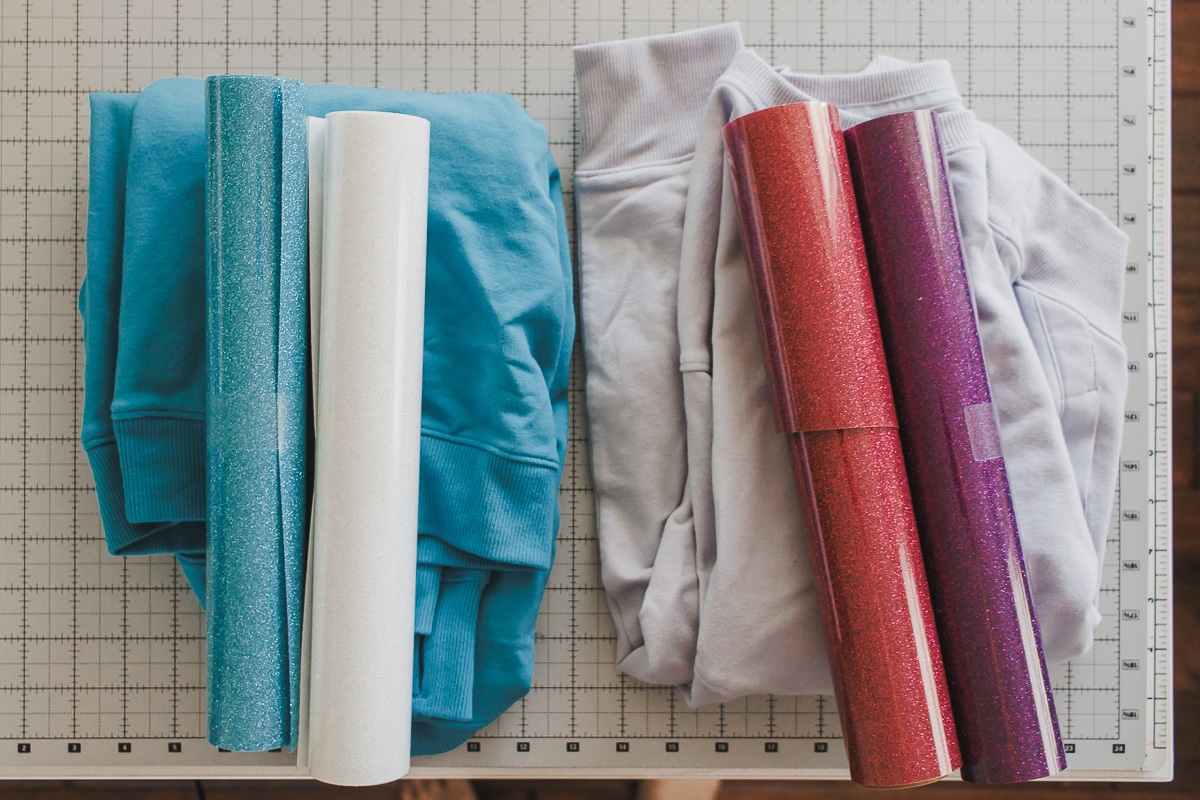
Supplies for glitter double applique
- Sweatshirt or shirt {I got these on clearance at Target many years ago and Rose is finally big enough to wear!
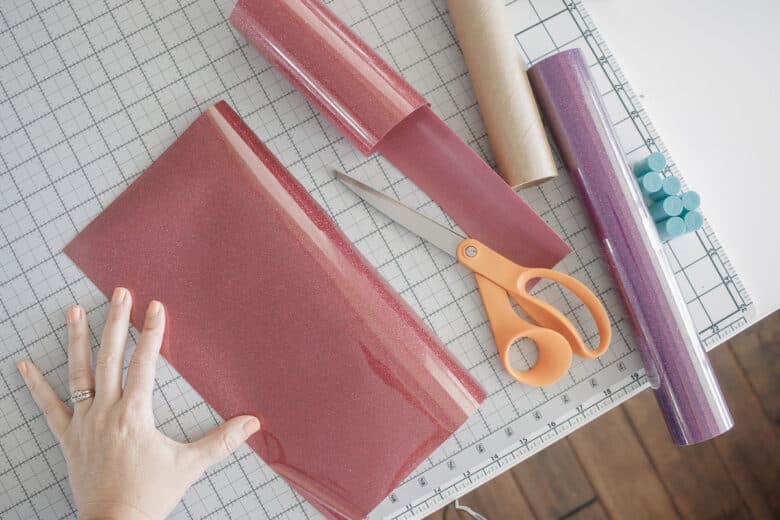
- Glitter vinyl {must be glitter as it tears away, you would have to cut/clip the vinyl if you use other kind}
- Embroidery Design – I used these…. {Collage Style} {Script Style}
- Embroidery Thread
- Embroidery Stabilizer
- Soft backing to finish
How to use a double applique machine embroidery design
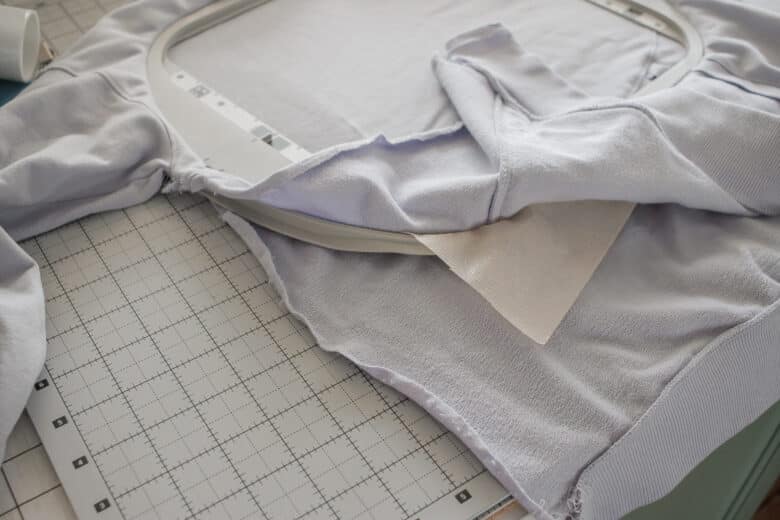
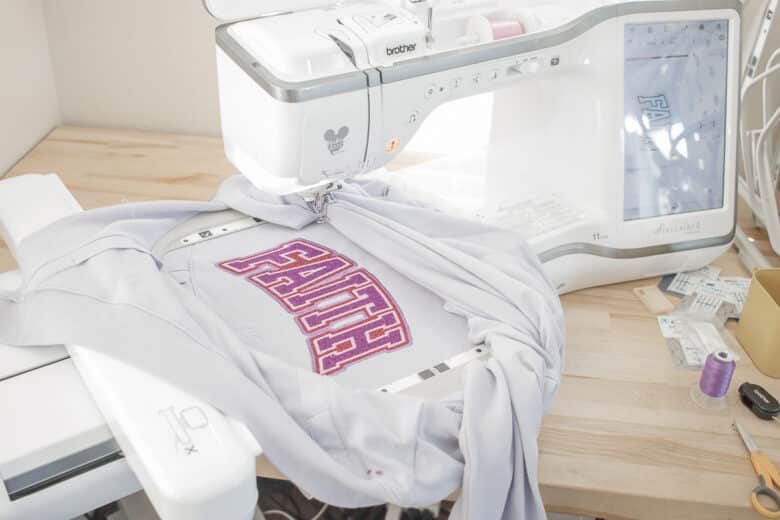
Ok! Start by prepping your sweatshirt. I like to cut open the side to allow for better hoop fitting. You can find my tips for sweatshirt embroidery here. Place a layer of stabilizer under the fabric and hoop at desired location.
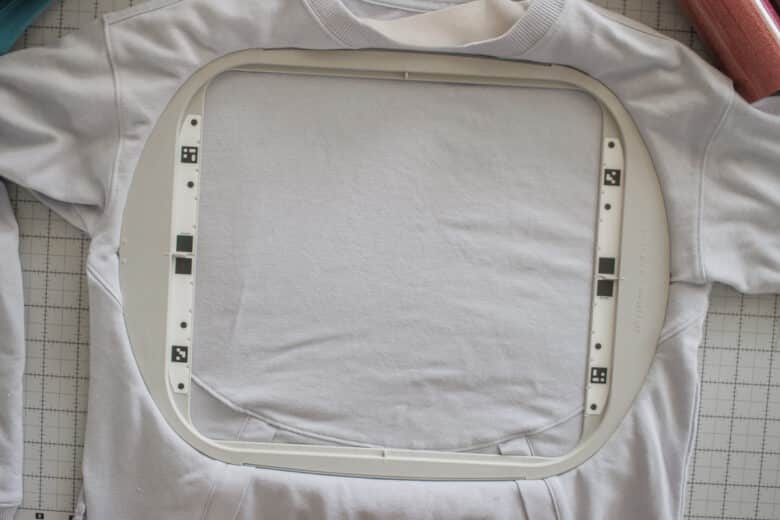
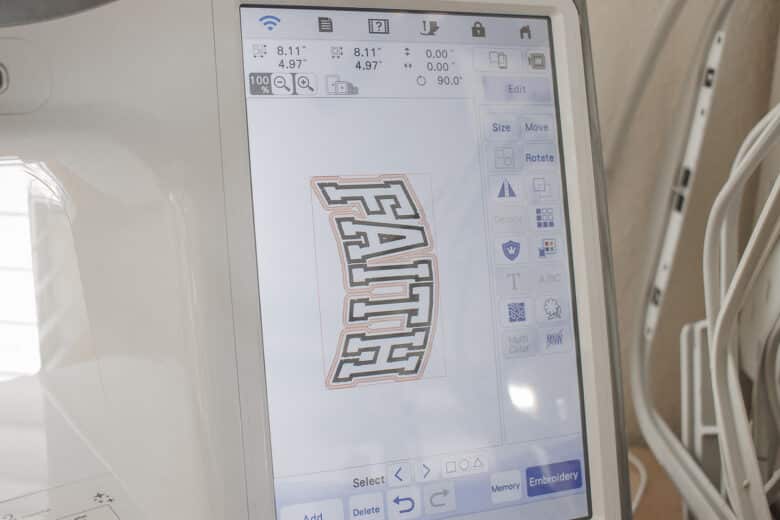
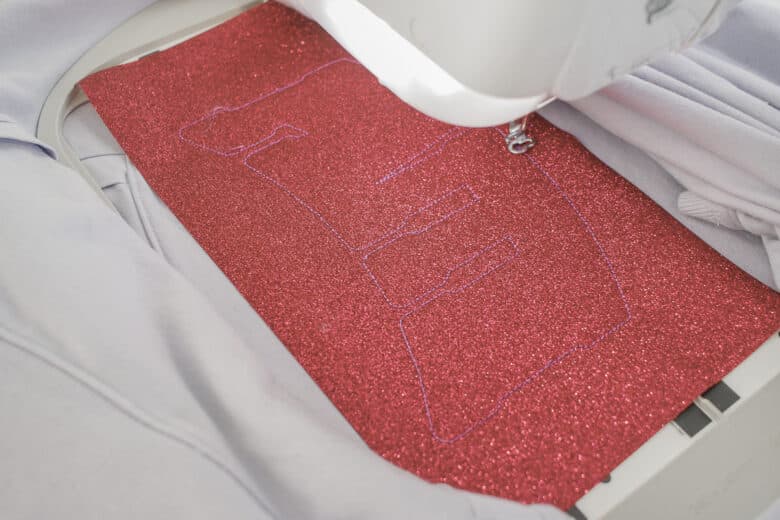
Now import your double layer applique design to your machine. You can transfer via wifi or USB stick. I’ve linked to both designs I used above. You can use any double layer design. I imported to my machine and rotated sideways to begin. Final placement will happen after hoop is loaded. After you have the hoop on the machine adjust the placement to where you want on your shirt.
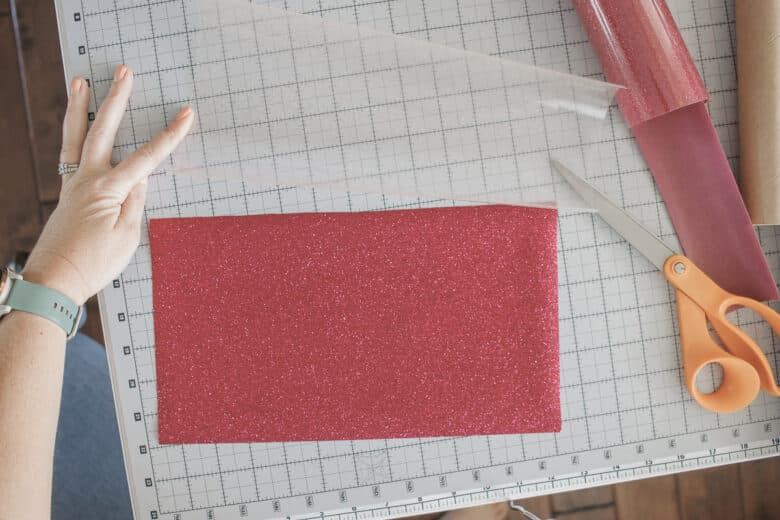
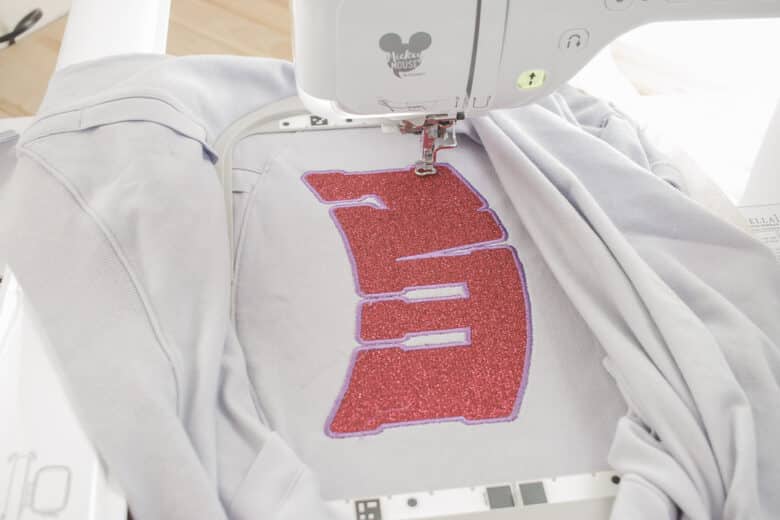
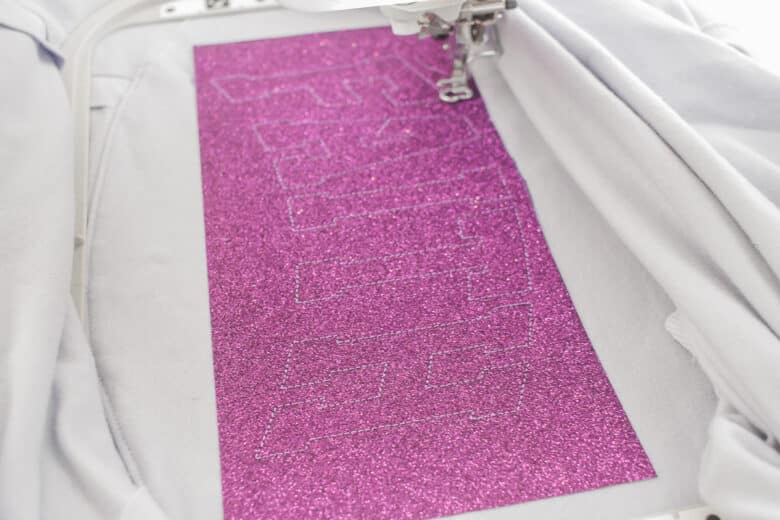
Cut a piece of glitter heat transfer vinyl a bit bigger than your design. Remove the clear plastic top layer from the glitter vinyl. NOTE you can use regular heat transfer vinyl BUT it will not tear as shown below. You will have to trim with scissors.
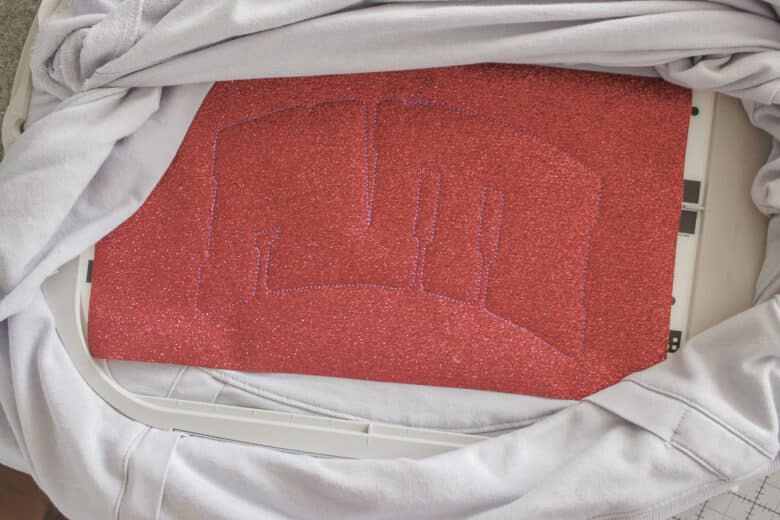
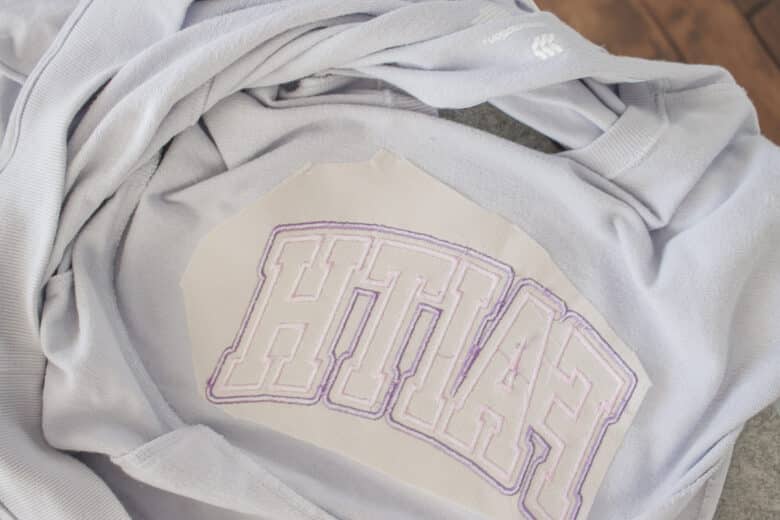
Place the vinyl on the shirt covering the area to be stitched. Hold in place with your hand at the edge while the stitching starts. Once its held in place with stitches you can remove your hand. Stitch out the first layer of stitches. {this design that I used had two layers of straight stitching before the satin layer} You can do both straight stitches before removing hoop.

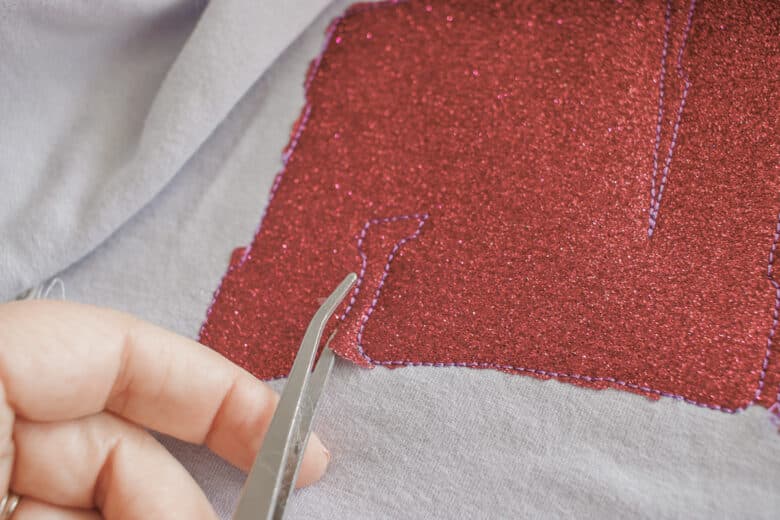
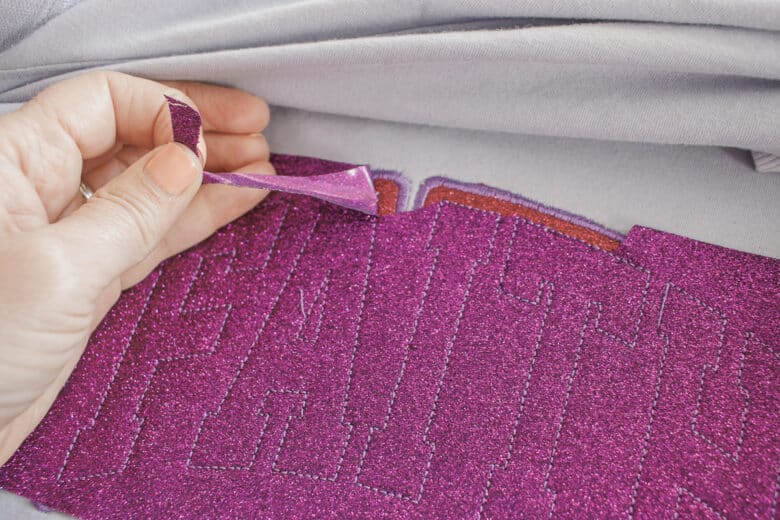
Remove the hoop from the machine, but DO NOT remove the hoop from the fabric!!! Tear off the excess vinyl from around the stitches.
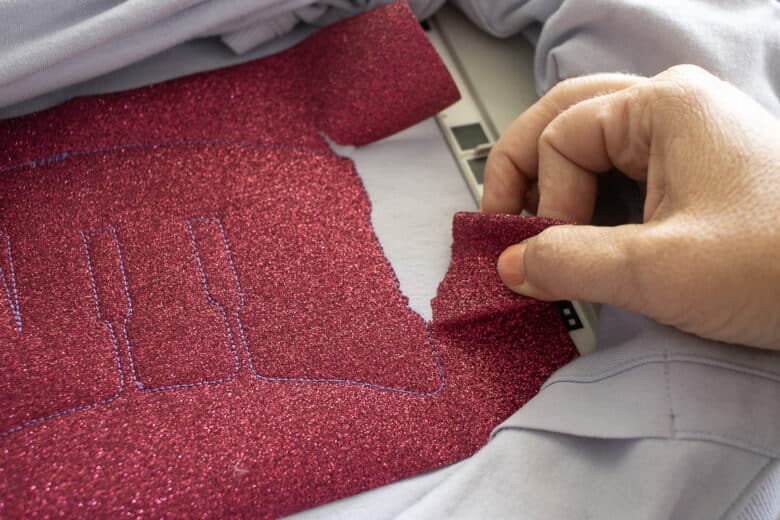
I used a blunt tweezers to help me pick the smaller areas of vinyl.
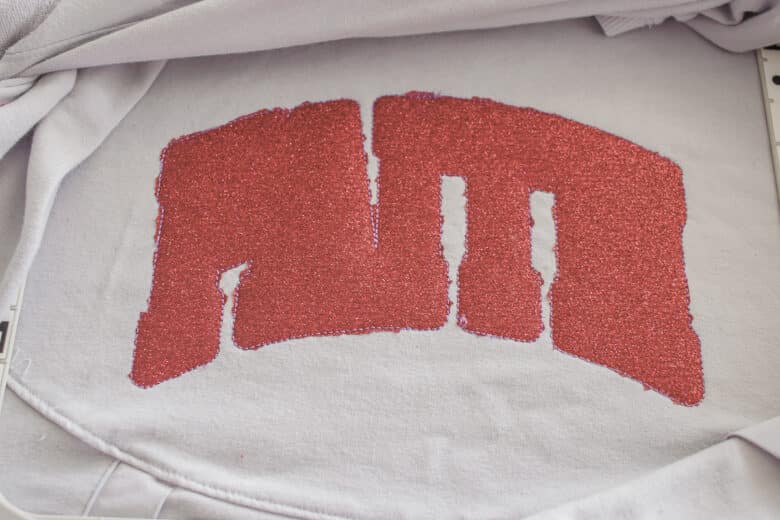
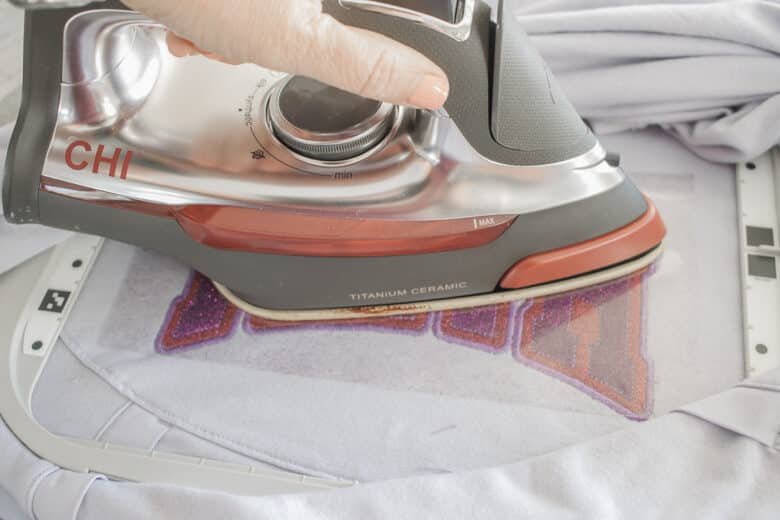
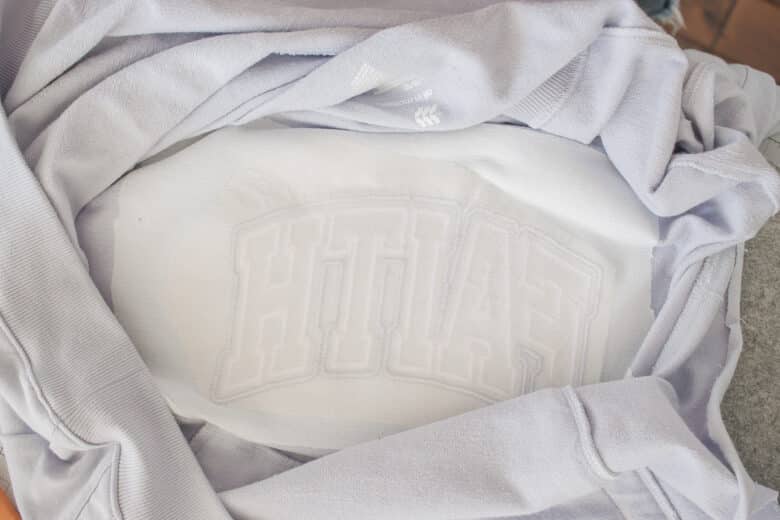
After all the extra vinyl is removed, place the clear layer you peeled off early back on top and use an iron or small heat press to set the vinyl. Press according to directions to fully adhere to shirt.
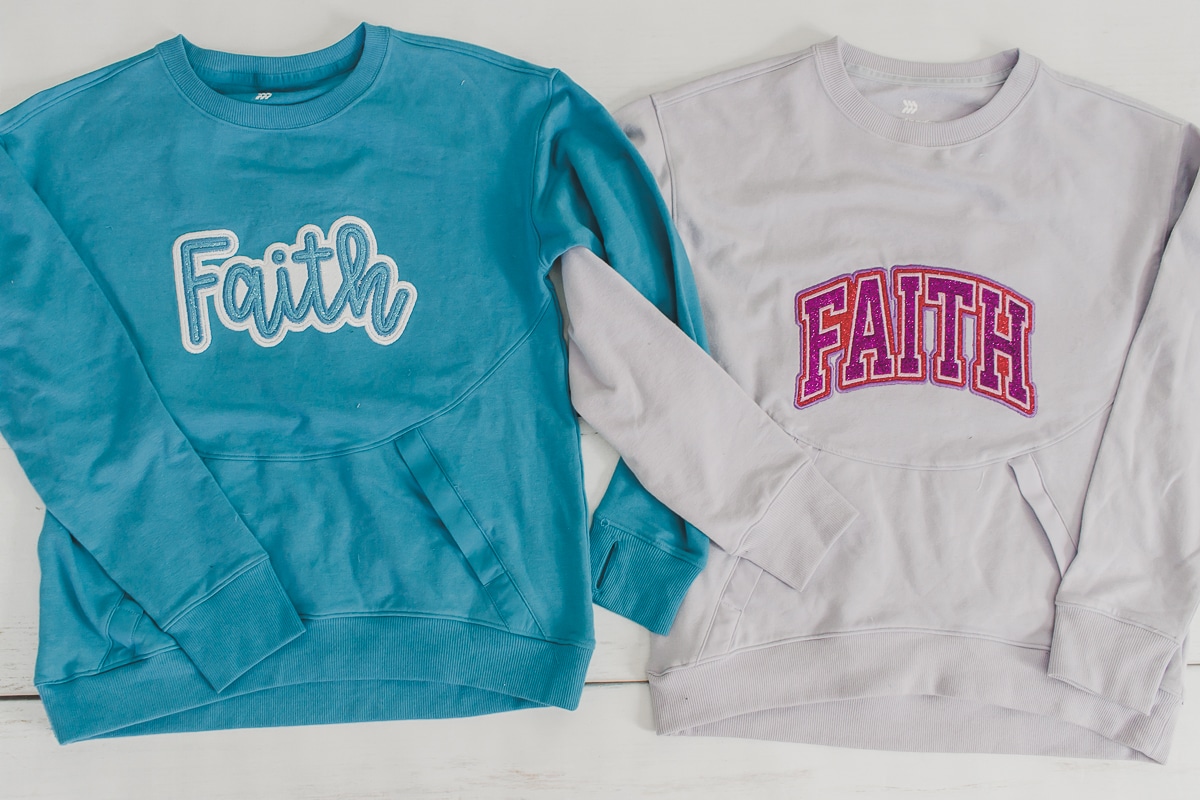
Place the hoop back on the machine and add the satin stitch layer. This is where is really starts looking amazing!!

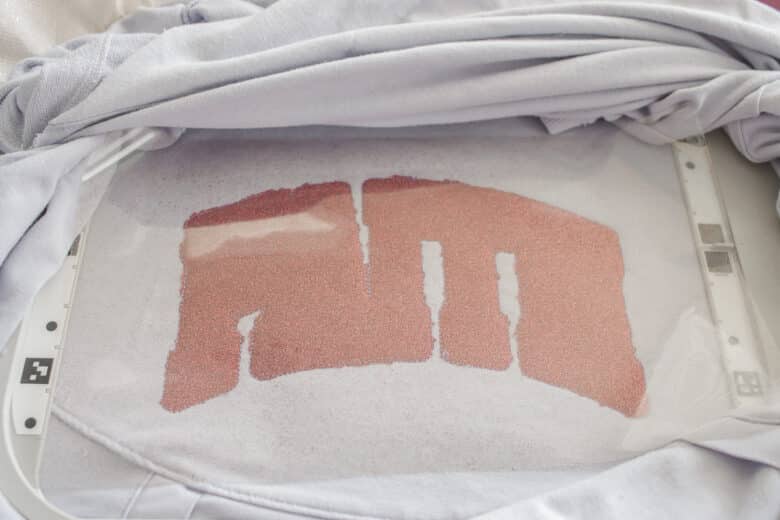
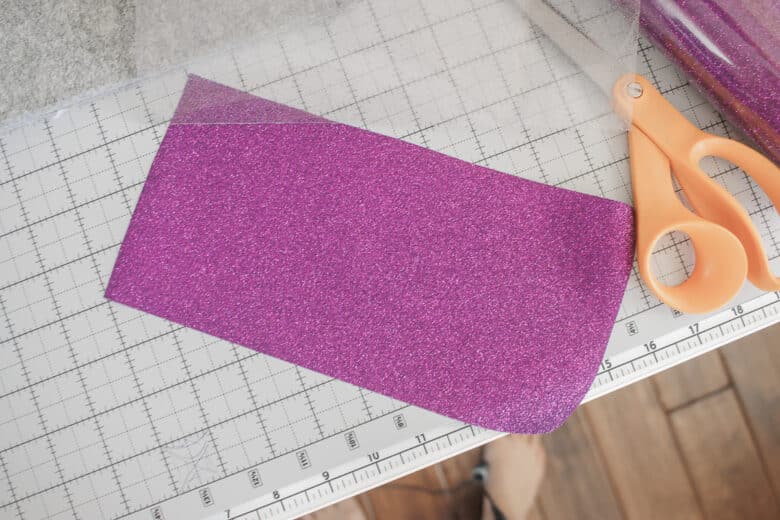
Prep second layer of glitter vinyl. Cut another piece big enough and then remove the clear top layer.

Place the second layer of vinyl over the first and hold in place while the stitching starts. Hold until it’s secure.
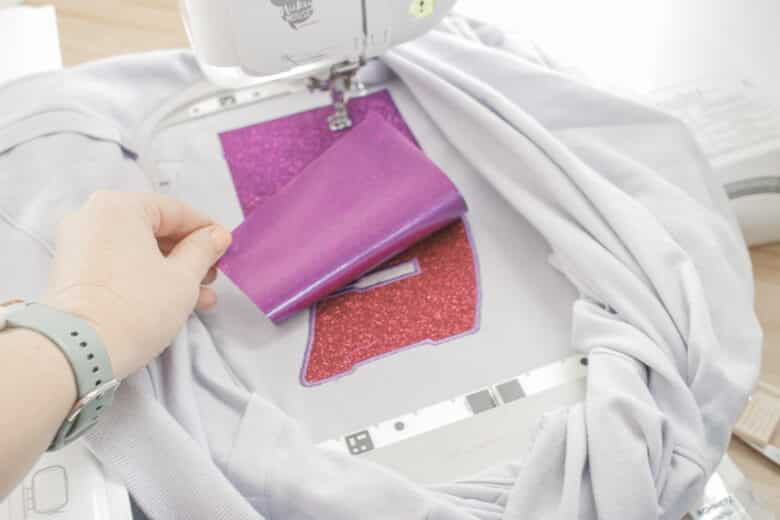
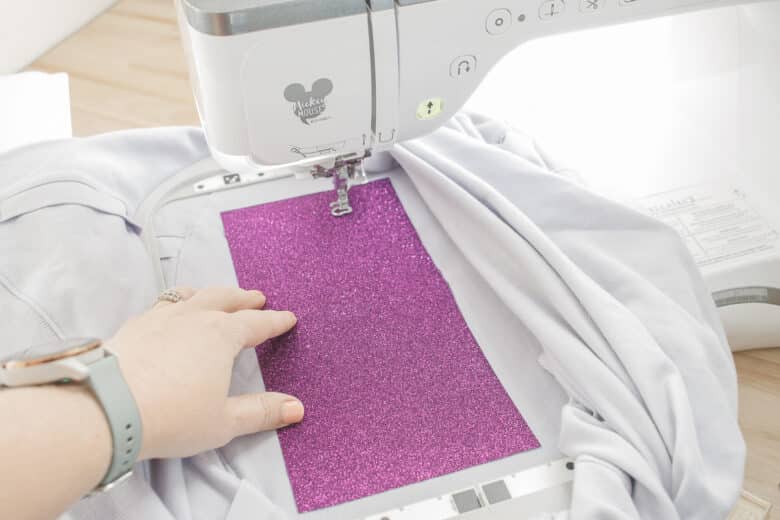
When the straight stitch is finished, remove the hoop again from the machine and tear away the extra vinyl.
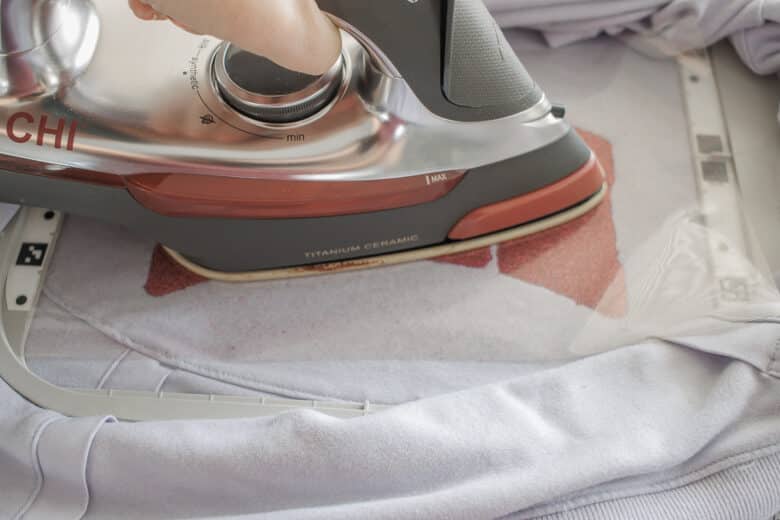
Cover both layers of vinyl with clear protective sheet and press again to heat the second layer.

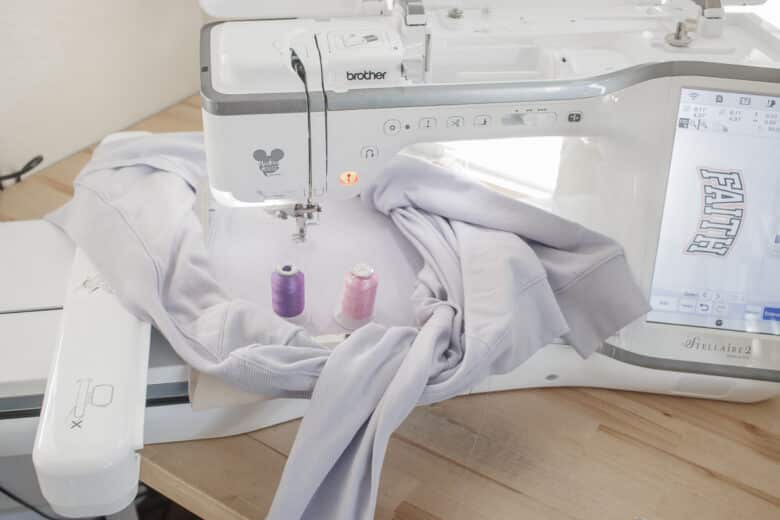
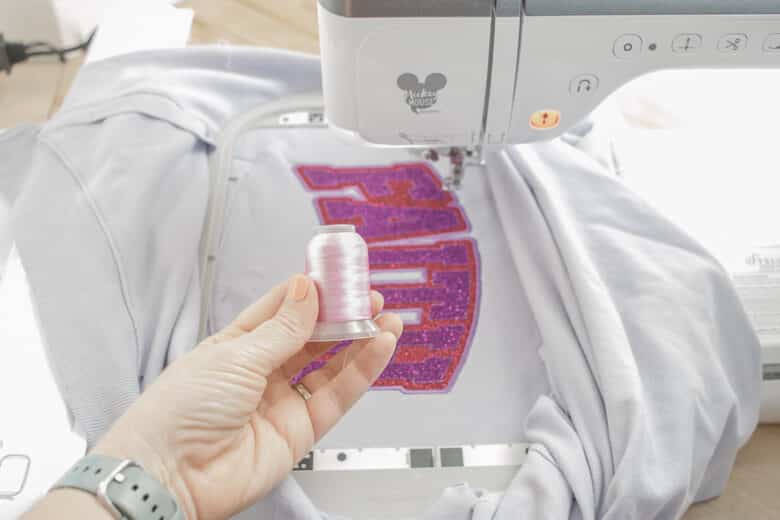
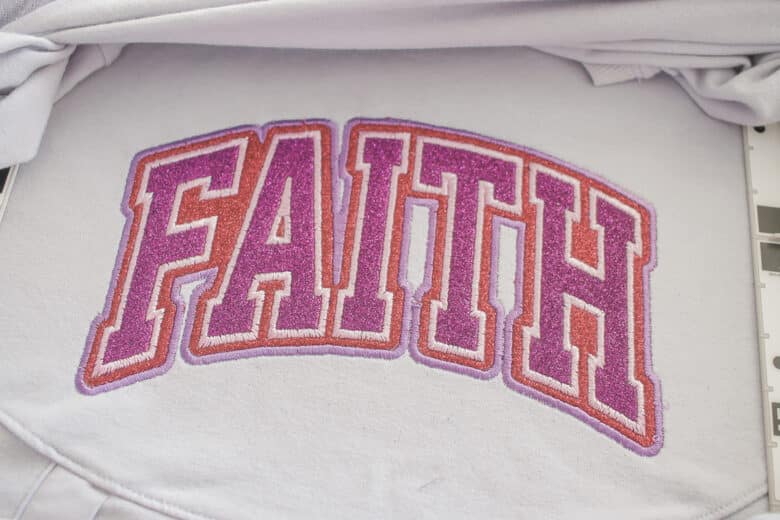
I changed up my thread color before stitching the second layer. Add the layer of satin stitching around the second layer of vinyl.
When all the stitching has finished you can trim the stabilizer on the back of the shirt and press a layer of soft backing over the embroidery if you want. {Rose will not wear without the backing}
And now you have a beautiful double layer embroidery design!


Angela11 says
In smashy road , remember to avoid obstacles, and staying ahead of the police is key to lasting longer in the game. Enjoy the game and good luck with those police chases