
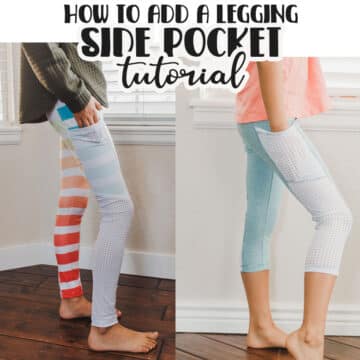
inside: Learn how to sew a shirt placket with this tutorial and get lots of free shirt patterns to use with this tutorial. Create a Henley shirt by adding a placket to a shirt pattern. Use one of my free patterns or your favorite t-shirt patterns.
**Post updated with NEW and improved placket tutorial 2/2025, original post and some photos 1/2016**
Do you have a favorite basic t-shirt pattern? Then this tutorial is for you! Make your favorite t-shirt pattern into a Henley style shirt with this placket tutorial that works with any shirt pattern. Need a t-shirt pattern? I’ve got you covered below.
I sewed up a raglan Henley and a normal sleeve Henley for this tutorial and LOVE how they both turned out. You can make the placket two ways with either woven or knit and I’ve included both a video tutorial and a photo/written tutorial so hopefully I’ve covered all the bases. Please let me know if you have any questions. Join our FB pattern group for updates like this one and support on patterns.
Sew a shirt with a placket
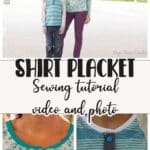
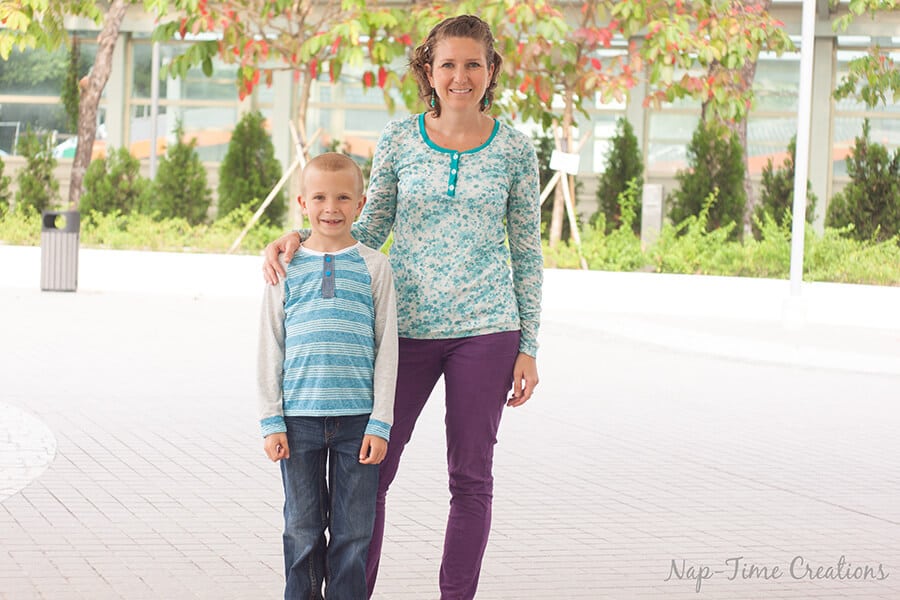
I’m so excited to share this tutorial as an add on to the free t-shirt patterns I currently offer. You can find the Free Kids Raglan Shirt {pictured on my son} size 18mth-10yrs, a Free Boys T-Shirt {2-14 yrs}, Free Girls T-Shirt {slightly more fitted} size 2-16 yrs, a mens free tee pattern here, and the Women’s Free t-Shirt {pictured here} size xs-xxl.
I’m sure I don’t have to tell you which photos are almost ten years old {haha} But I will anyway… The floral shirt tutorial photos are the new photos added to this post. All other photos are from the original.
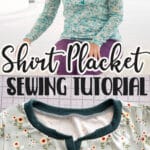
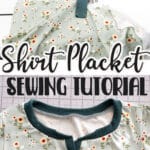
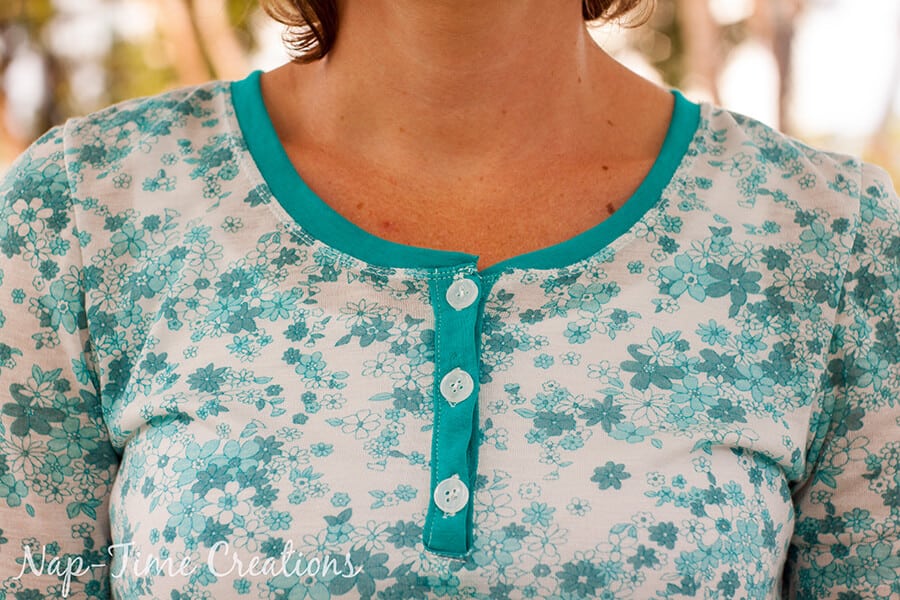
Both of these shirts are made of knit fabric. The striped shirt has a woven placket and the floral shirt placket is knit fabric. You can use either when adding a placket to knit fabric. You can use the tutorial I’m going to show you today for both knit or woven fabrics. {side note… I loved this floral shirt… I don’t know when I got rid of it, but I know that I wore it for many many years after we took these photos}

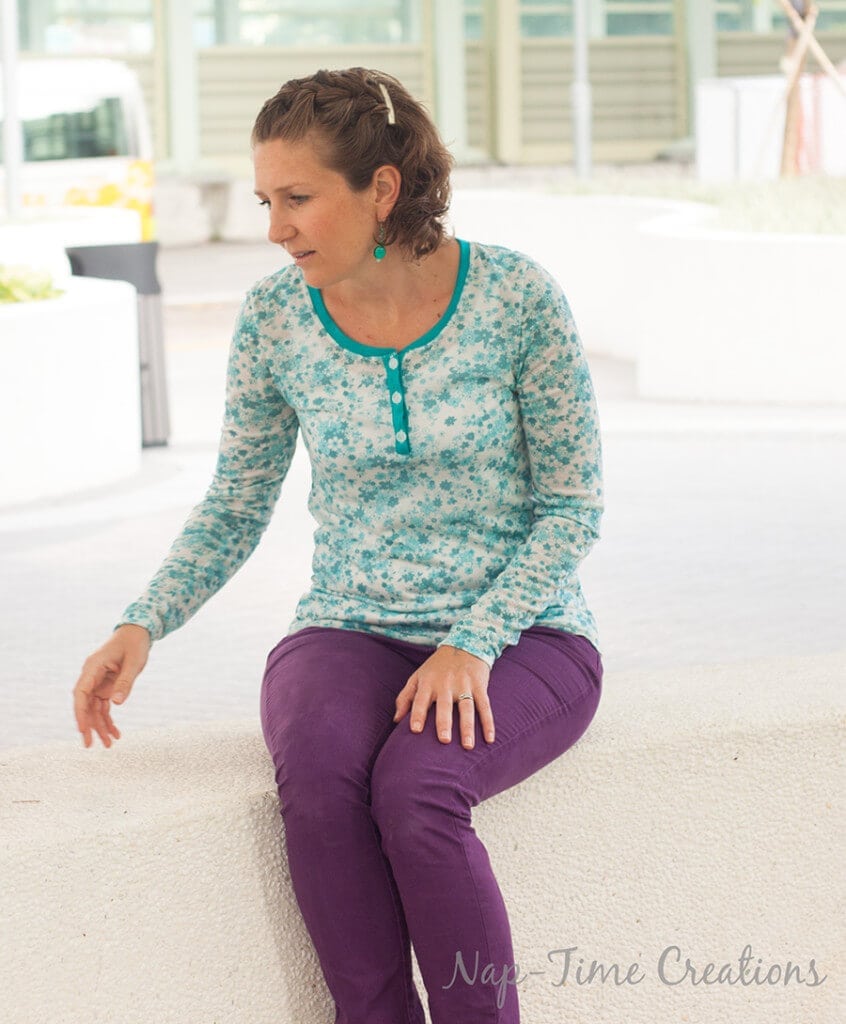
Confession I REALLY really dislike button holes… so Jack has snaps on his shirt. {who’s with me?} You can add buttons or snaps with this placket tutorial. I lean towards snaps, but buttons are more functional if you plan to actually open and close the placket often.

Shirt placket video tutorial
If you like video tutorials or just want to get a feel for what these pictures are showing you can watch the video there. Just like always, if you don’t see the video check the sidebar for the video. Sometimes the video moves from the placement from where I placed it here. You may also need to disable any ad blockers you may be running to see the video.
Shirt placket sewing tutorial
Okay, let’s get started. Here are my recommended cutting dimensions.
- Cut the placket fabric 1″ longer than you want your placket
- for a 6″ placket, cut 7″ placket pieces
- Cut 2 of each placket piece {I cut 2 – 7″ x 2″}
- Cut interfacing 1″ x same length {I cut 2 7ish” x 1″} use thin fusible interfacing
- I like the longer placket… but you can adjust the length as needed.
- NOTE: For a thicker placket cut fabric 3″ wide. See instructions below.
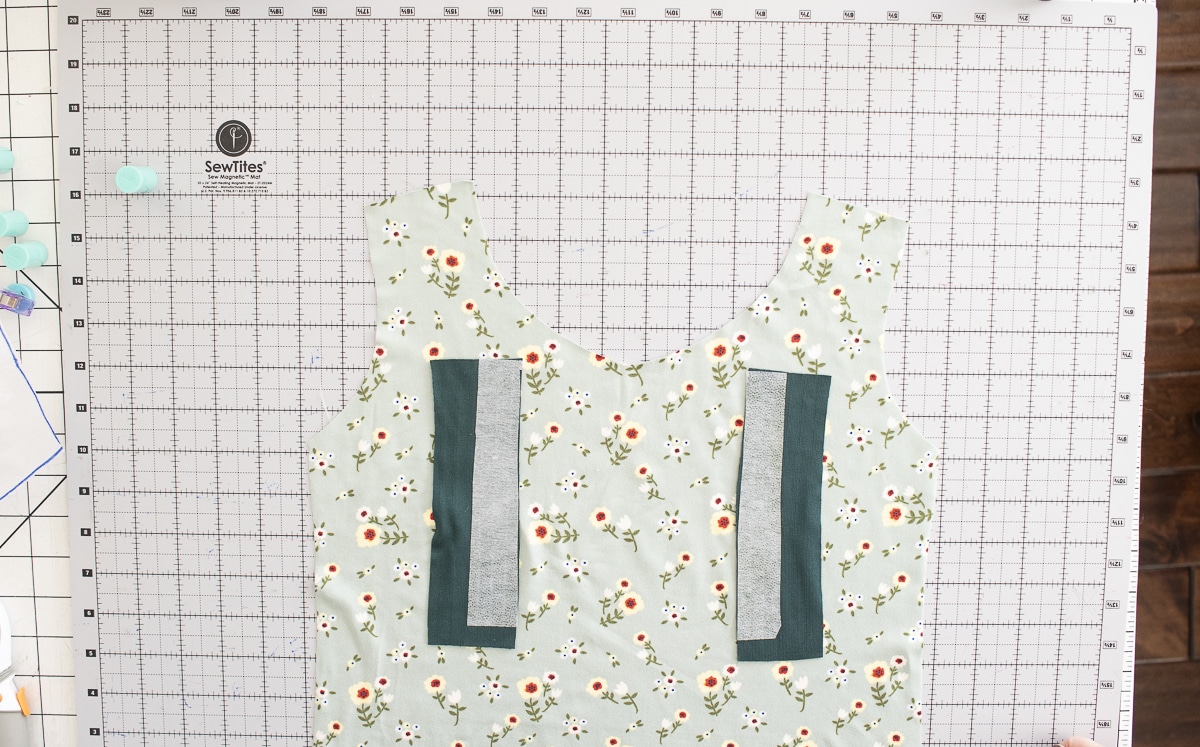
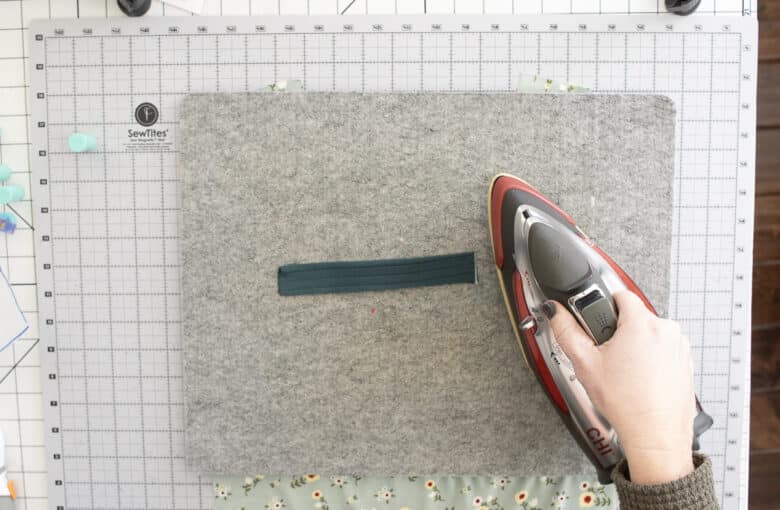
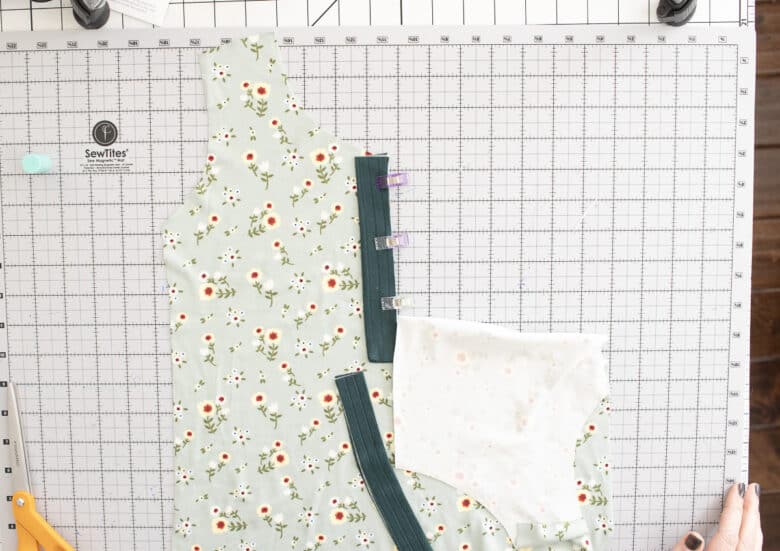
Cut out all shirt pieces as directed and cut 2 placket pieces. Fuse interfacing to the wrong side of fabric. It’s ok if the interfacing isn’t quite as long as the fabric.
Fold the plackets in half length ways and press. Make sure the right side of the fabric is out.

Find the center of the shirt. Cut the desired placket length. I cut a 6″ opening in the center of my shirt.

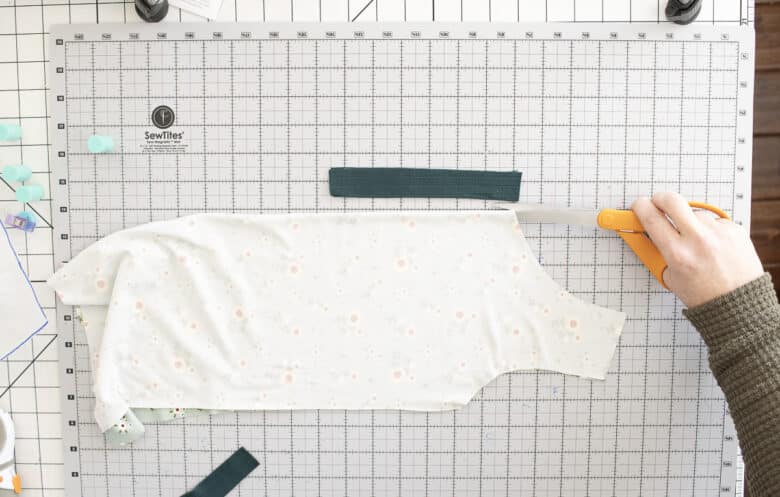
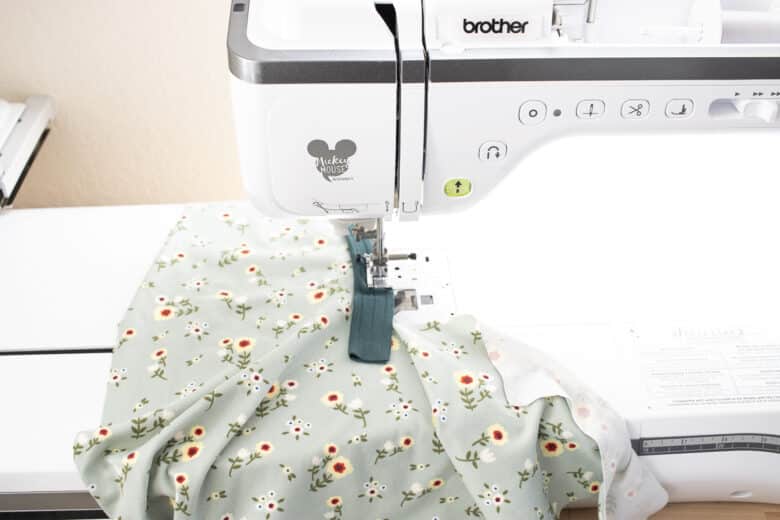
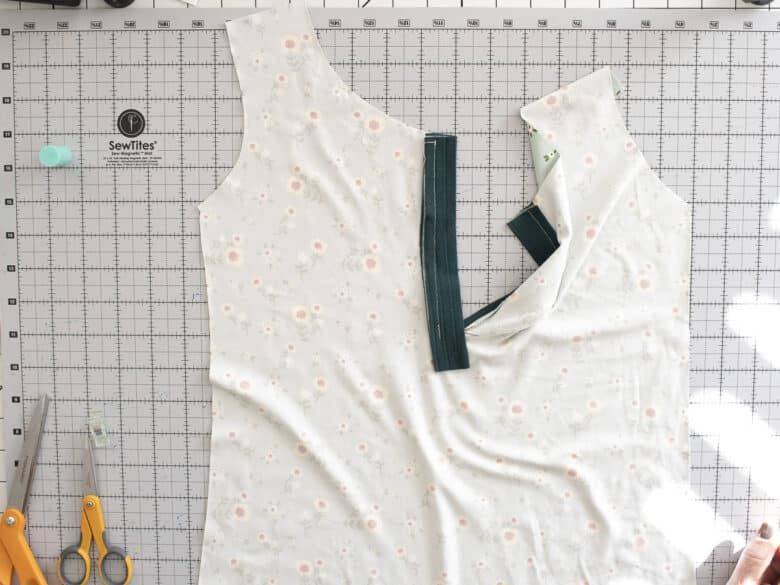
Open up the shirt with the right side facing you. Place one of the placket pieces on the left side of the cut. The side with the fused interfacing should be down towards the shirt. The raw edges of the placket and the shirt should be lined up. The placket will extend down past the cut opening. Pin or clip in place. It may make it easier to sew to fold the shirt down and out of the way on the other side.
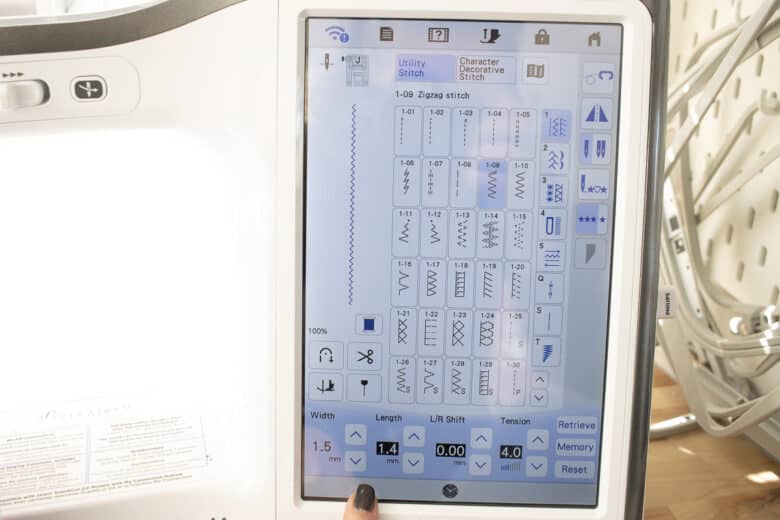
Use a narrow zig-zag or knit stitch to sew. I like to use a zig-zag. My settings are seen here. Sew with a 1/4″ seam allowance down the placket edge and 1/2″ past the cut opening.
Repeat on the other side of the shirt.
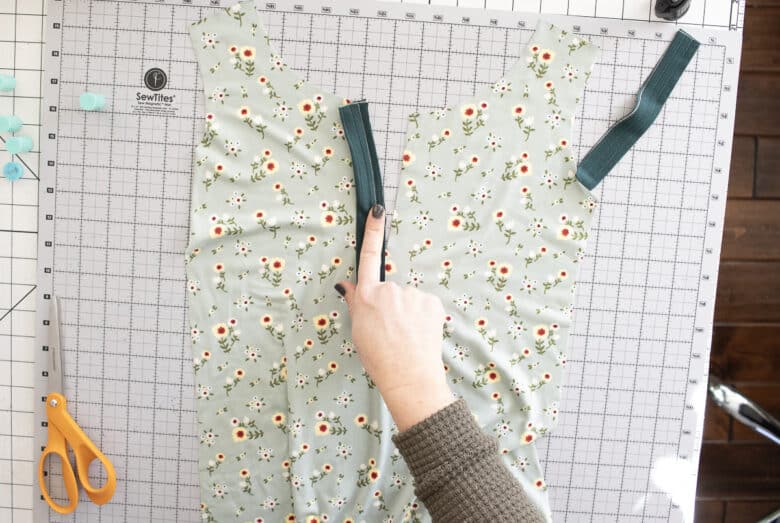
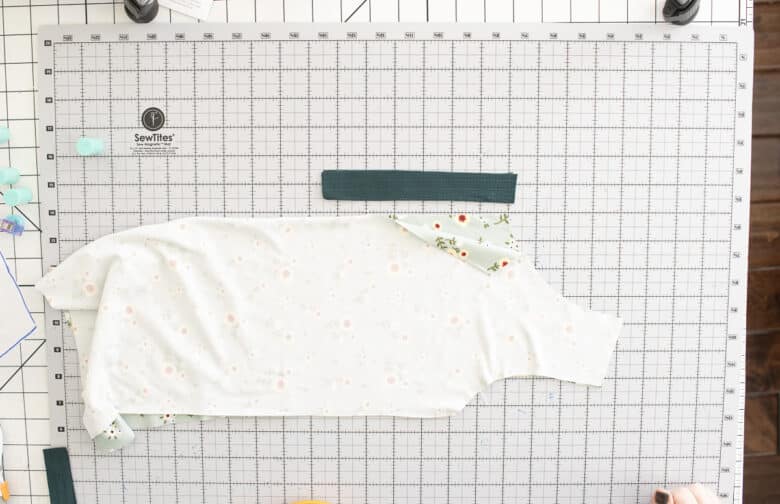
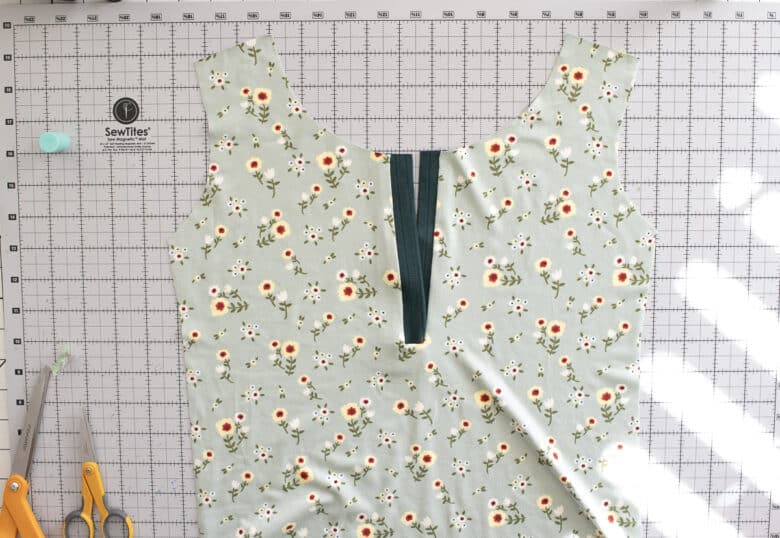
Turn the shirt over to the back side and cut a V shape from the slit bottom to the end of where you stopped sewing. Pull one side of the placket through to the back, then the other side. The V of fabric will fold down towards the longer tail of the placket.
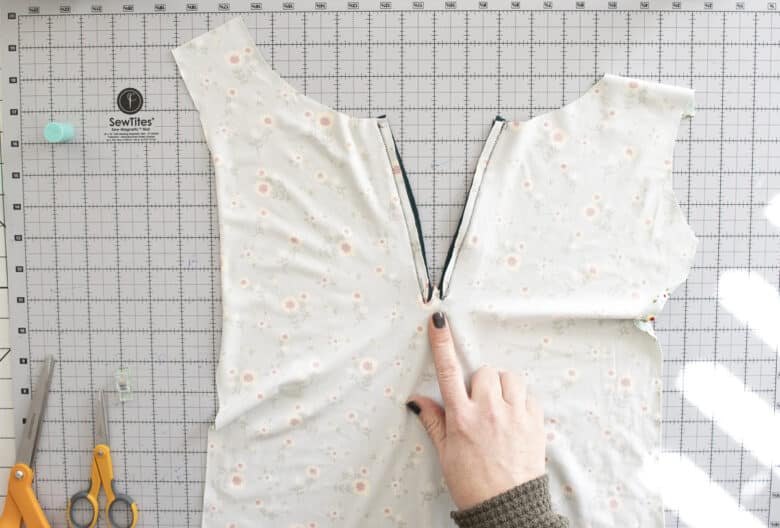
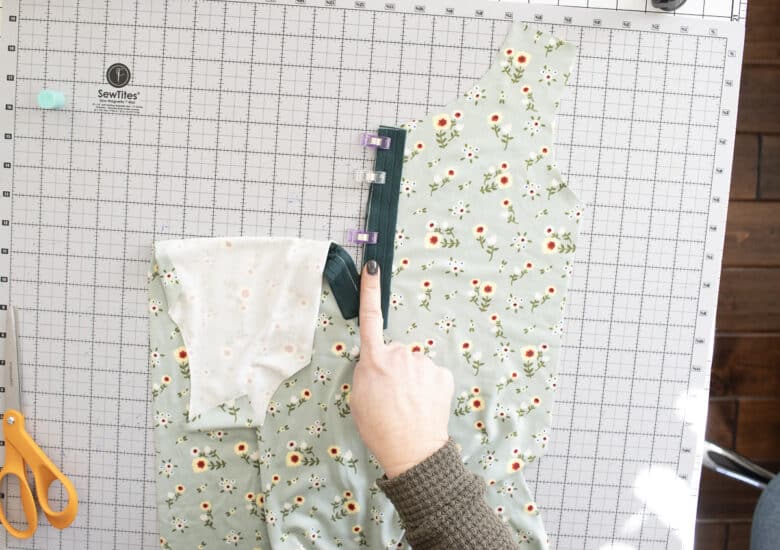
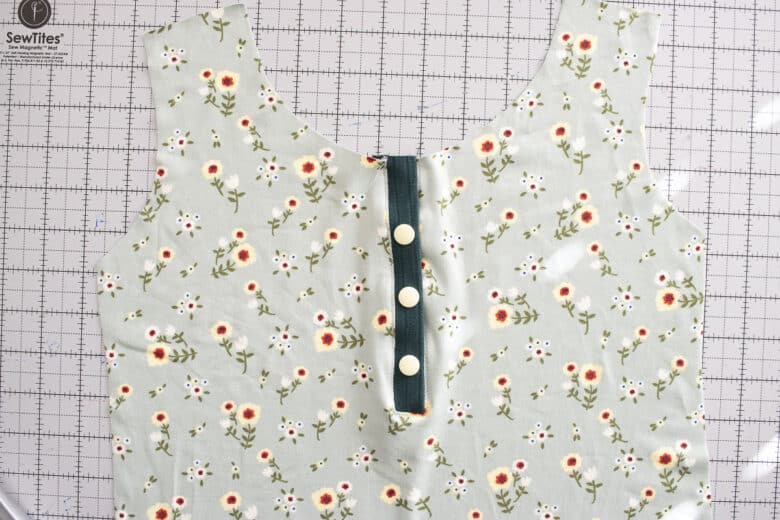
Stack the two sides of the placket on top of each other. Turn to the front side and smooth out the sides and bottom to reveal and pretty placket. Pin anywhere you need to keep lined up while you top-stitch. Stitch on the shirt fabric, but very close to the placket.
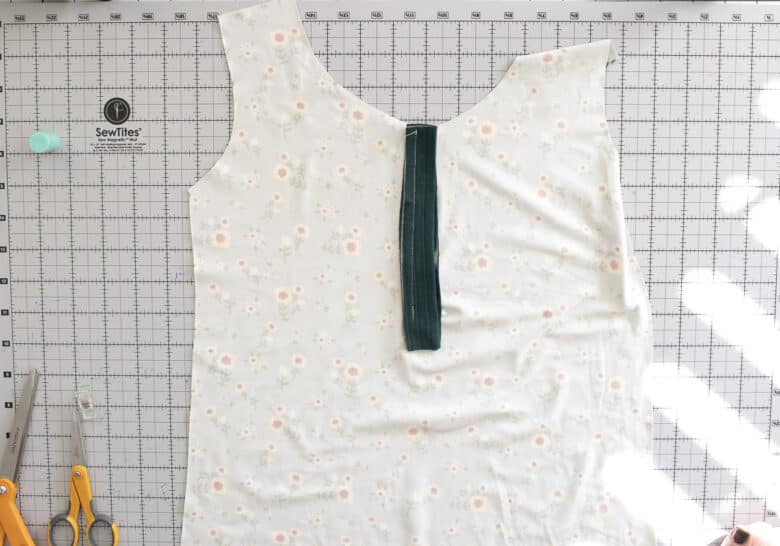
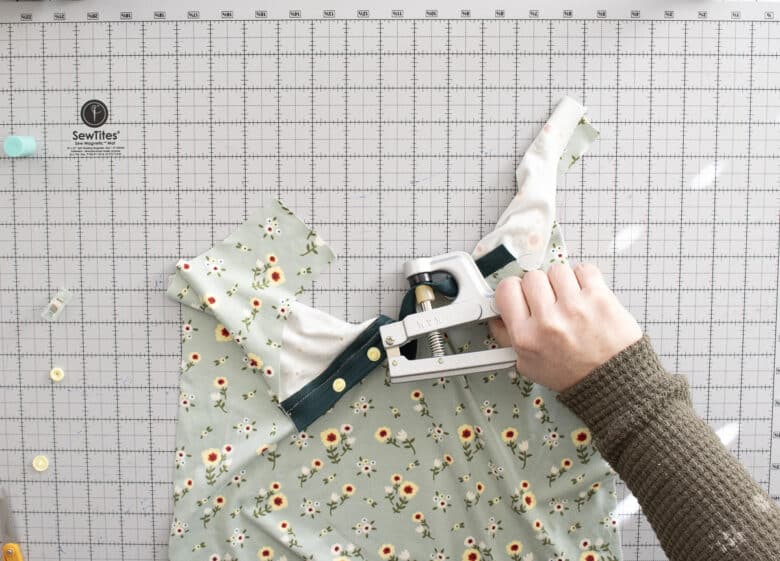
Add evenly spaced snaps or buttons. I did not take the snaps all the way to the top as I like the look of it open a bit at the top.
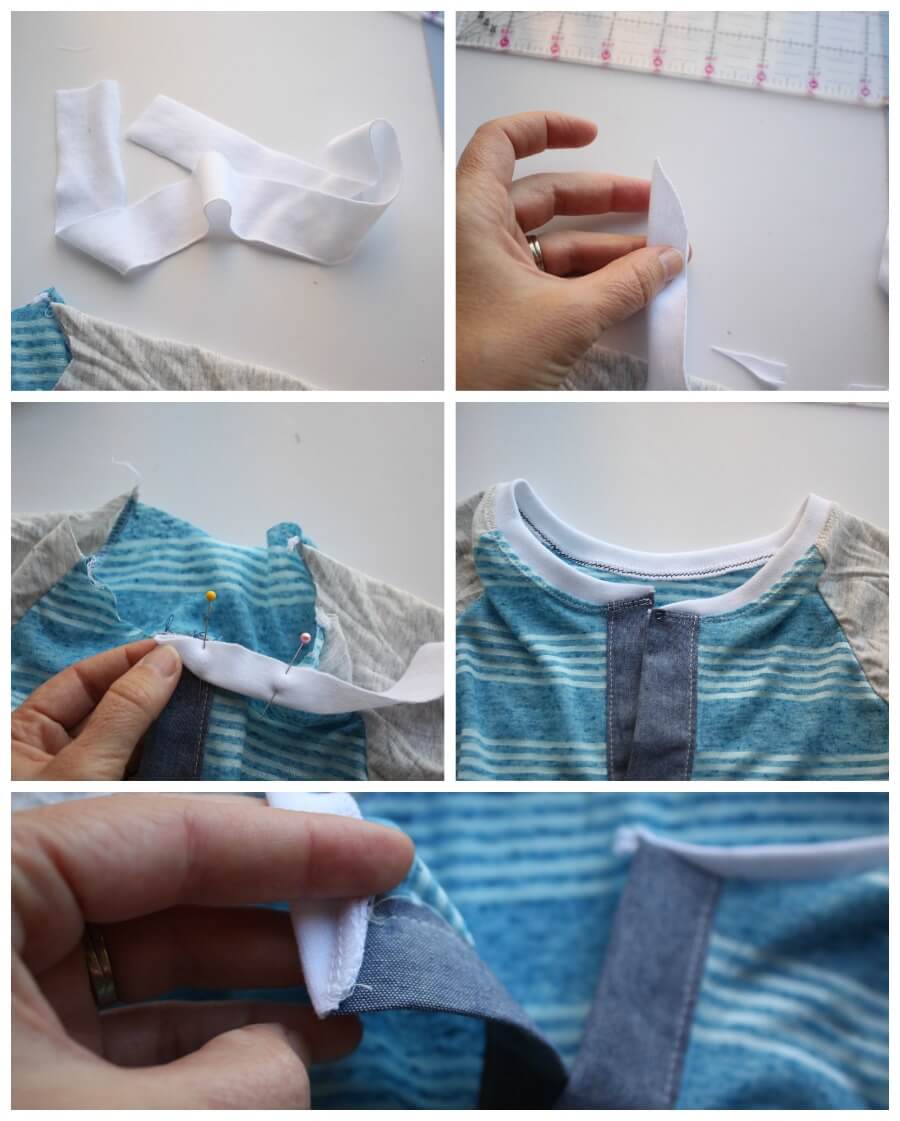
Let’s add the neck band. Cut a long piece 1 3/4″ wide. Fold together length wise and create a curved end as shown. Match the point of the back to the edge of the shirt neckline. Pin the curve, then the straight, slightly pulling band along neckline. When you get to the other side, cut another curve and pin. Use a serger or zig-zag to sew to shirt, then top-stitch the seam allowance to the shirt. I used a double needle to do this. Be sure to finish edge of neck band when you top stitch.
Do you need help measure the length of your neckband? Check out my neckband tutorial post.
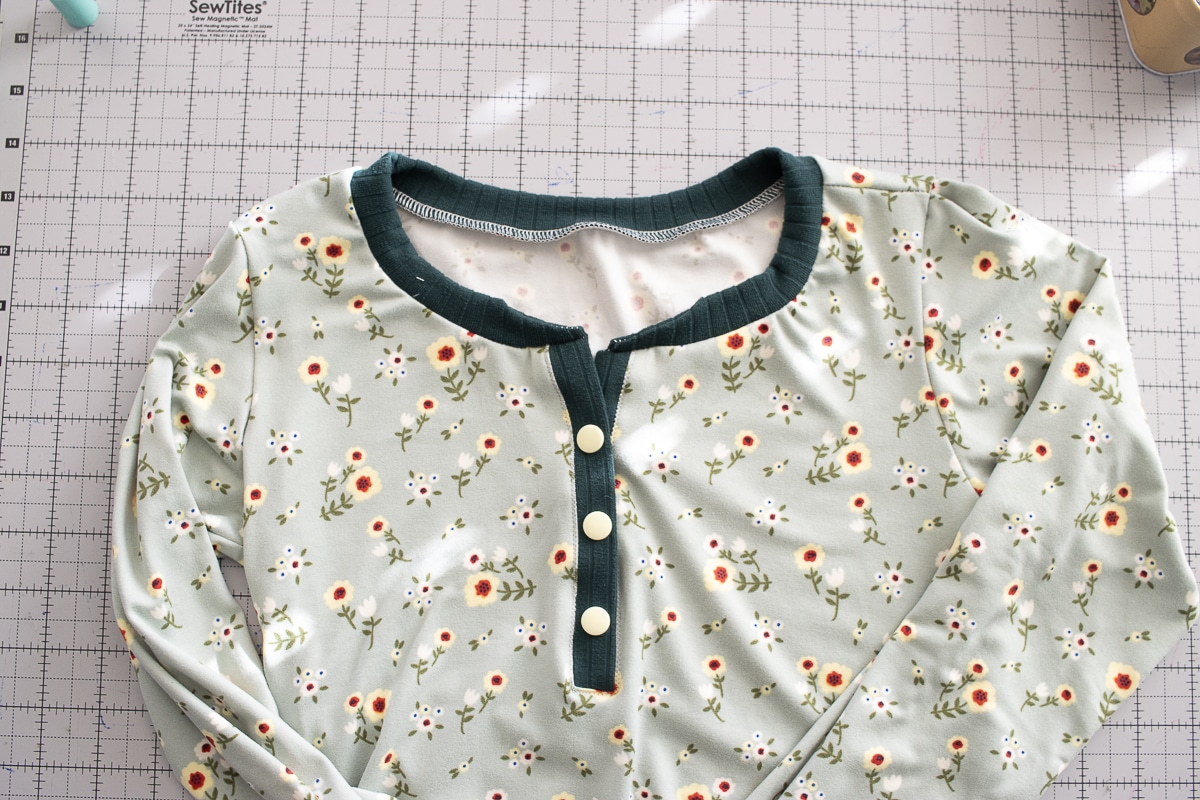
Finished placket with curved neckband ends.
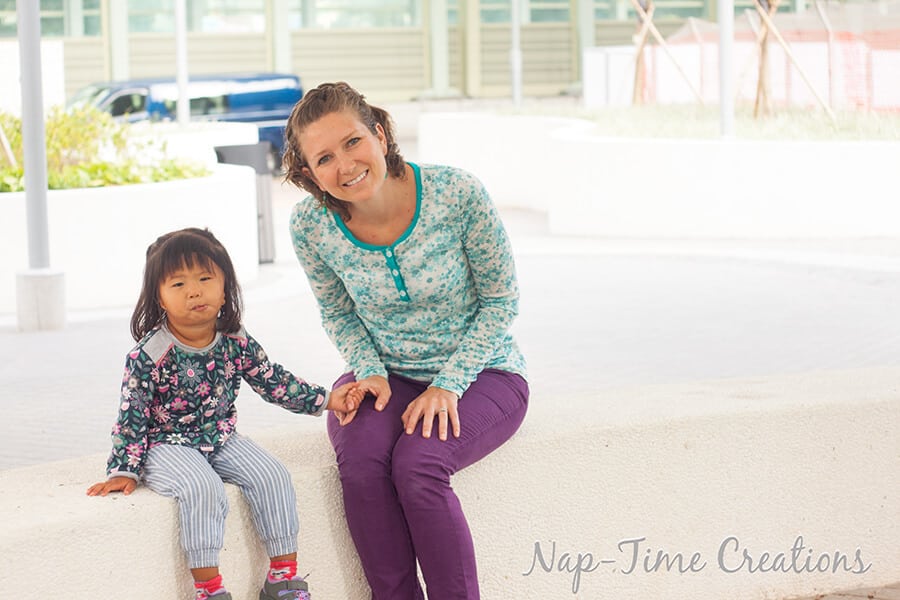
My little photo bomber… {also wearing handmade}


Laurie says
Cute! And your model is adorable! Thank you so much for sharing with us at Snickderdoodle Sunday! Pinning and tweeting to share 🙂
I host a Tuesday link party – Brag About It, and would love it if you would share with us there. Its a Tuesday link party that starts Monday at midnight. Hope you will join us!
~Laurie
Stephanie says
I just used your tutorial to make a placket for a maxi dress that I needed to make nursing-friendly. I’m so excited to finish and wear this dress, the placket turned out great, and it was so easy. I can see myself adding these to lots of tops and dresses in the future. Thanks!
Emily says
yeah!! Please share I’d love to see photos!! Are you in my group on FB?
thea O. says
Hello Emily! I’m from the Philippines.. Can i ask you regarding on the sewing needle you’re using in making this? Cause I really want to make this but my sewing machine wont sew when using a stretch or tshirt kind of cloth .It gives me gap everytime i try. I tried zigzag,straight type but still wont sew. Ive tried looking for a ballpoint needle here in our place but unfortunately its not available. Any suggestion please would be appreciated.. Thanks
Emily says
hey! I’m not exactly sure where you can get a stretch needle there. There has to be a fabric or tailor shop where you can get one… Or international Amazon order?
Ana says
Thanks you . It is the best tutorial I find.
Carol says
Where is pattern I see tutorial