


inside: create a phone wristlet wallet with this free pdf sewing pattern and tutorial. This wallet is the perfect size for your phone and other necessities. The wrist strap will make sure you keep your keys and wallet with you wherever you go.
This pattern is another one inspired by a well placed facebook ad. {haha} I saw this cute wristlet wallet that was big enough to hold your phone and I thought “I have to make that!” AND “I’ going to make a pattern for it”. So today’s post is the result of that ad and inspiration, enjoy this phone wristlet wallet free sewing pattern and tutorial below.
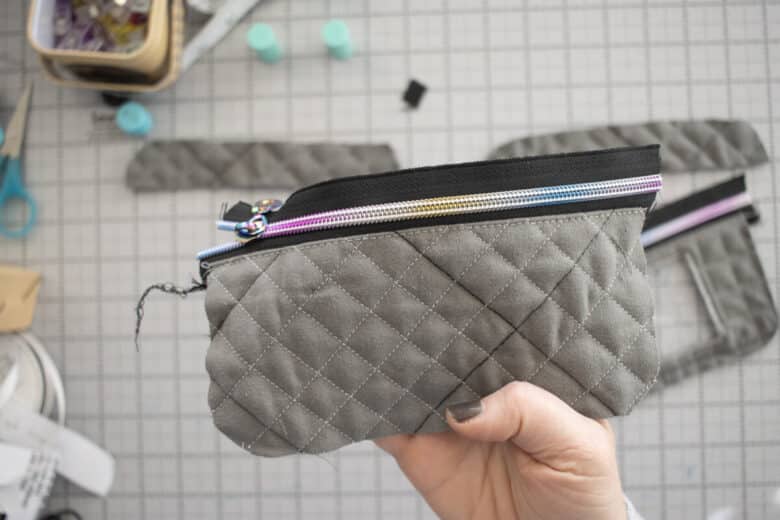
Cute Phone Wristlet with key ring
The hardest part of this project was finding the fabric that I wanted to use. I knew I wanted a fun quilted fabric, and I ordered this green from the Joann’s {one of the final days you could order online} only to find that the quilted squares were quite large. So I added lots more quilting lines before cutting and sewing. Not really how I wanted to spend the time prepping, but I’m glad I did as the final result is just how I wanted.
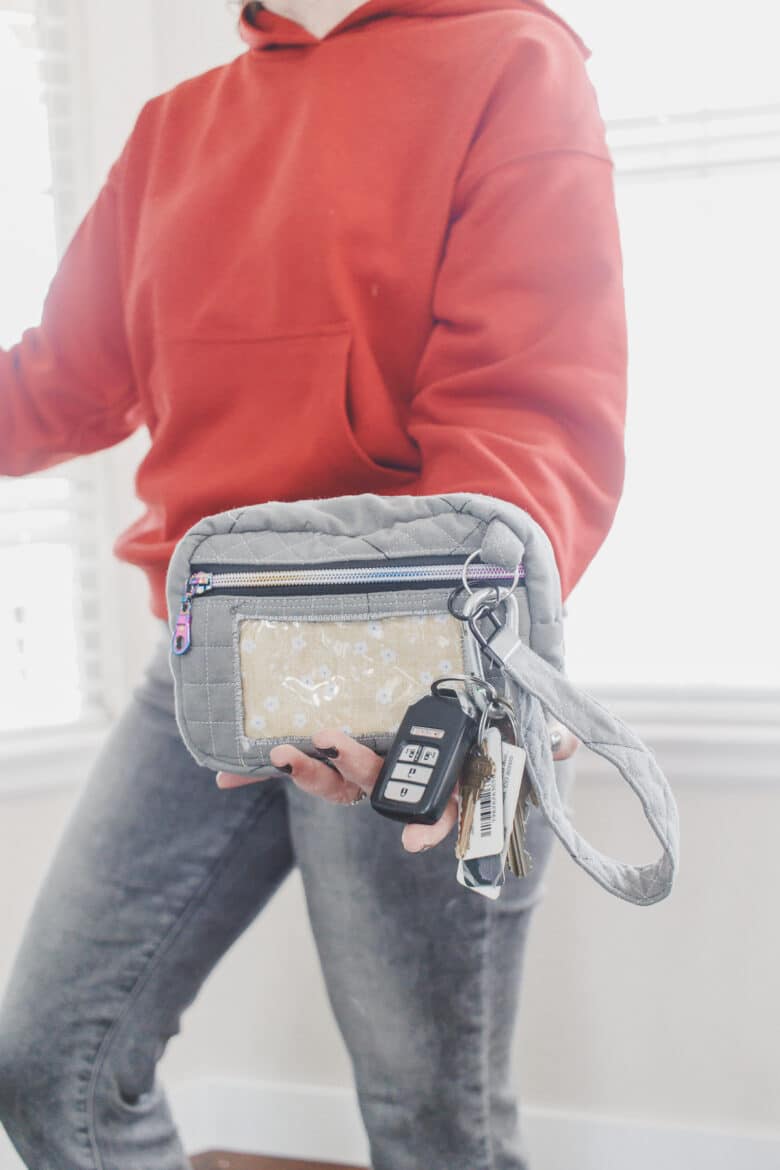
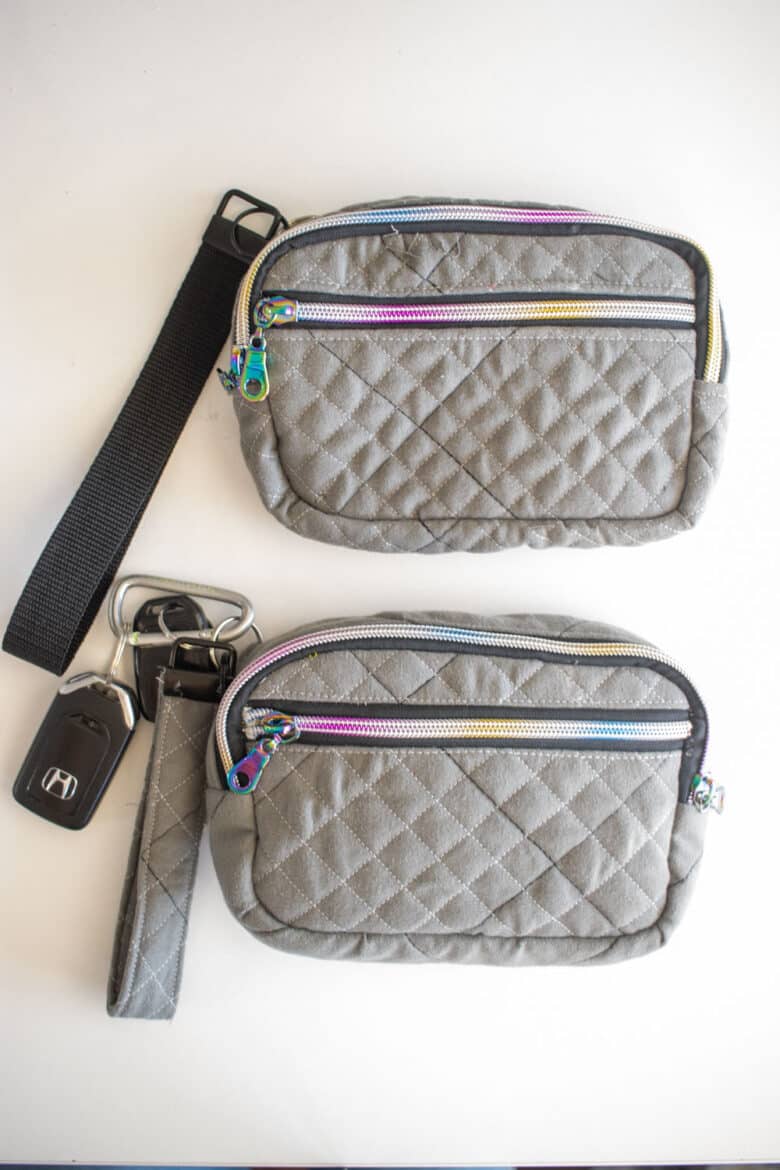
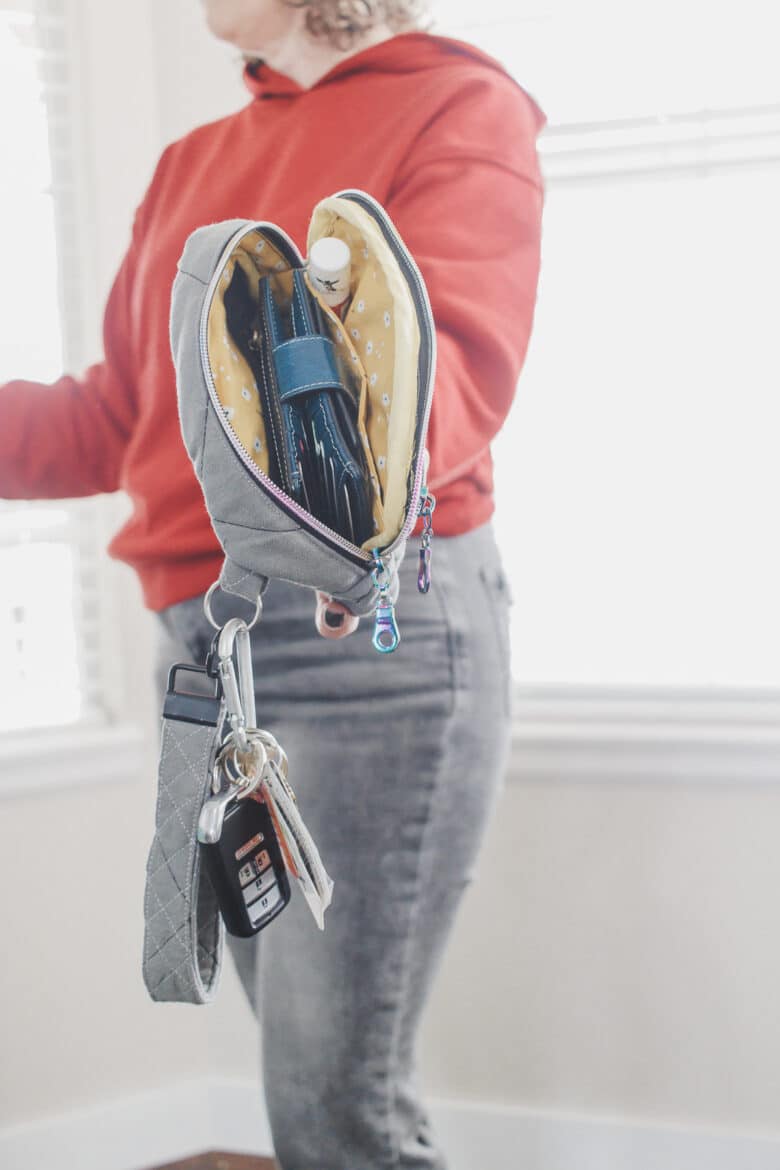
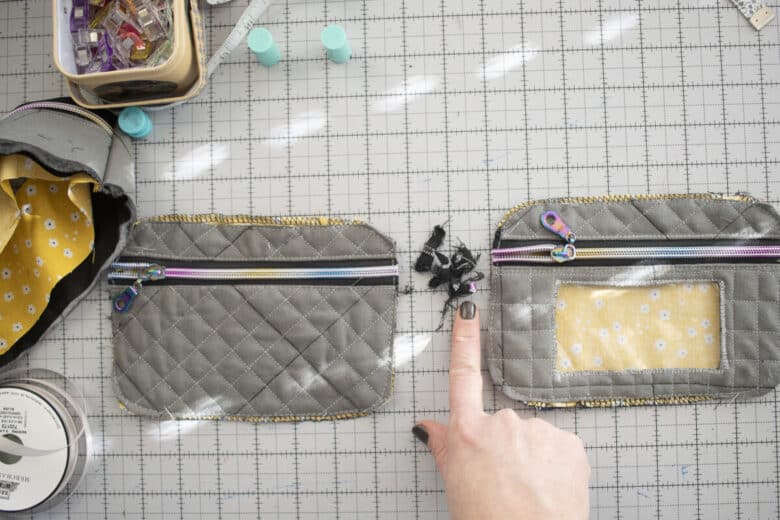
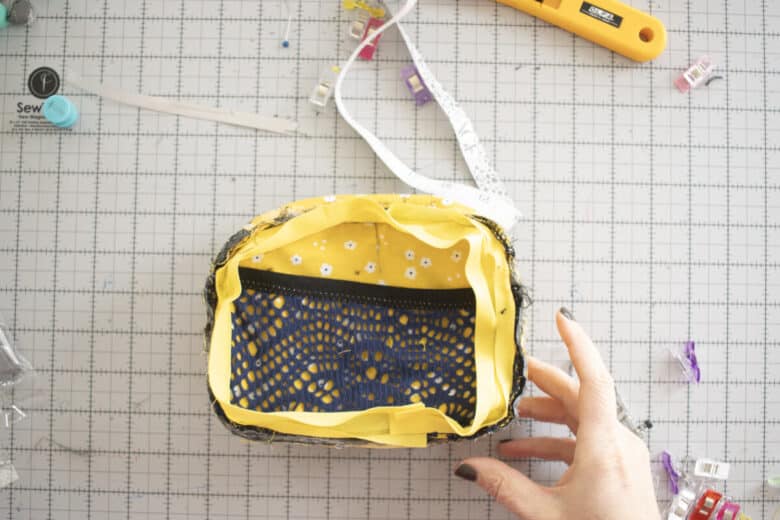
I sewed up two of these cute little wristlet wallets this past week to work out the issues. After I made the first version with the yellow lining, I decided I didn’t like how it looked through the clear vinyl window. For the second wallet I used a lining fabric that was the same on both sides, so it looks good through the window, and on the inside of the bag.
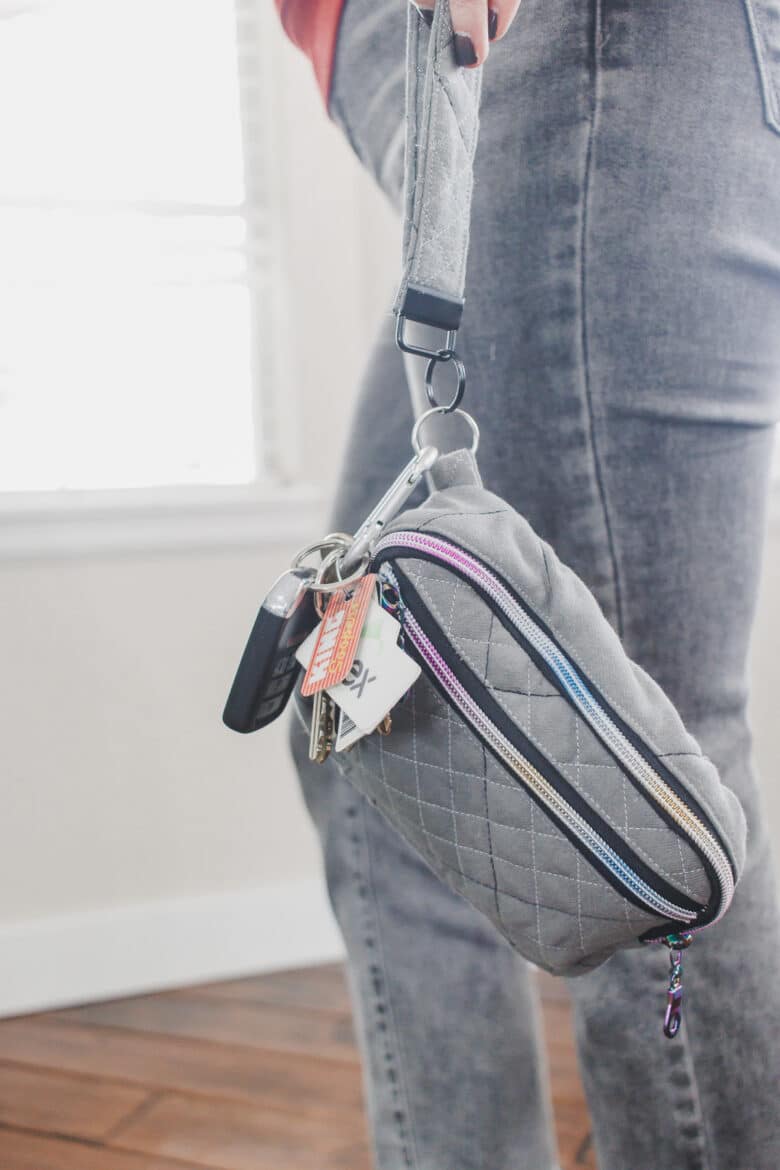
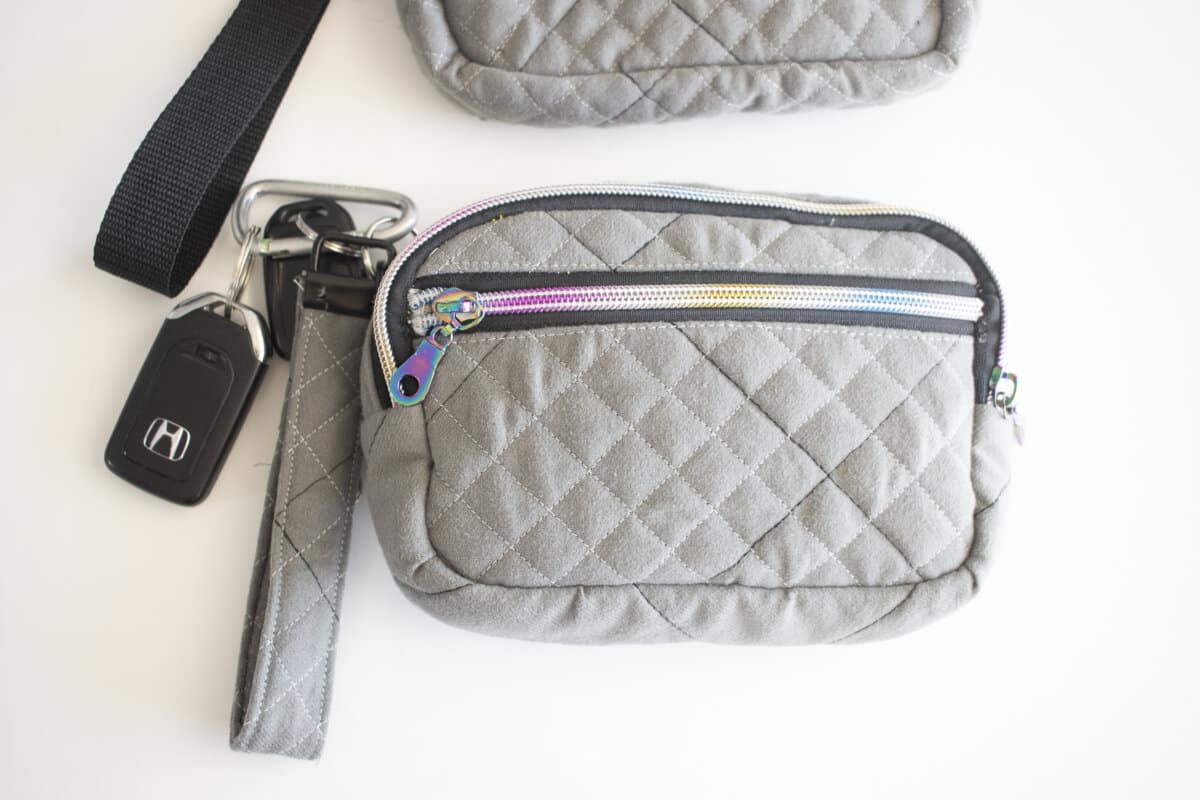
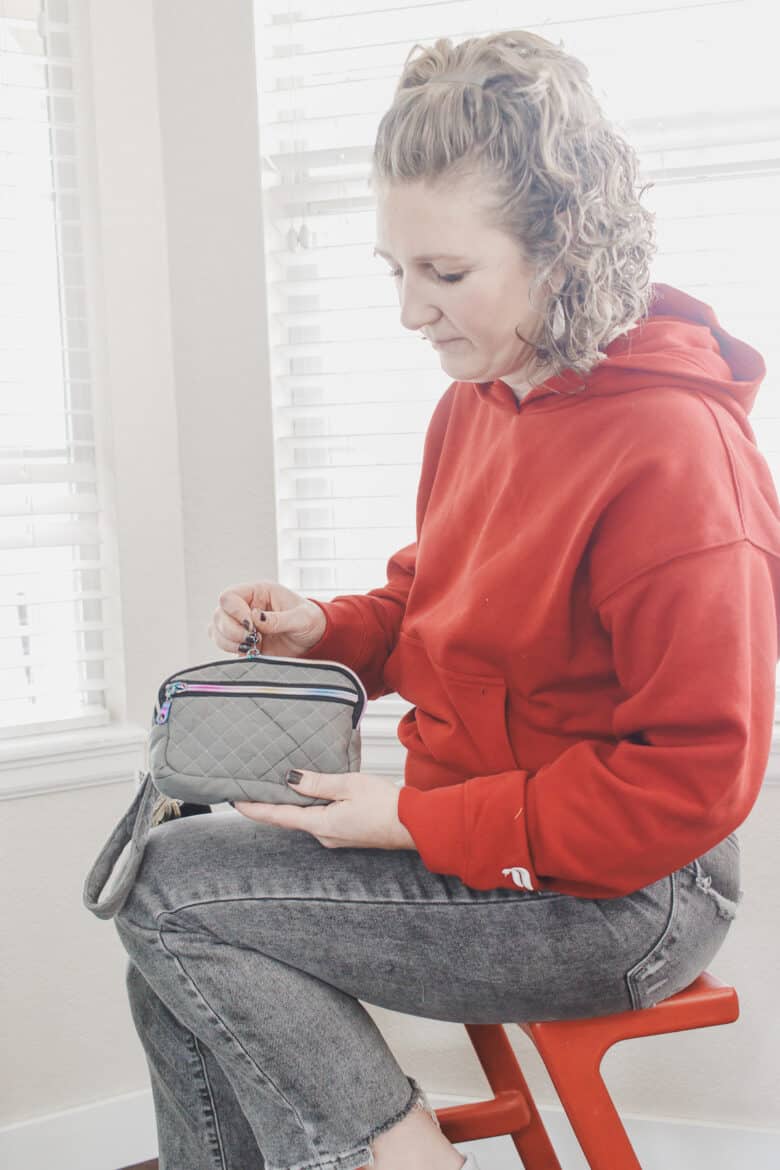
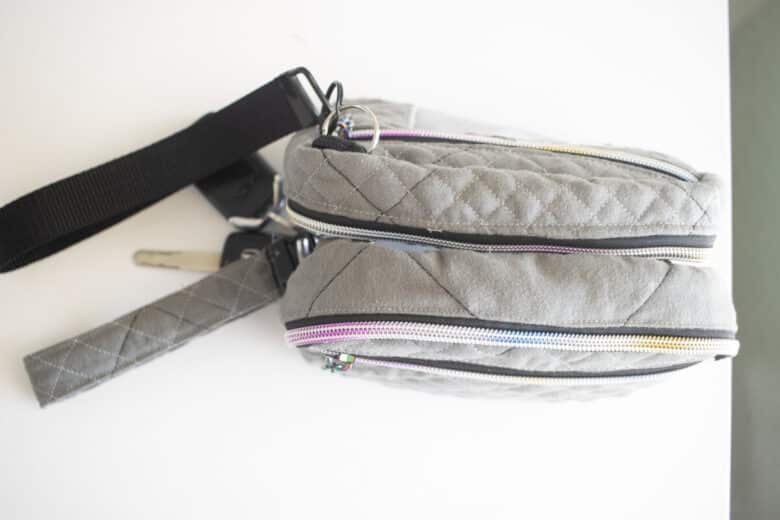
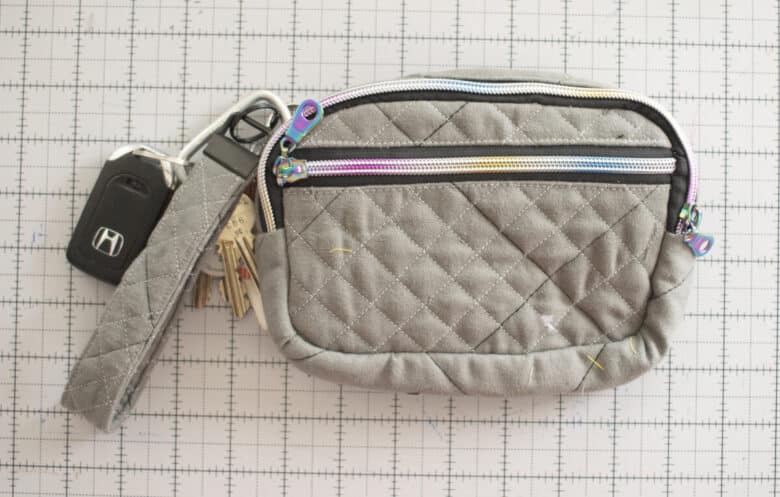
I’ve been carrying this around for a week, and I’m still not sure I’m a wristlet wallet kind of girl, but this bag is cute, handy and does hold a phone and the bare necessities for carry for on the go. I added a carabiner clip on the key ring so I can take my keys on and off easily.
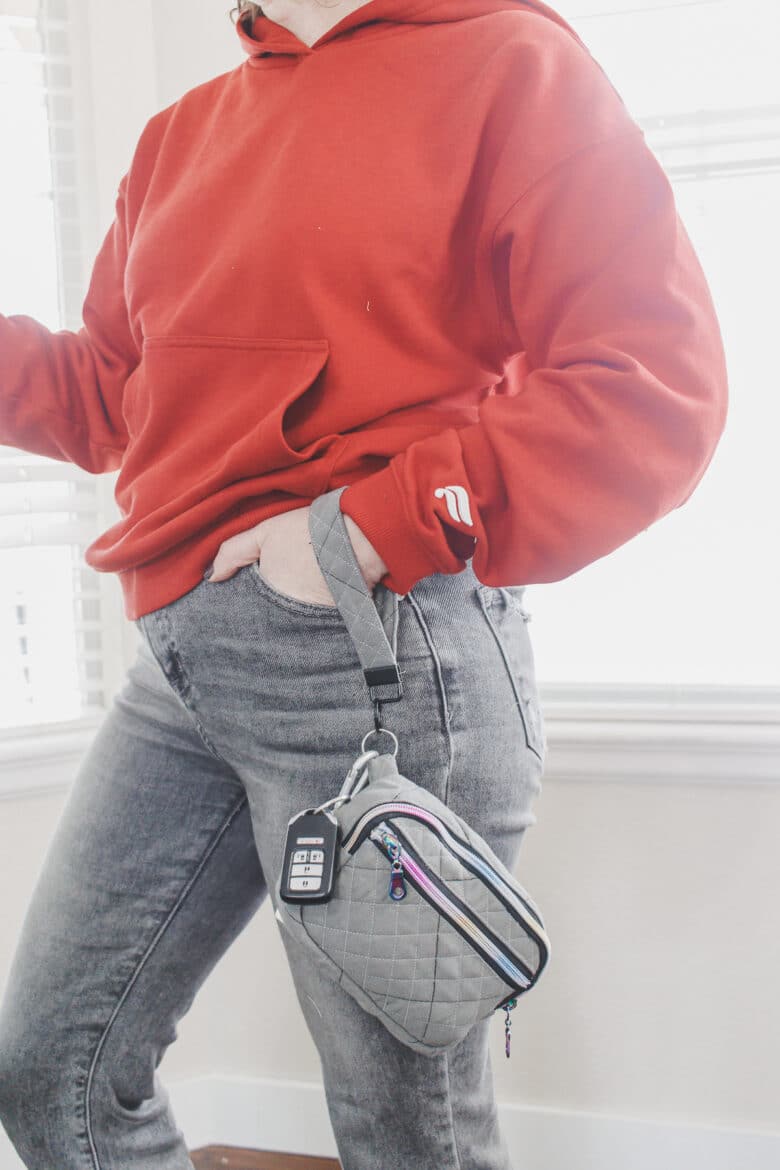
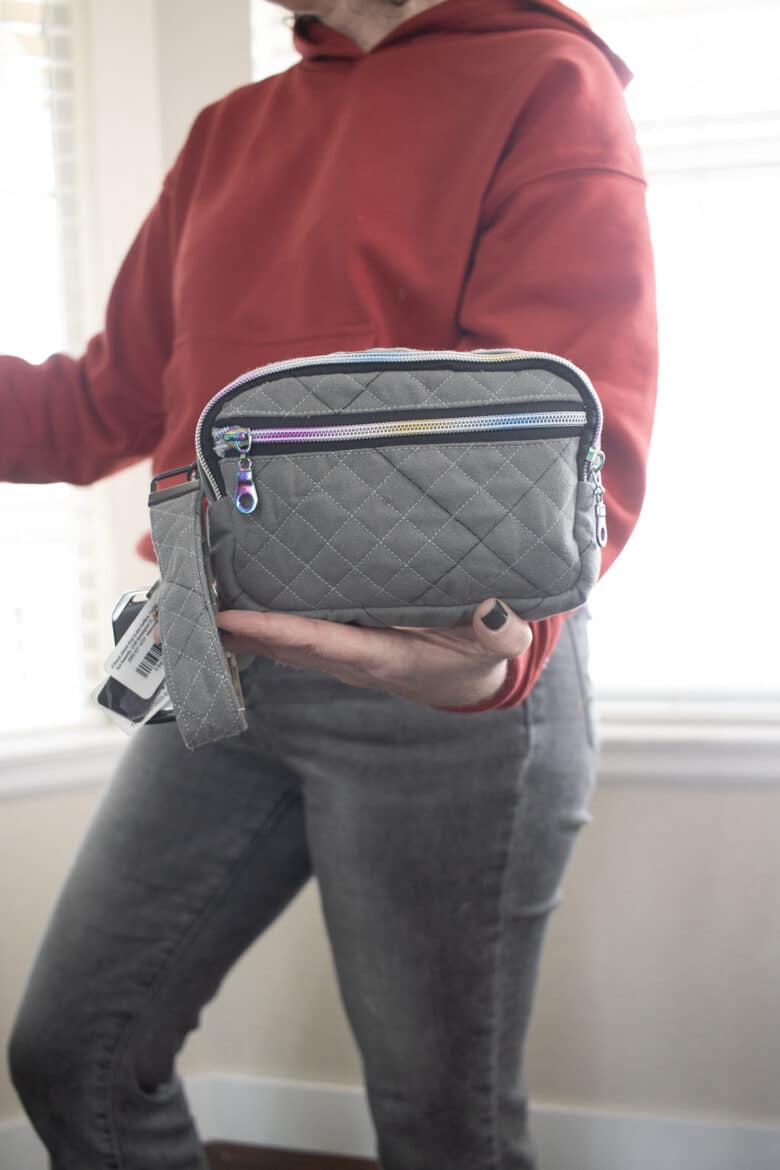
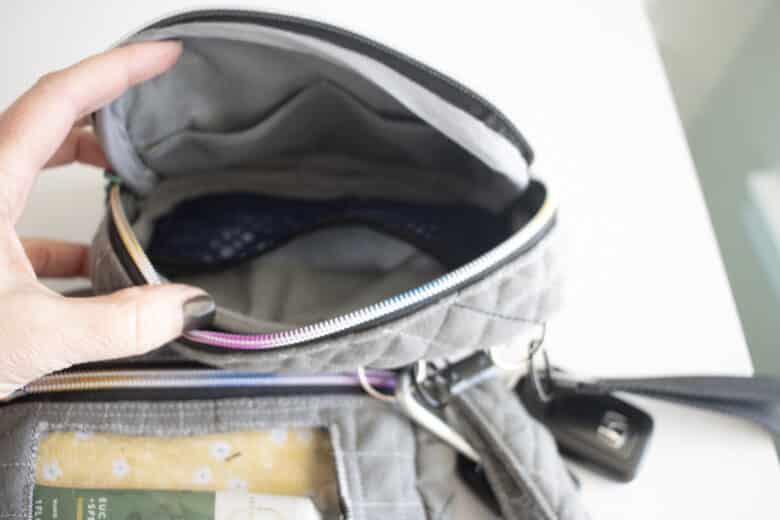
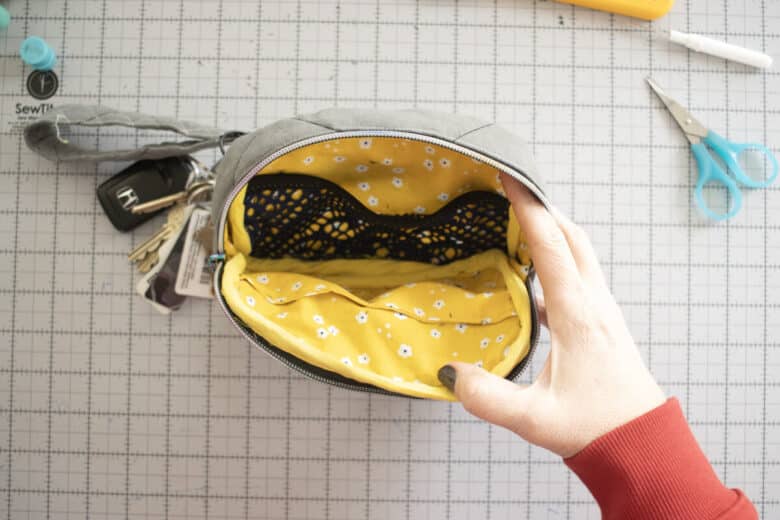
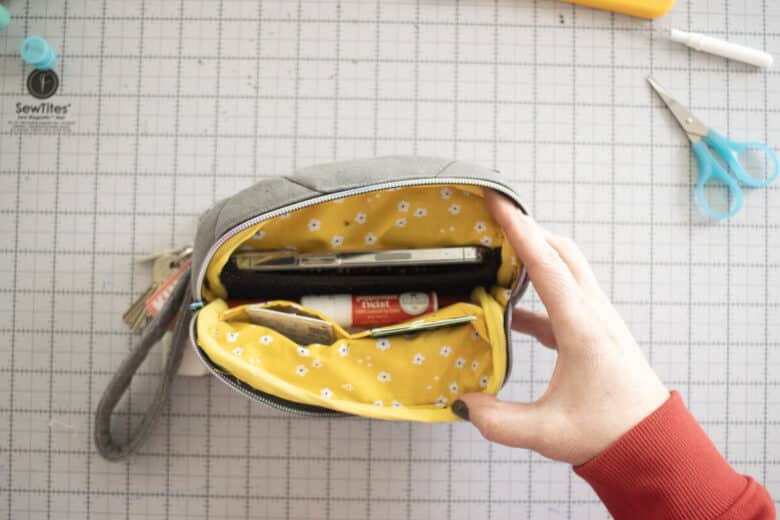
One version I sewed a wrist strap from the bag fabric, and the other bag I just used a piece of strapping. The outside has two zipper pockets, one on each side, and the inside of the bag has two pockets on one side and a stretch mesh pocket on the other side. There is room in the center for other items you may want to carry.
More cute bag patterns to sew
- Cross body Hip/shoulder bag
- Sling Bag
- Sling Backpack
- Wool Sack Purse
- Winter Purse
- Mesh Beach bag
- Convertible Bag/backpack pattern
- Small Faux leather purse pattern
- key fob wristlet
Phone wallet free sewing pattern
Download the free pdf pattern pieces using the button below. You will need the tutorial in this post to put it all together. Need help with the download or using your account? Here is my PDF pattern tutorial or my account help tutorial.
Having trouble with the photo tutorial or just don’t want to bother? You can purchase a full length VIDEO tutorial using the link below. {50 min sewing tutorial}
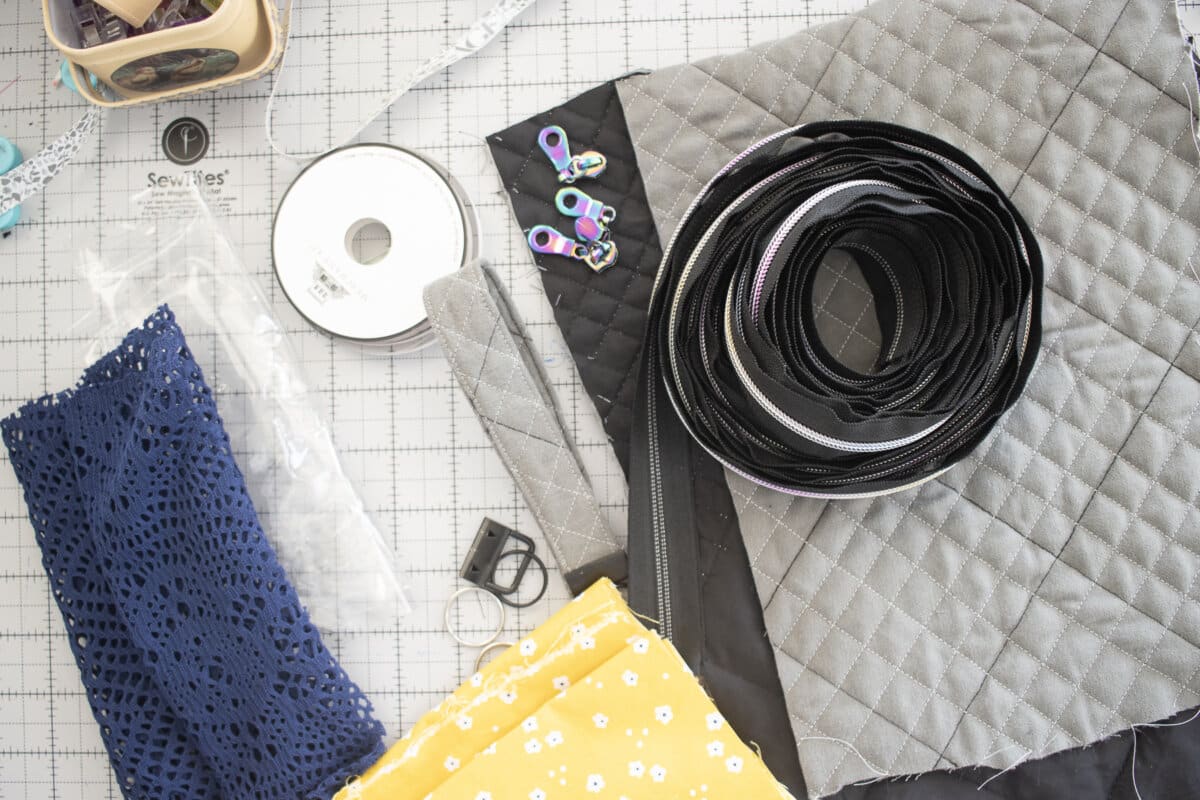
The PDF is just a basic two pages, so it should be easy to put together and get the pieces organized. Below are links for the hardware and bag notions that I used in my bag. Feel free to substitute with what you have on hand. I had everything on this list already, except for the wristlet hardware, which is why I used it all. I also subbed the mesh for the mesh pocket, but I linked my favorite pocket mesh below, and what I usually have on hand.
- Key fob/Wristlet hardware
- Zipper by the yard
- Key rings
- Fold over elastic
- Mesh fabric
- Clear vinyl
- 1″ strapping {or make your own straps}
- Quilted fabric
- lining fabric
- Carabiner Clip
- Bias tape for finishing
How to sew a wristlet wallet
Ok! now that we have those details out of the way.. let’s get into it! All seam allowance is 3/8″ unless otherwise mentioned.
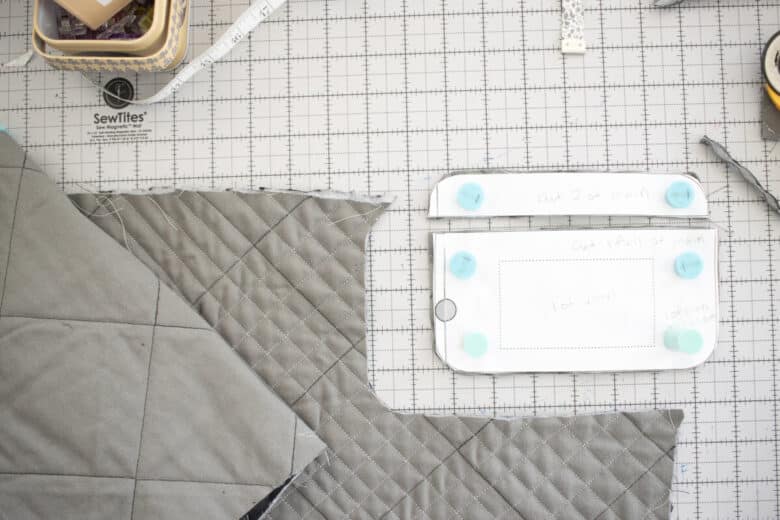
Start by cutting out all pieces of the bag as directed on the pdf pattern. There are several pattern pieces with paper pieces and a few with rectangles measurements. You can also cut one vinyl rectangle window if desired. You can totally make the bag without this as well.
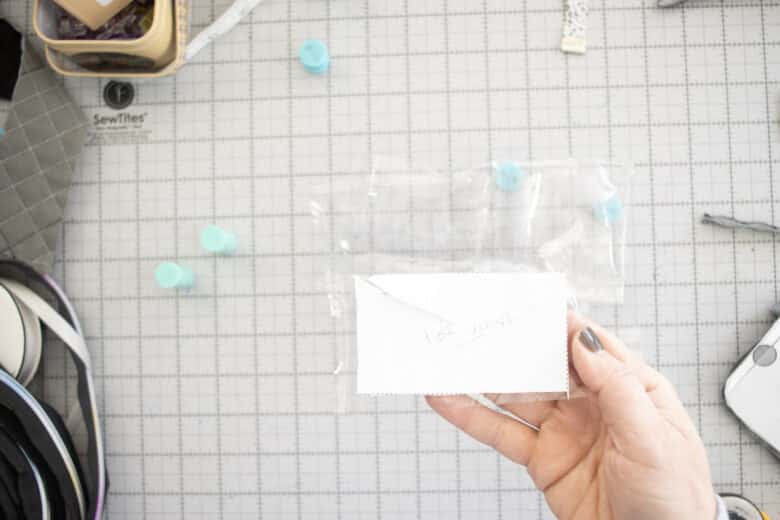
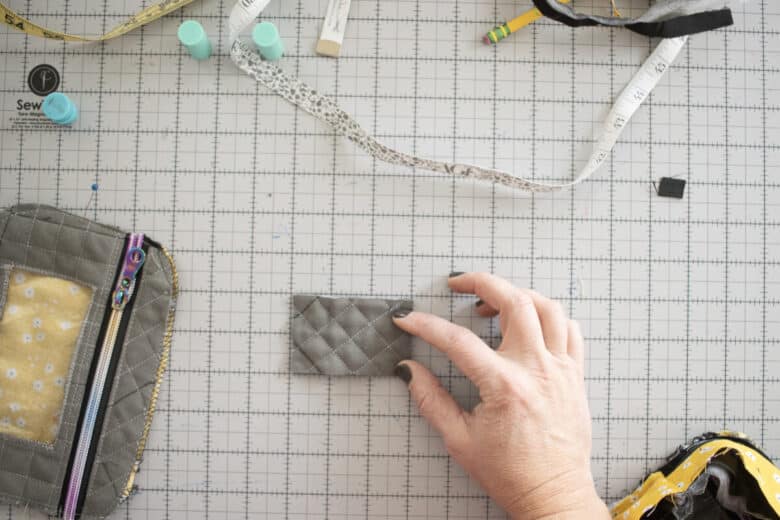
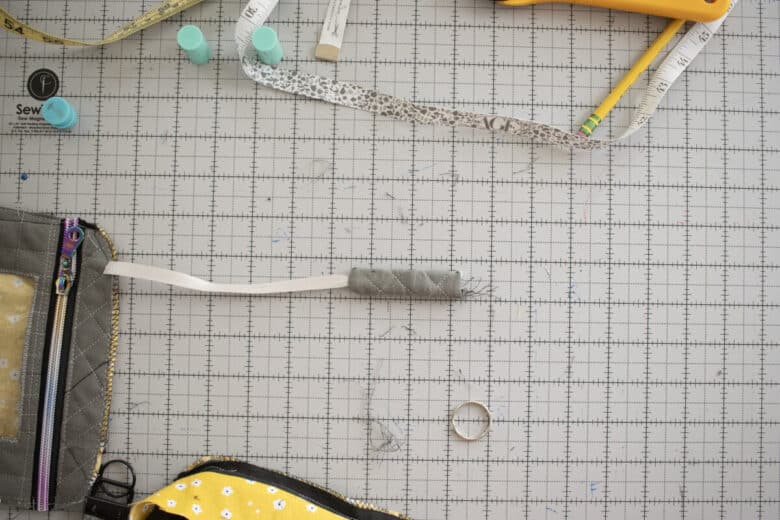
Start by making the wrist strap. You can use a length of strapping, or make your own strap from fabric of your bag. Start with a piece of fabric 14″ x 2.75″. Fold in half, then sew the long edge with a 3/8″ seam allowance, sew one short end as well. {it may make it easier to turn to sew a ribbon inside this tube, attached at the short end. You can pull the ribbon to turn}
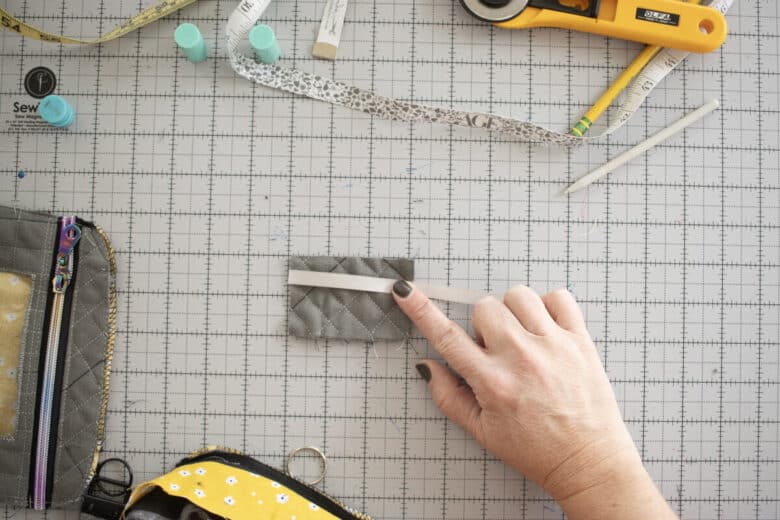
Turn right side out.
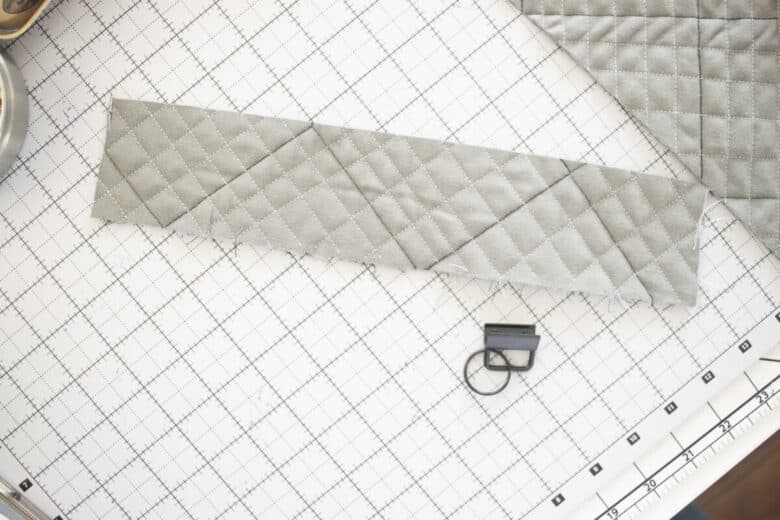
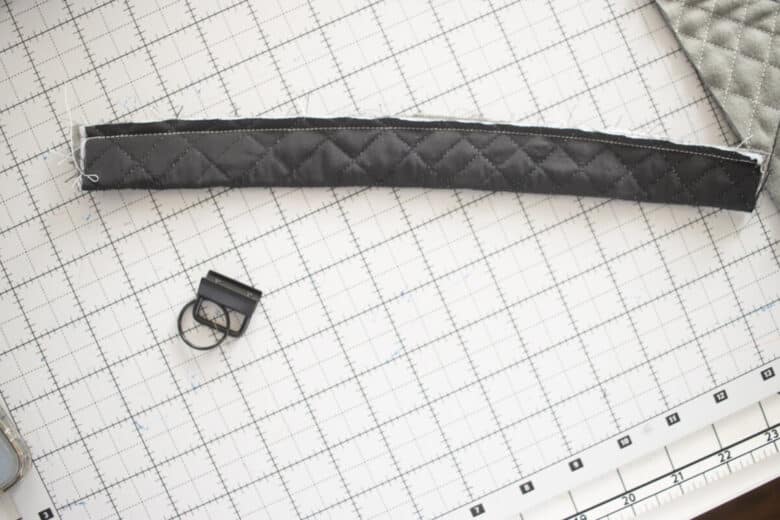
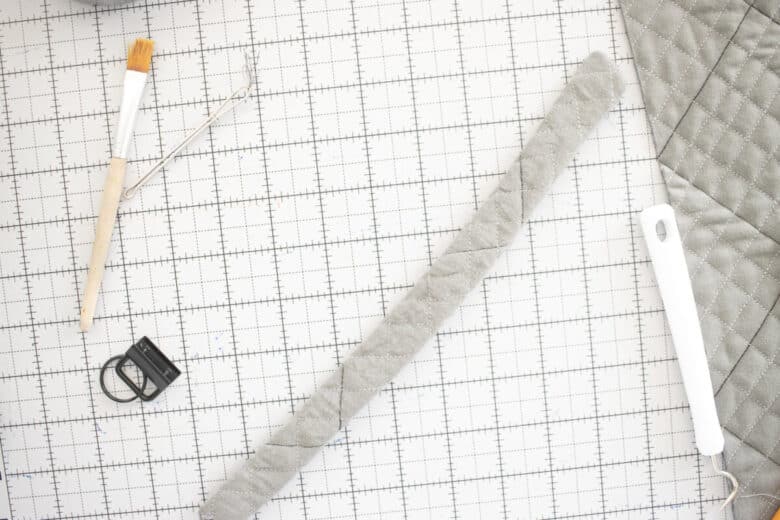
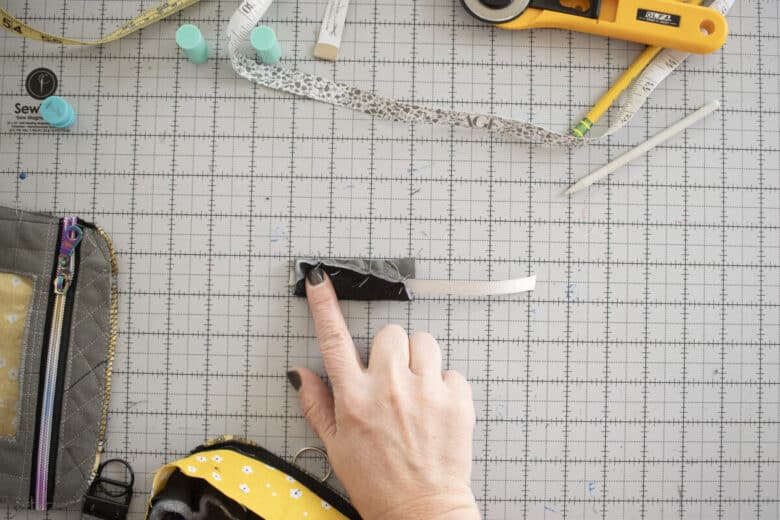
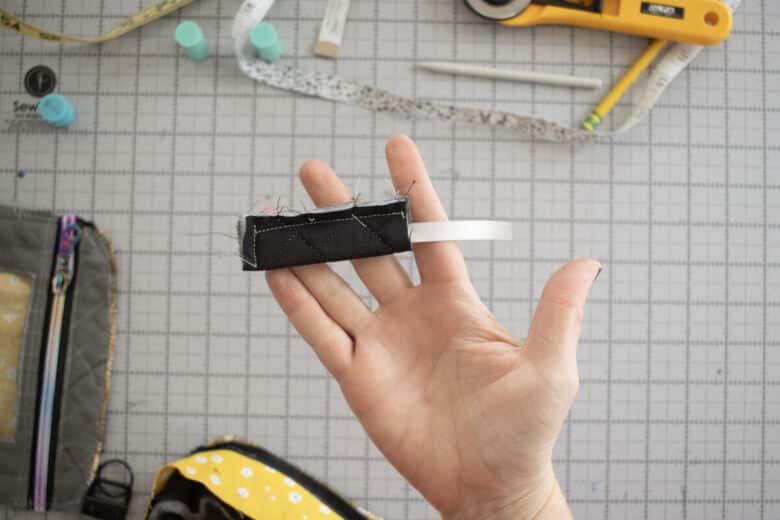
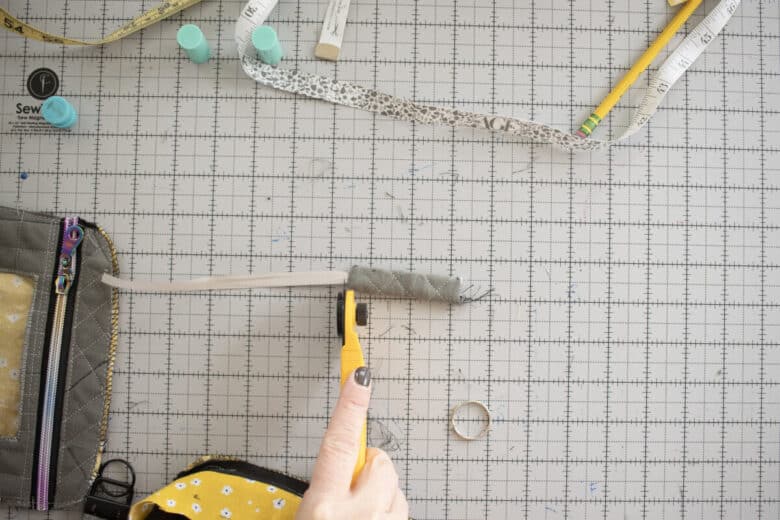
Top-stitch the two sides of the strap pieces. Trim the ends to reduce any bulk and loose threads. Pinch on a wristlet hardware clamp with a pliers. The process is the same with a pieces of strap, just clamp on the hardware to the end of a folded piece of strapping.
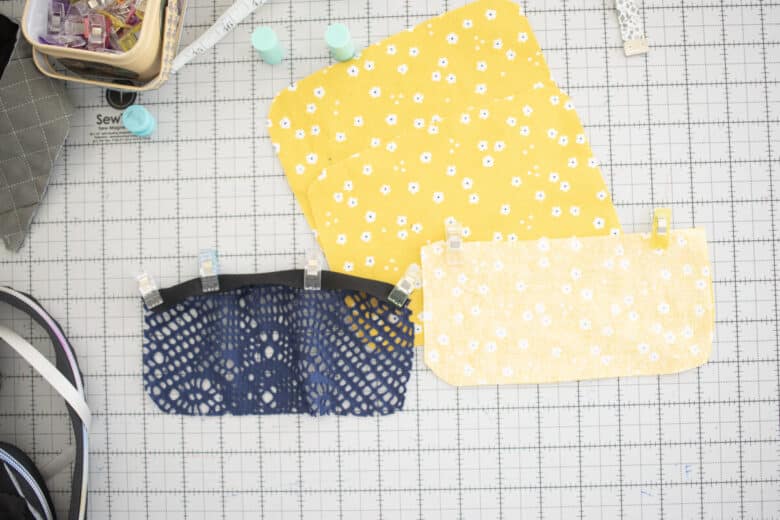
Start the bag assembly with the inside pockets. One is a mesh pocket and the other side is a two compartment pocket. Lay out the two lining full pieces, the mesh pocket, a piece of fold over elastic the same length as the top of the pocket and the two pocket pieces. Fold the elastic over the top flat edge of the mesh and pin or clip. Place the pocket pieces right sides together and pin or clip the top flat edge.
Sew the side pockets

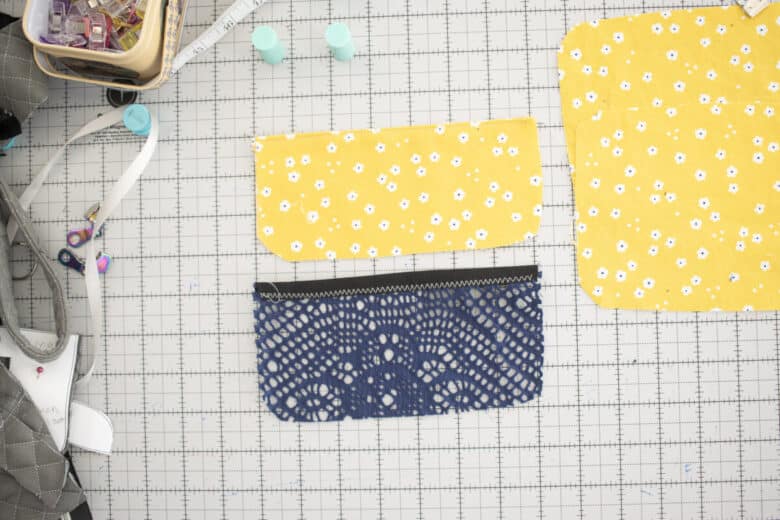
I stitched the fold over elastic with a zig-zag stitch. You can use any stitch, but it should be a stretch stitch. After sewing the other pocket side, fold it over so the right sides are out and top-stitch along the flat top edge. Place the pockets on the lining sides as shown. Stitch down the center of pocket to divide it in half as well. Baste the pockets in place on the lining sides and then finish the edges of the lining with a serger or zig-zag if the lining fabric can fray. My second version the lining fabric did not fray so I skipped this step.

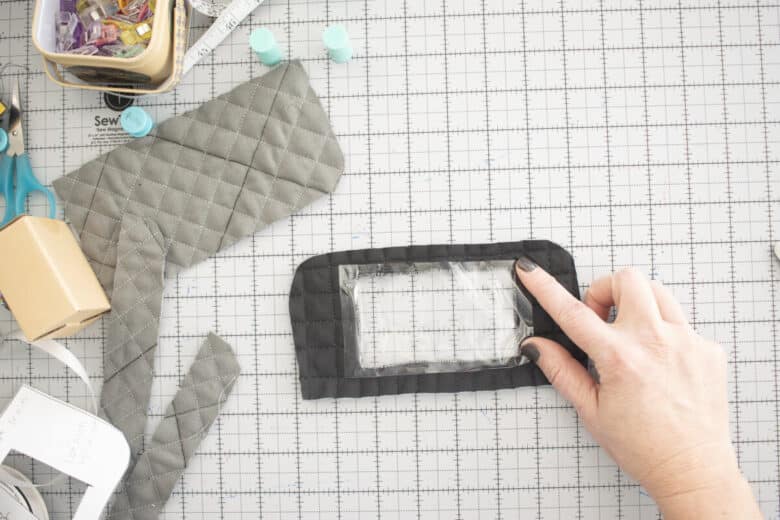
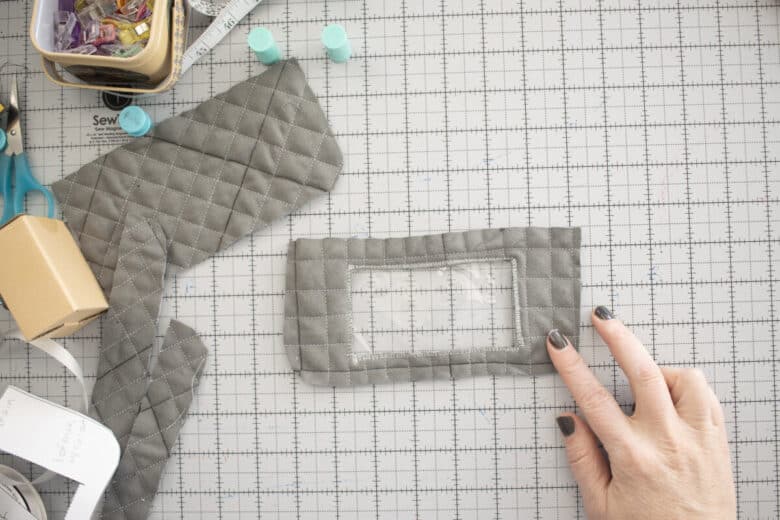
This step is only if you are adding the vinyl window. You can finish the raw edge of the window with a zig-zag first then add the vinyl.

When I made the second bag I pinned the vinyl to the back of the piece first {before finishing the edge} and then sew a zig-zag a tight stitch from the right side on the raw edge of the window. This will finish the raw edge and attach the vinyl in one step! I would suggest this method as it was easy and saved a step.
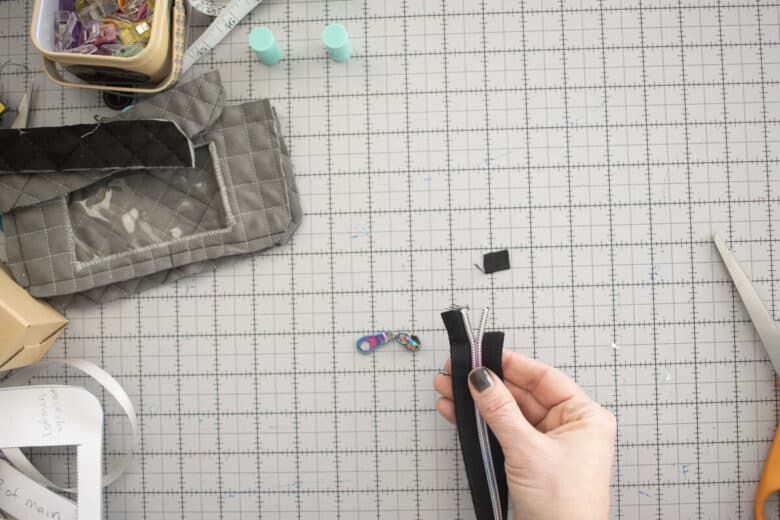
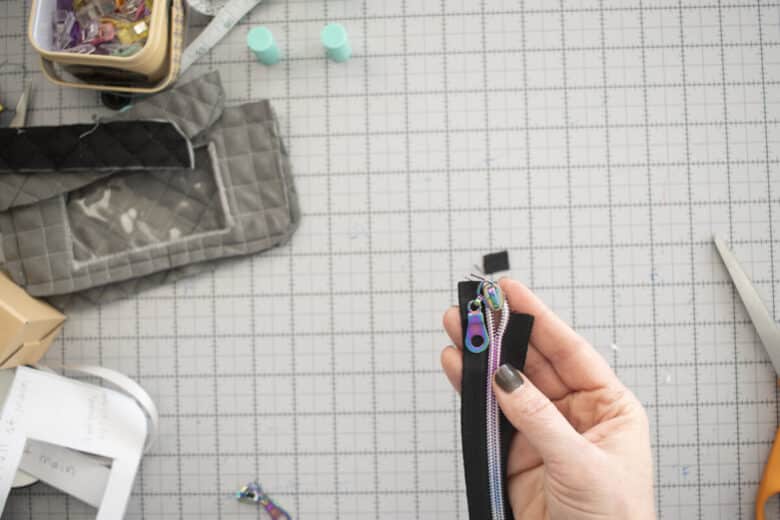
If you are using zipper by the yard it’s time to cut the zipper into length. Here’s how I put my zipper tabs on the zipper teeth. I open up the teeth about 1/2″ and then cut off the zipper tape from ONE side of the zipper about 1/2″. Place the zipper tab on the left side first, then slide the teeth from the cut side into the other side of the pull tab. Push the teeth as far as you can on both sides, then pull the tab down. Repeat with three pull tabs then cut two 8″ zippers and 12″ zipper.
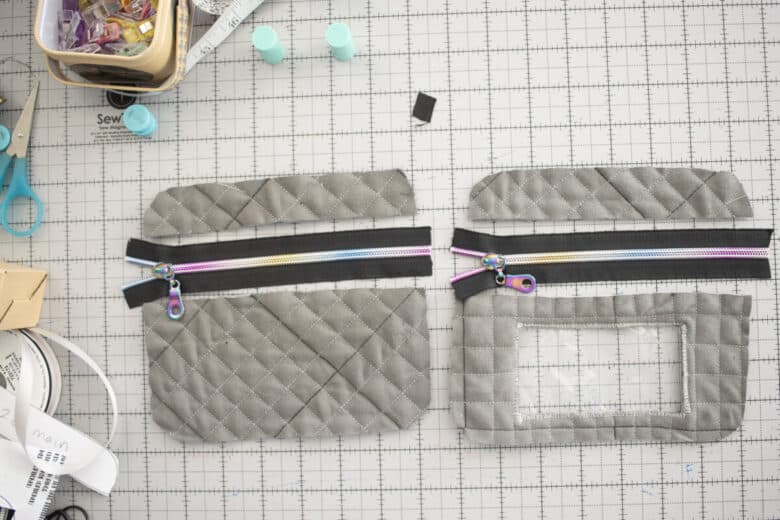
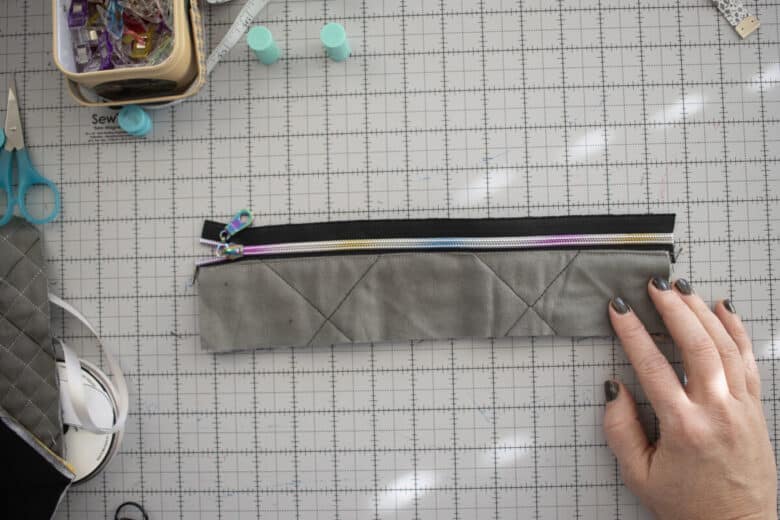
Place the right side of the shorter zipper on the right side of the bottom part of the outer fabric. Sew using a zipper foot. Do not sew past the zipper pull. Lift the pressure foot and move the pull before sewing past it. You want the stitching to be straight and most likely you cannot sew straight with the pull in the way.
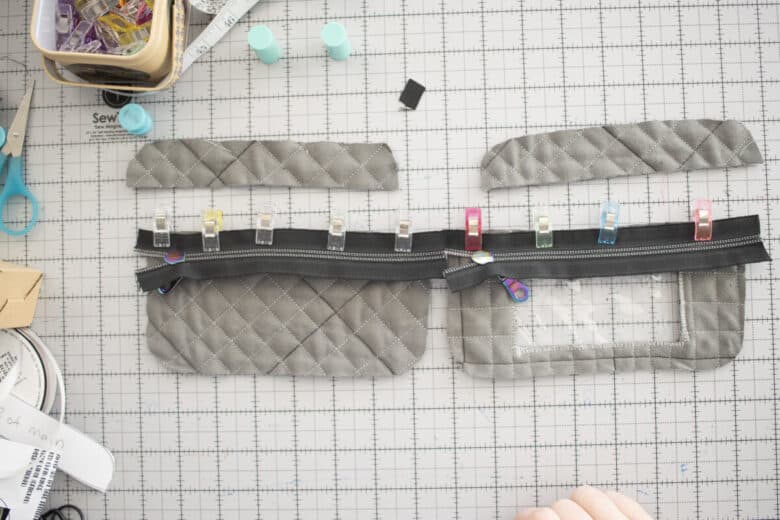
Finish the edge of the zipper and bag with a serger {seen here} or bias tape {I did bias on my second bag} Then fold back the seam allowance.
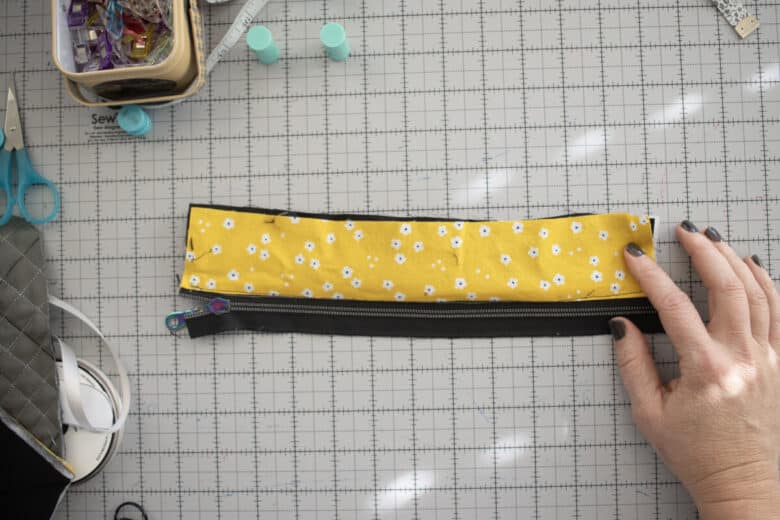
Top-stitch the seam allowance to finish the zipper side. Repeat with the other side of the zipper. Place the right side of the top of the out bag on the right side of the zipper. Sew to the zipper with a zipper foot. {I like to sew with the zipper tape up. Finish the edge, then fold back and top-stitch.
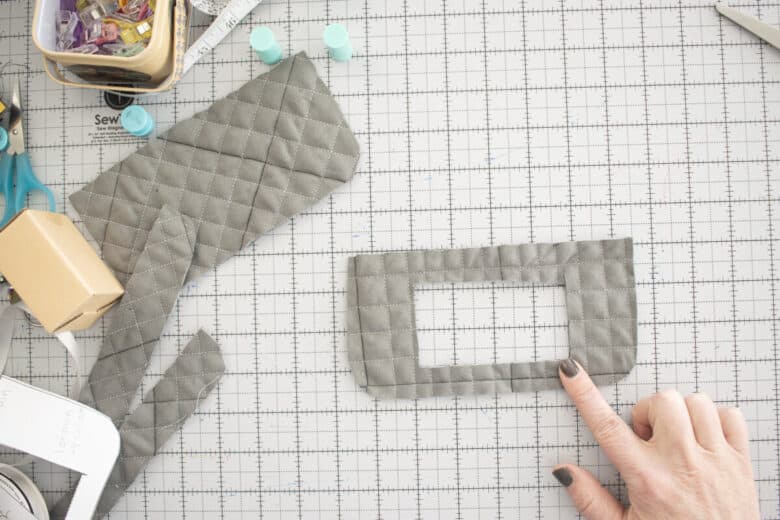
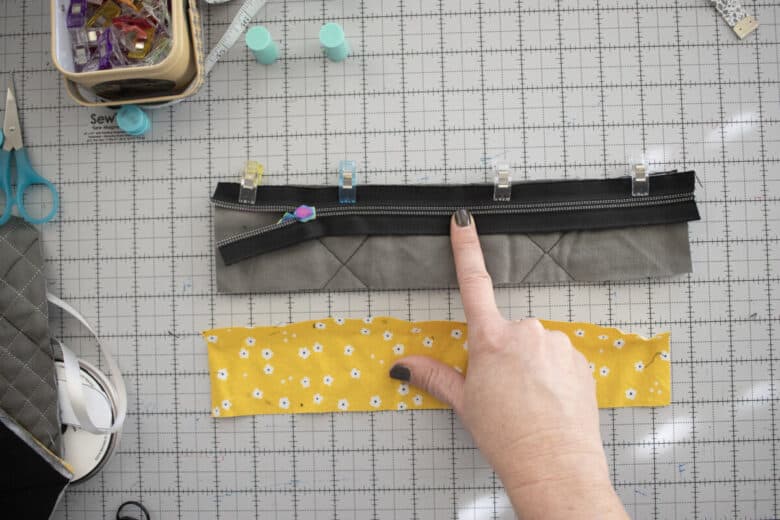
Create the zipper facings
The next step is the bag side. Grab your zipper facings. You should have two of linings fabric and two of the main fabric. Place the right side of the zipper on the right side of the outer fabric. You can sew this first, then add the lining, or make a sandwich with the zipper in the middle and sew all in one step.
Open up both pieces of fabric so that the wrong sides of the fabric are touching, then top-stitch along the edge of the zipper.
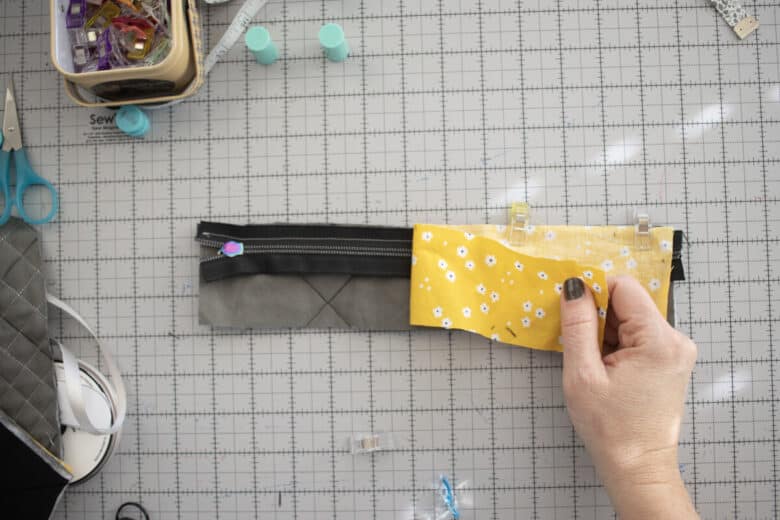
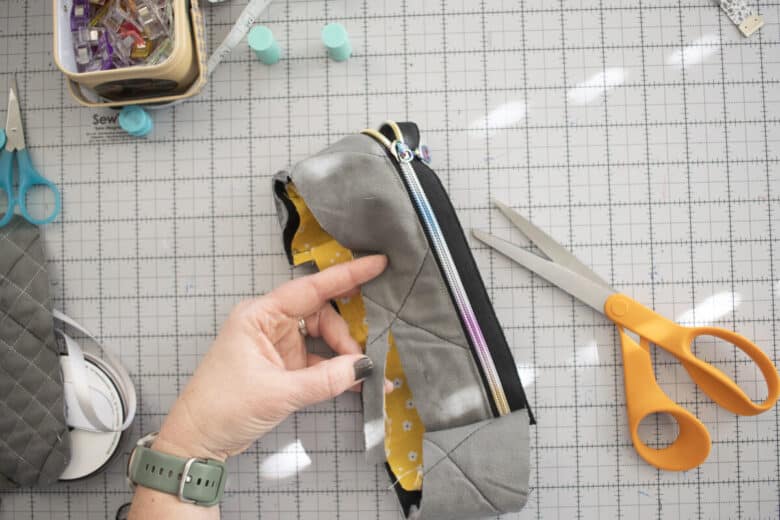
Grab the other two facing pieces. On one short end of the zipper {it doesn’t matter which one} Place the lining fabric right sides together and the outer fabric right sides together. Line up the side with the ZIPPER side {the other side will NOT line up} and the short edge lined up. Sew across.
Now take the short end that is not sewed and fold it back up to the other short end. {you are forming a circle of fabric} The lining should be right sides together and the outer should be right sides together. Again, line up the side with the zipper. Sew across the short side.
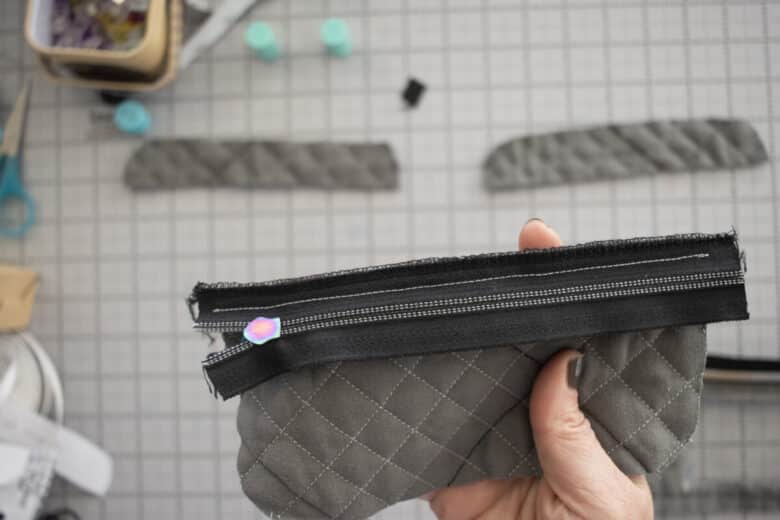
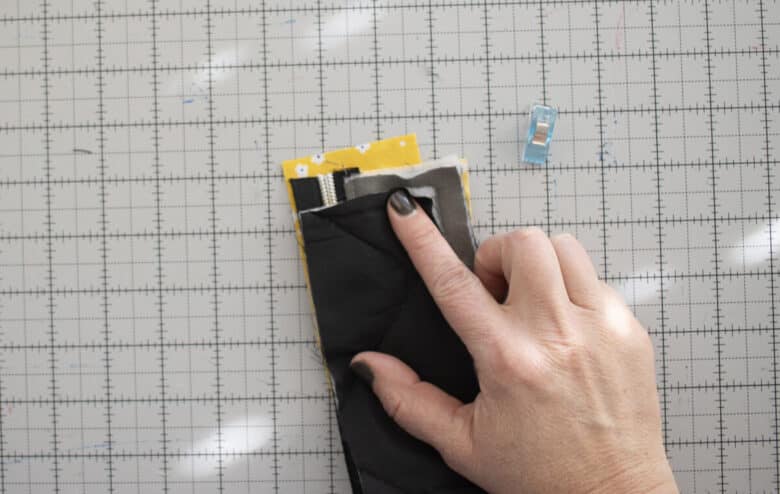
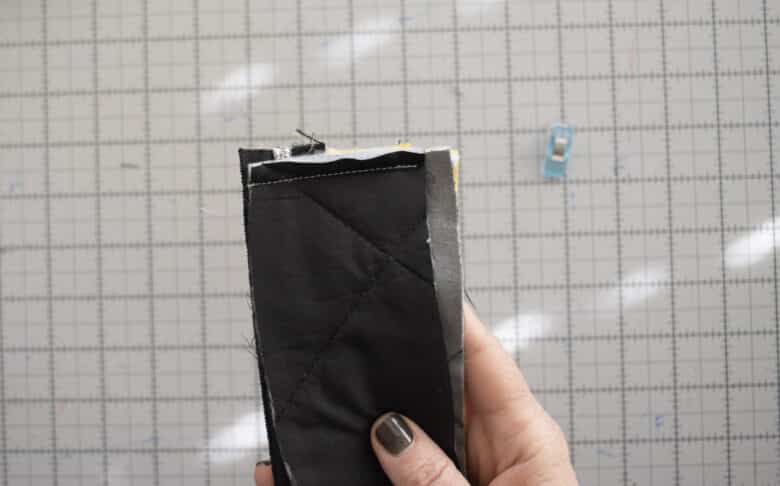
When you turn right side out it should look like this. And when turned on the side, you should have some fabric extending on the piece with the zipper. Some zippers may be wider or narrower which is why I didn’t adjust the fabric.
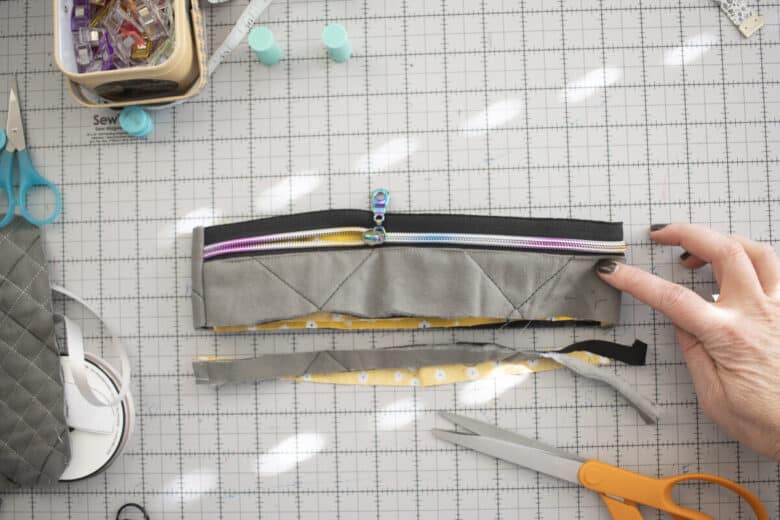
Just trim the fabric now to match. Cut both the lining and the outer fabric.
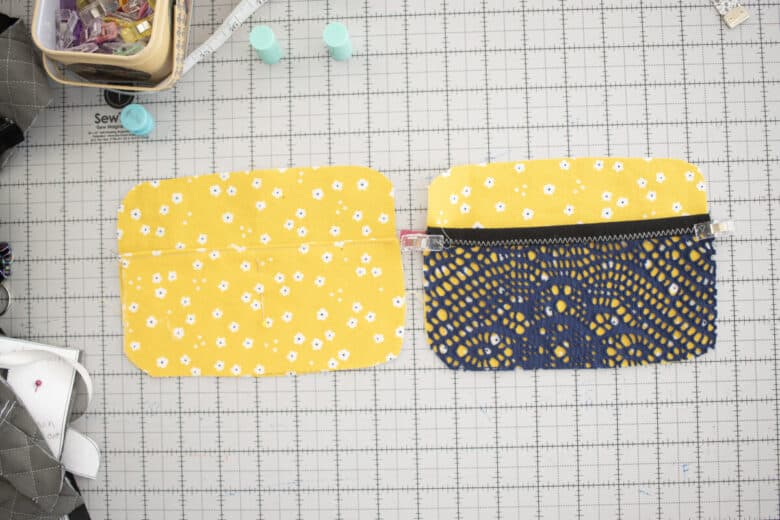
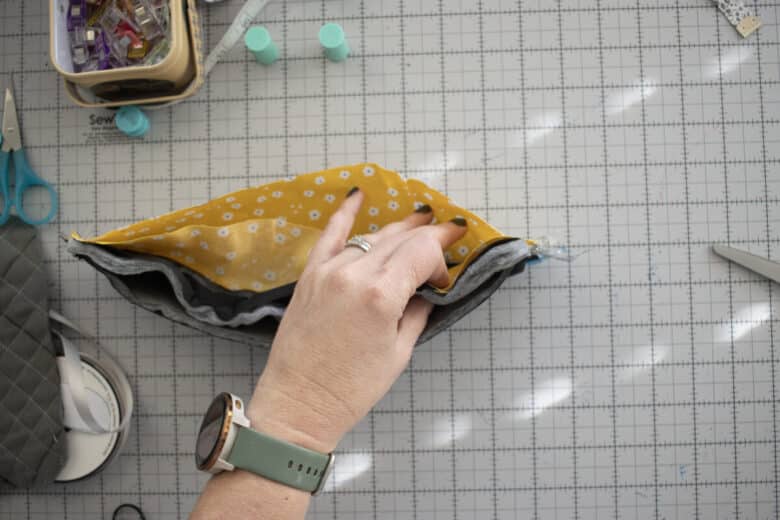
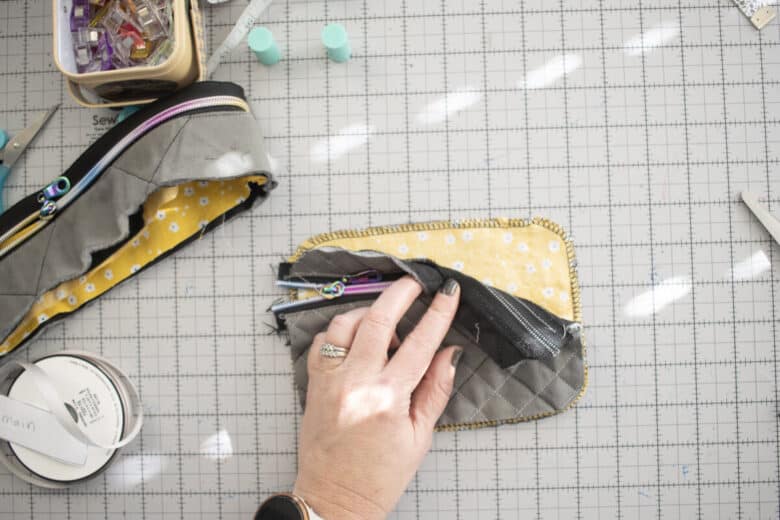
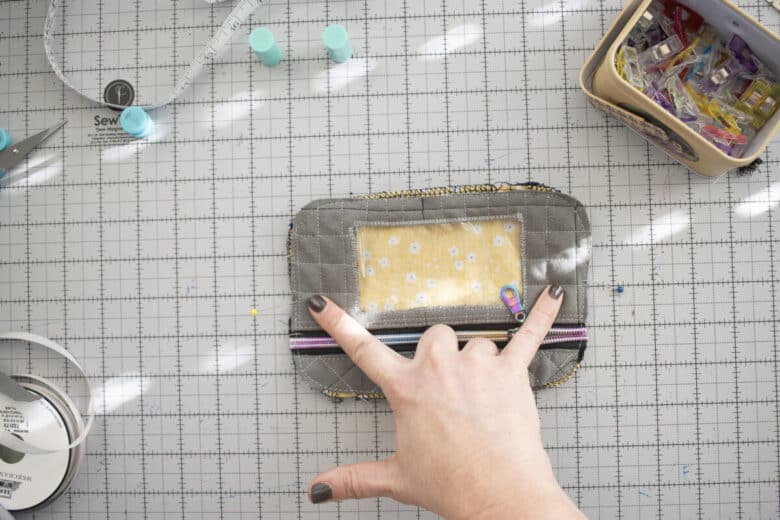
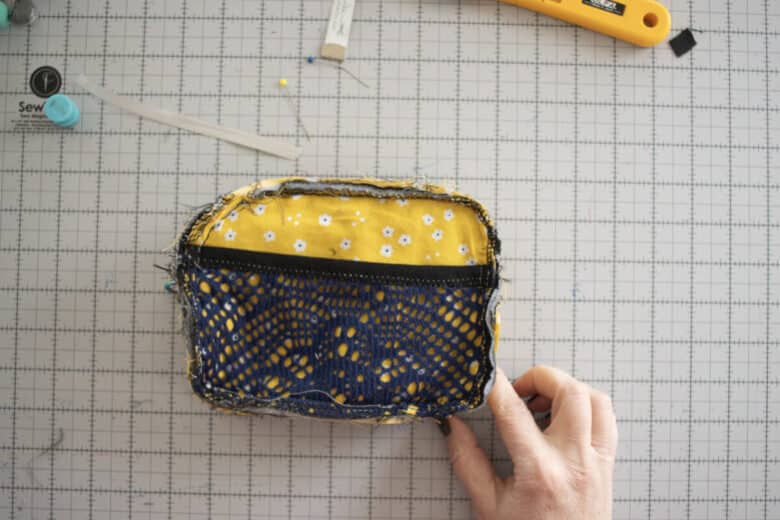
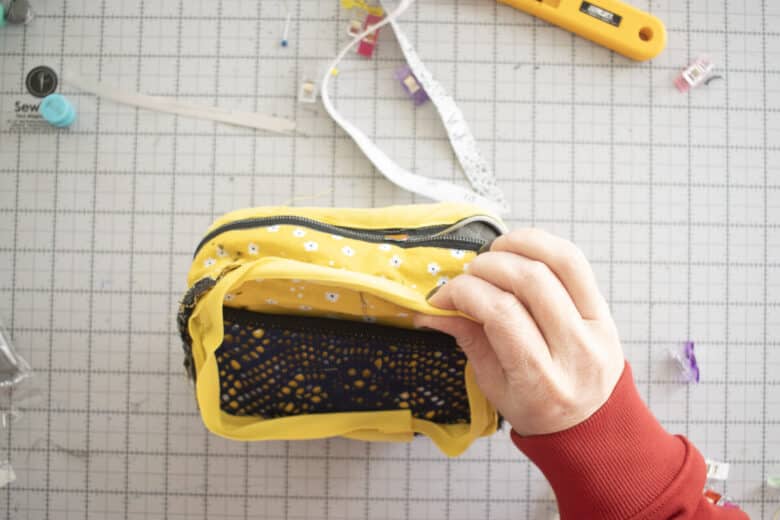
Take the bag sides and place the wrong sides together. Baste these pieces together. {see how the back of the yellow fabric doesn’t look great in my window? My second version I used a plain lining fabric that looks better through the vinyl. Trim any excess fabric or zipper.
Sew the bag sides
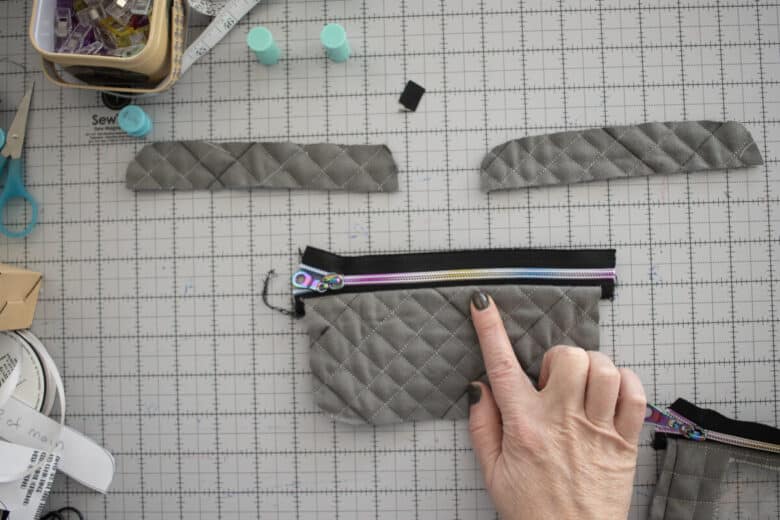
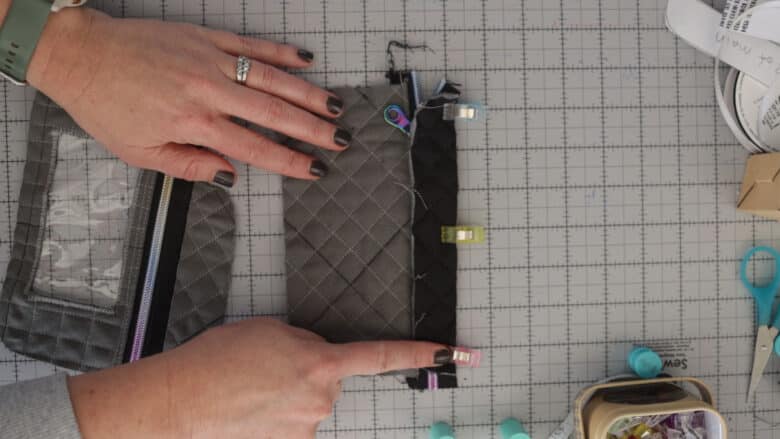
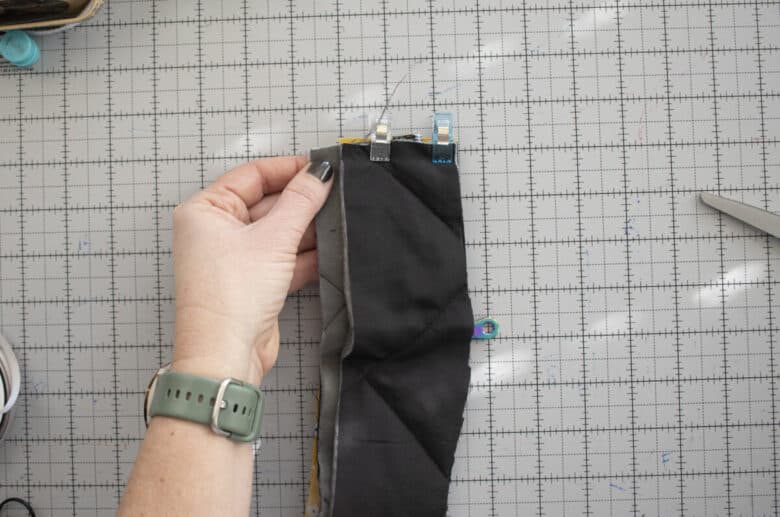
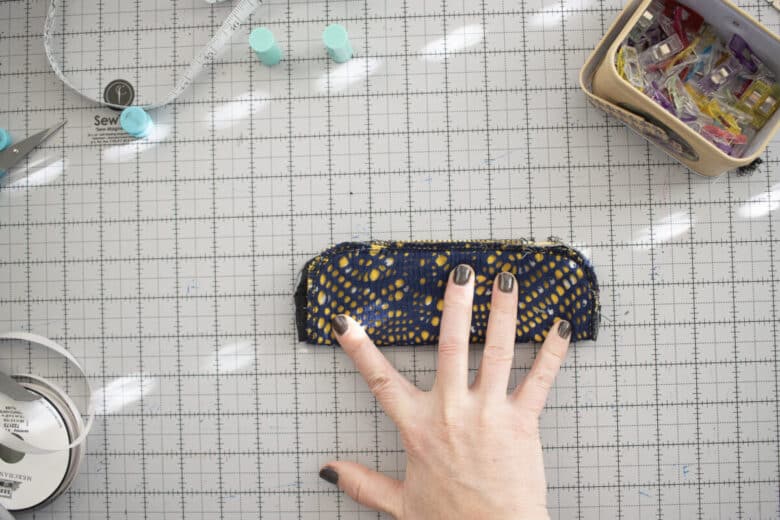
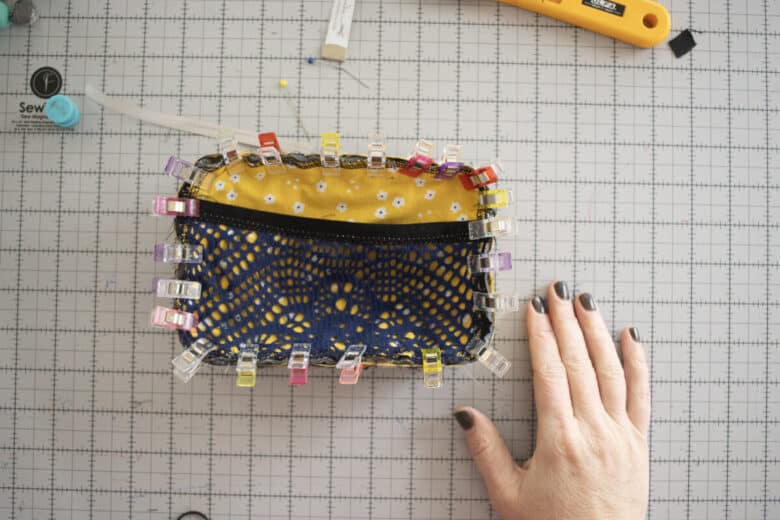
Fold each side piece in half and mark the middle with a pin.
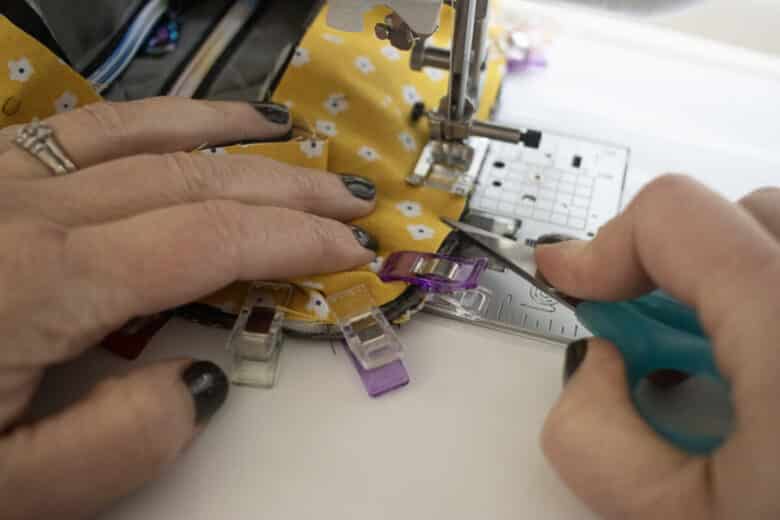
I made the front of my bag the one without the window. Pin the zipper side of the of the side piece to this side first. Match the side seams of the side with the marking pins and then work in from there with pins of clips easing the corners. Sew with the SIDE piece up towards you. I like to sew this with a zipper foot {although that’s not in the photo} I did switch to that for most of the stitching. Also a small scissors or stiletto is very helpful for keeping everything together while sewing.
Before sewing the second side you need a strap for your key ring. You can use a small piece of strapping. Or make a strap as seen here. I will warn you with the quilted fabric it’s quite thick and a broke a needle sewing this into my side seam. You could also make a little strap from your lining fabric.
I like to sew the ribbon into the casing to help turn the narrow tube. Cut the fabric 2 x 3″. Sew the long side and one short side. Sew the ribbon into the short side and pull the ribbon while pushing on the end to turn. Cut off the ribbon and seam.
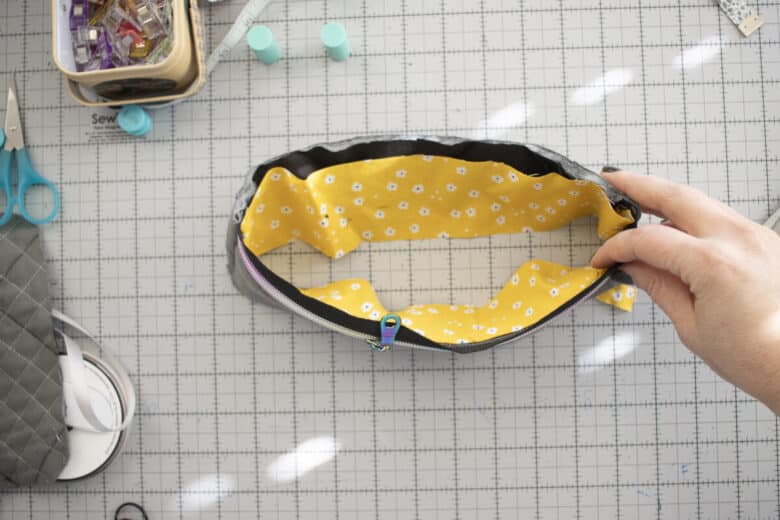
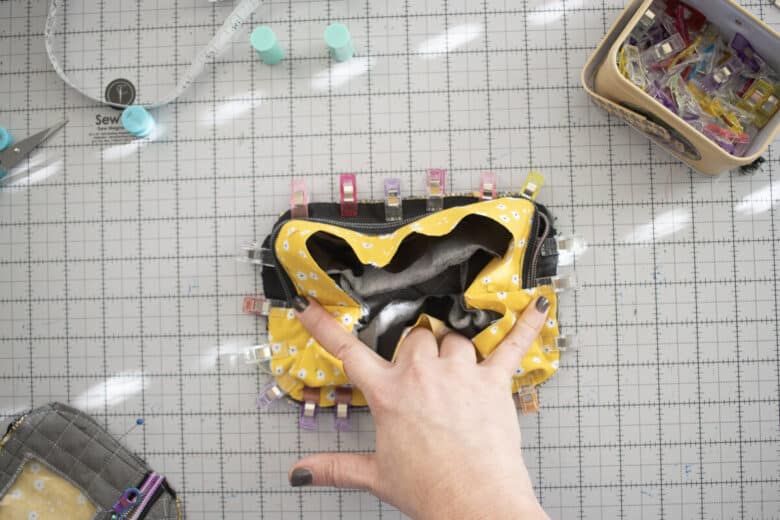
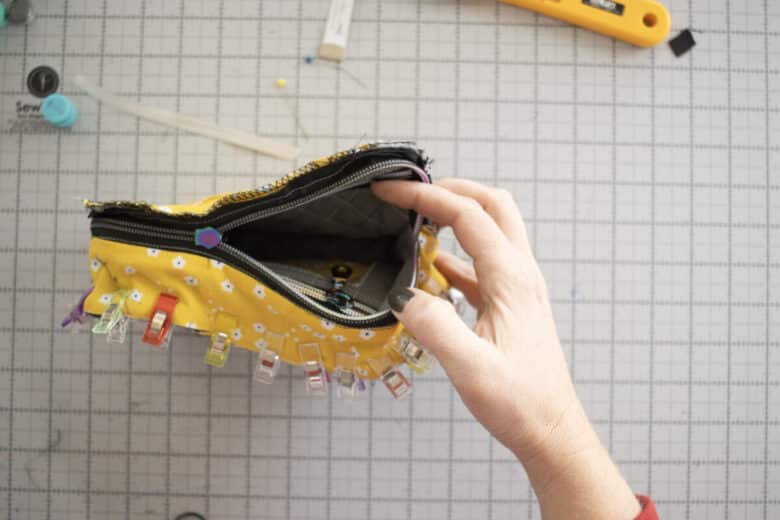
Place a key ring through your strap of outer fabric, lining fabric, or strapping. Place it above the side seam so it won’t be in a bulky place. MAKE SURE THE ZIPPER IS OPEN! Match the side seams of the side piece with the pin markings on the bag side as before. Pin or clip from the side markings in each directions.
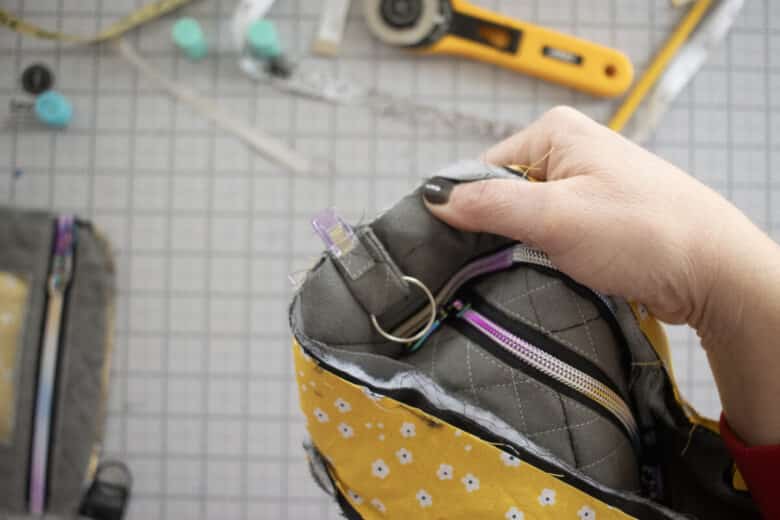
As seen here, make sure the zipper is open. This is how you will turn the bag right side out. At this point I turn the bag right side out to make sure all the layers of fabric are in the seams before going to the next step. Re-sew any seams as needed with a bit larger seam allowance.
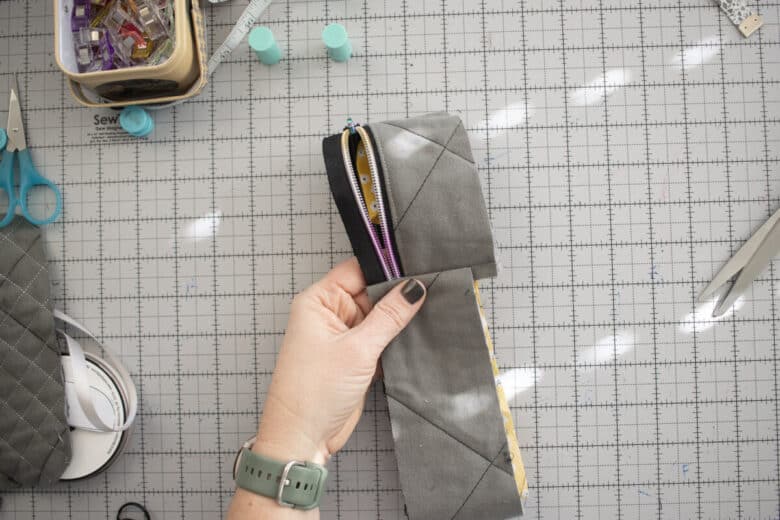
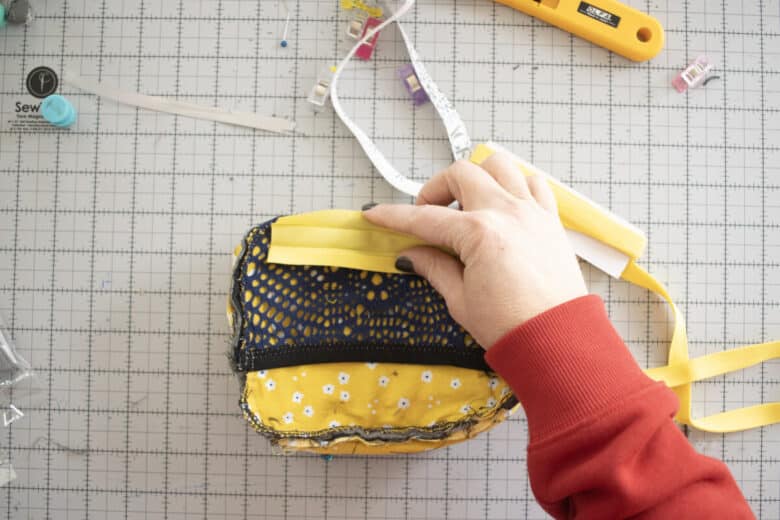
Finish the inside of the bag with bias tape. You can place the tape over the seam and sew with a single stitch {I find this hard to keep everything lined up.}
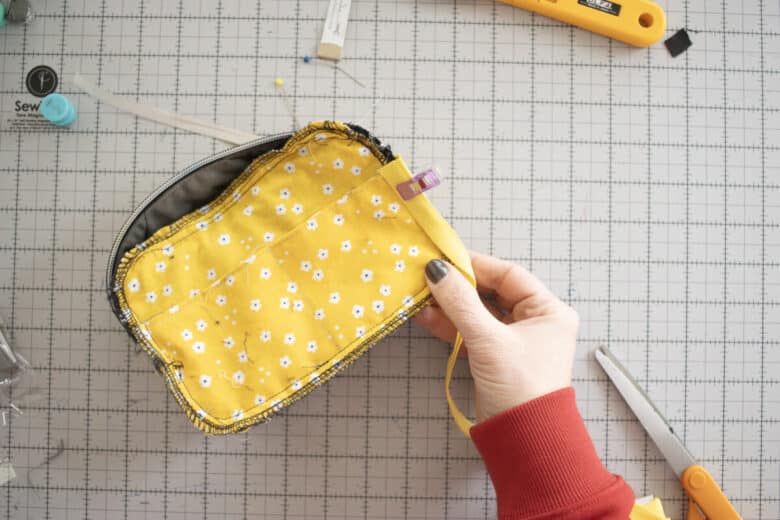
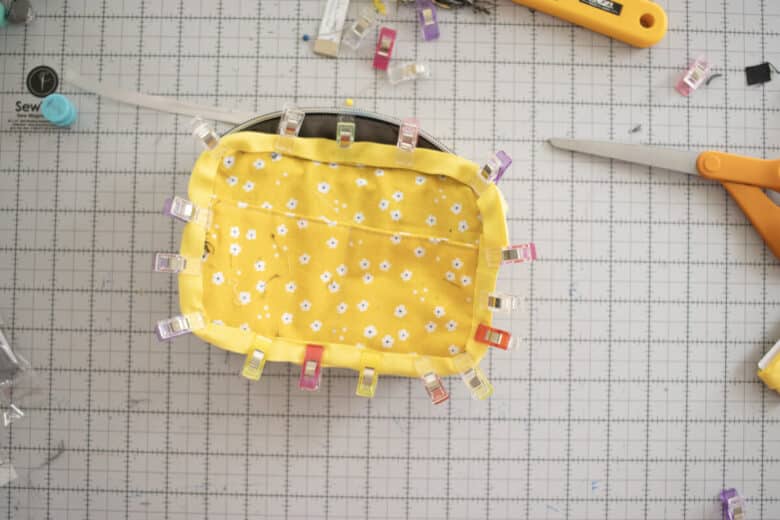
This takes two steps, but I like it better. Open up the bias tape. Place one edge of the tape on the edge of the bag with the rest of the tape on the inside of the bag. Stitch in the ditch of the first fold on stitch you just sewed to sew the bag side on. Overlap around an inch. Then re-fold the bias tape and fold it over the seam allowance. Clip in place and sew again to secure. Repeat with the other side of the bag.
Add the wristlet to the key ring and I also added a carabiner so I can take my keys on and off quickly as we share cars.

The yellow lining is cheery! This little bag holds quite a bit and is perfect when I just need to carry my phone and a couple other things. The wristlet hardware clamp holds the fabric perfectly! I’ve been carrying this small bag for over a week and the strap is strong!


Smart AI Find says
This phone wristlet wallet sounds super handy! I love how a Facebook ad sparked the idea. I can relate to the fabric hunt struggle. Did you end up finding the perfect green? And how do you think this would work for someone who’s not super into sewing?
Cryptordle says
This phone wristlet wallet sounds super handy! I love how it came from a Facebook ad inspiration. I can relate to the fabric hunt struggle. I once spent ages looking for the perfect material for a project. Can’t wait to see the finished product. Do you think it’d work well for those who are always on the go, like runners who need to carry their phones and keys without weighing themselves down?
Waffle Game says
This phone wristlet wallet sounds super handy! I love how it came from a Facebook ad inspiration. I can relate to the fabric hunt struggle. I once spent ages looking for the perfect material for a similar project. Did you have any trouble sewing the wrist strap? And how do you think this would hold up if you stuffed it with a bit more than just a phone and keys?
Connect 4 says
This phone wristlet wallet sounds super handy! I love how it came from a Facebook ad inspiration. I can relate to the fabric hunt struggle. I once spent ages looking for the perfect material for a similar project. Did you have any trouble sewing the wrist strap? And how do you think this would hold up for someone who’s a bit clumsy like me? 😜
Today Wordle says
This phone wristlet wallet sounds super handy! I love how a Facebook ad sparked the idea. I once made a similar project but struggled with the strap. Did you have any trouble attaching the wrist strap? Can’t wait to try this pattern with a bold fabric like you did!
Absurdle says
This phone wristlet wallet sounds great! I’m curious, how did you attach the wrist strap? And what other fun fabrics could work well for this project?
Spellbee Online says
This phone wristlet wallet sounds super handy! I love how it came from a Facebook ad inspiration. I once made a similar project but struggled with the strap. Any tips on making the wrist strap extra durable? Can’t wait to try this pattern!
Tic Tac Toe says
This phone wristlet wallet sounds great! I’m curious, did you have any trouble matching the pattern pieces with the quilted fabric? 😜
Sprunki Day says
This phone wristlet wallet sounds super handy! I love how it came from a Facebook ad inspiration. I can relate to the fabric hunt struggle. I once spent ages looking for the perfect material for a similar project. Did you have any trouble sewing the wrist strap? And how do you think this would hold up if you stuffed it with more than just a phone?
Wordle Answer says
This is so cool! I love how a Facebook ad sparked this. Can’t wait to try it. What other fun fabrics could work well besides the green quilted one?