I have been working on how to hem stretch fabric since I started sewing for my kids. Since knit is MY FAVORITE! Today I’m going to share a few years worth of trial and error in one simple video tutorial. Several years ago when I really started sewing a lot for my kids I fell in love with knits, LOVE sewing with knit fabric! BUT, for awhile I had a hard time top-stitching and hemming my clothes. I used a zig-zag stitch for awhile, and that works for the stretch, but the looks wasn’t as professional as I would like. SO… I tried out a few things… and found the perfect knit hem.. Last year I got a Coverstitch machine and even more options for hemming stretch fabric became available to me. This post will discuss sewing with both a “normal” sewing machine and a coverstitch machine. Both have great options for hemming stretch fabric.
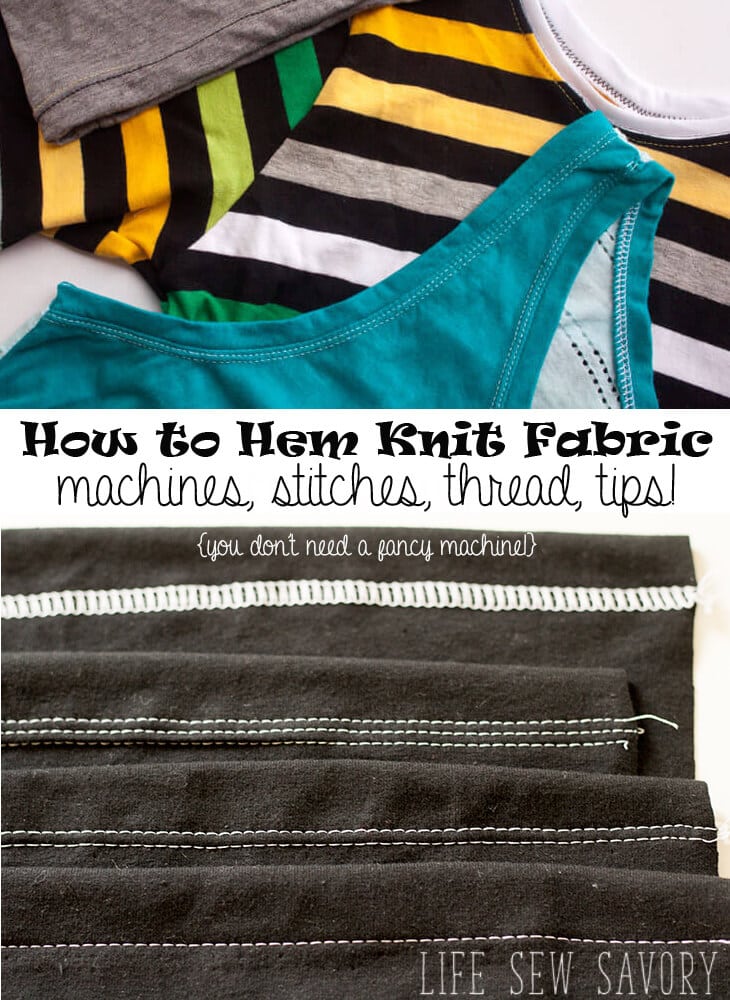
How to Hem Stretch Fabric –
I sew so many clothes for my kids from knit fabric. I found that even with some of my very first projects {see these pjs here} I struggled with the finishing. I didn’t mind using my sewing machine zig-zag stitch for the inside seams but the hems and necklines I wasn’t pleased with. I sewed for many many years with just a “regular” sewing machine and was able to create clothes that looked great and were durable for my kids. Read on for tips and materials needed for getting a great finish on your knit fabric projects.
How to Hem Knit Fabric with a sewing machine –
You don’t need a fancy machine to get a great finish on your knit clothes. This photo shows stretch stitches that were all sewn on a sewing machine. The top is a twin needle with stretch thread in the bobbin. Then a zig-zag and finally the stretch stitch that is built into most machines. It looks like a little lightening bolt.
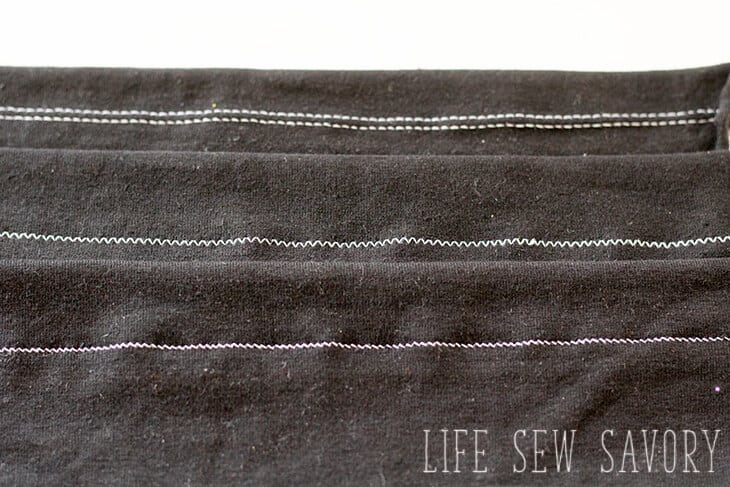
Here is the back of these stitched. The top stitch that was a twin needle on the front has a zig-zag on the back – this makes it stretchy. The other two stitches are also both forms of a zig-zag on the back. These stitched will create stretchy, durable hems and necklines for your clothes.
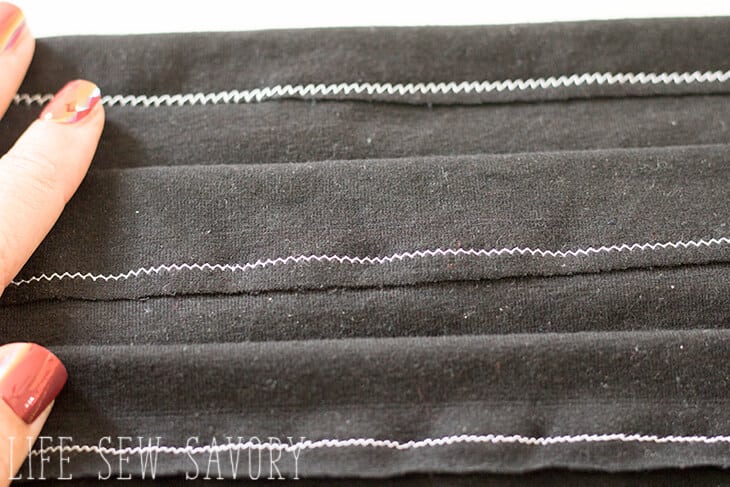
The twin need is my favorite in this group. It’s not at all hard either. Wind the bulky/woolly nylon thread on the bobbin as shown in the video. Then use regular thread in the needles. Stitch as normal. You can back-stitch to secure even with the twin needle on your machine.
Hemming with a Cover Stitch –
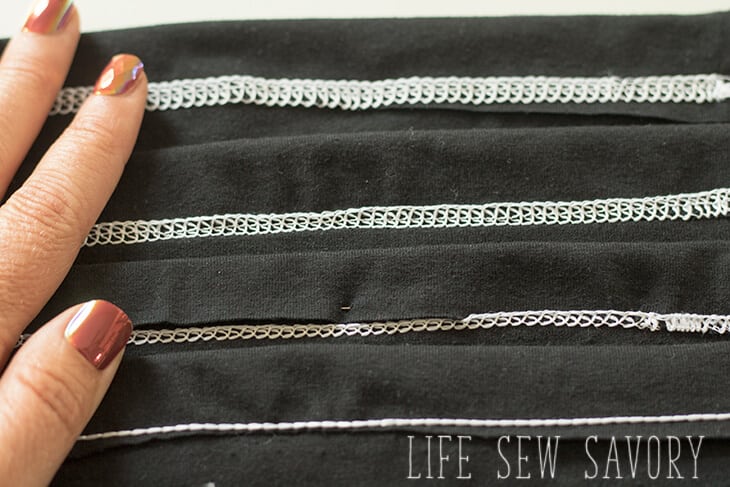
Just last year I started sewing with a cover stitch machine. If you plan on sewing a lot of clothes, I would highly recommend investing.. No one will know you made your clothes, the finishes look the same as if you bought your clothes, but are even better – because you made it! Let’s look at the hems the machine can create. The first one is a double coverstitch – three needles and a looper on the top and bottom. This top looper feature is relatively new to the home machine market, so your machine may not have this, but it’s great for sportwear, leggings and other hems where you want to reinforce the stitches. The three stitch finish is standard on cover stitch machines. For the two stitch you have have the needle right next to each other as show here, or take out the middle one for a wide double stitch. And finally, the chain stitch in a single stitch, but it’s still stretchy due to the looper on the back and you can use it to top-stitch necklines or bindings.
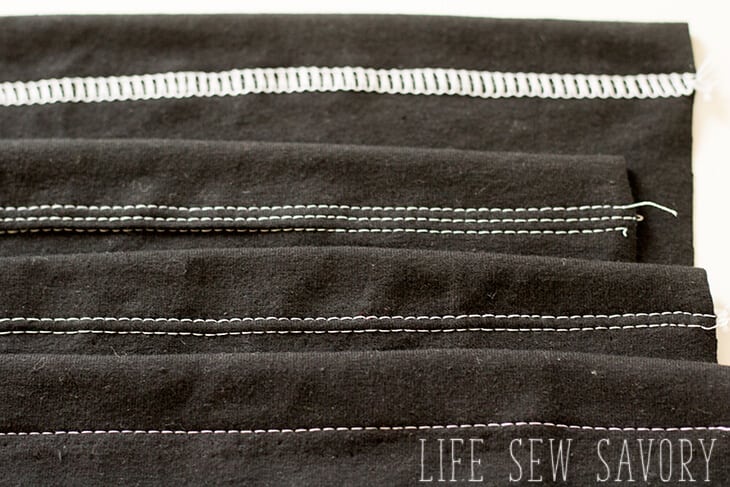
Here’s what the back of all the stitches looks like. They are all pretty similar, just more narrow as you have less threads. I’ve really enjoyed learning this new machines and giving the clothes I sew great finishes every time.
Projects to try with Knit Fabric –
Helpful Supplies for Sewing with Knit –
Please let me know if you still have questions about this technique… I’m happy to help.
Here are links to the products mentioned in the video {affiliate links}




Jean Tsai says
Can you explain how to sew the double looper cover stitches on the hem? I was told the cover stitch machine has one looper only. Thanks.