Inside: download and sew this convertible purse / backpack free sewing pattern. This bag is perfect for nearly all occasions and has been a favorite of mine for years.
{Original post 6/2016 … updated 7/2023}
Happy Friday everyone! I’ve got a free pattern Friday share today! I’ve designed a new bag pattern and I’m in love with this convertible purse / backpack free sewing pattern. This post has the free written tutorial and NEW for this update is a video tutorial full walk through that you can purchase to go with this free pattern if you need more help.
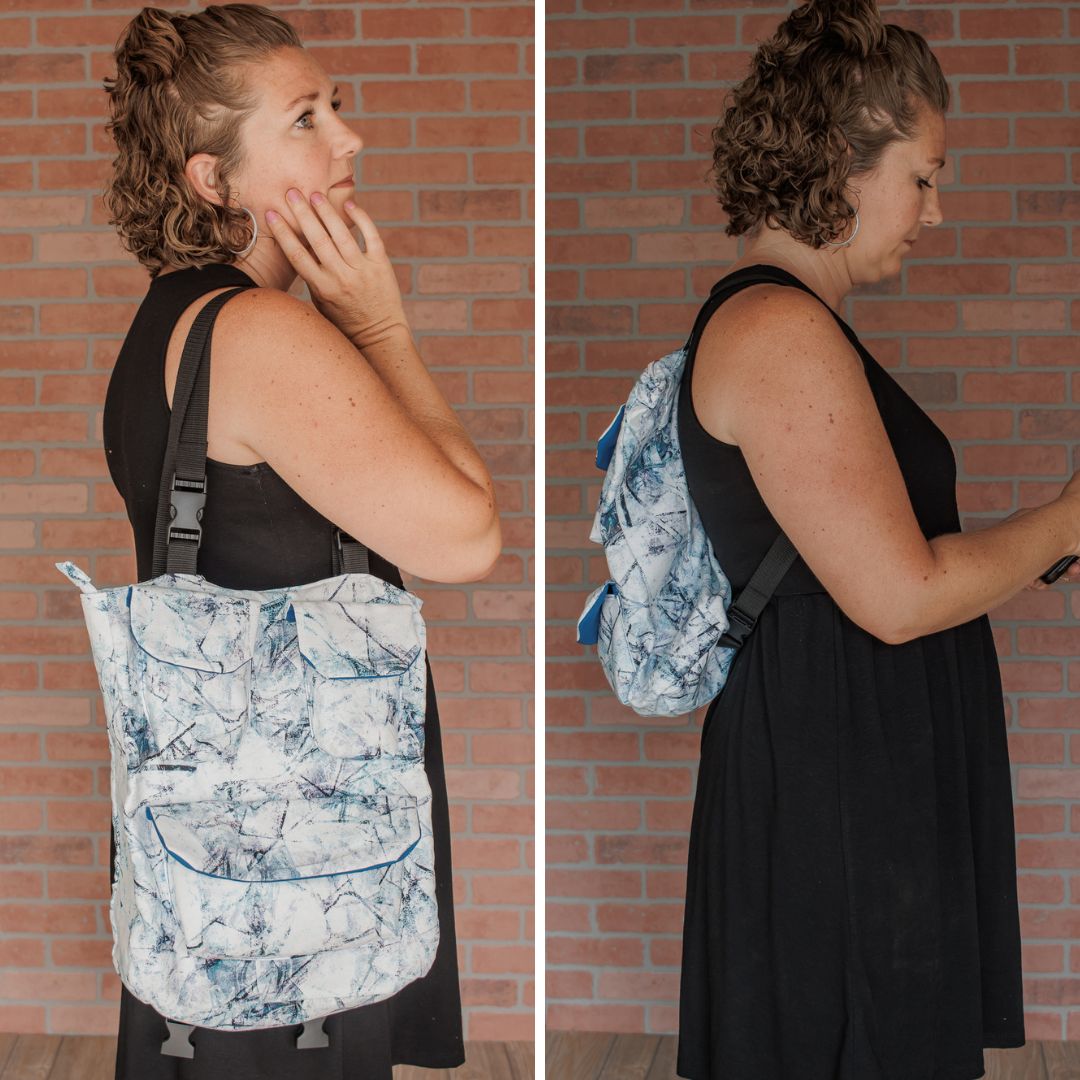
I love that I can wear in on my shoulder OR as a backpack. I’ve had it done for a few weeks and have used it SO much already… both ways! Just use the clips to change from backpack straps to shoulder straps… easy! You can find loads of photos on the first page and the photo tutorial on the second page. Head over to my shop to download the free pdf pattern.
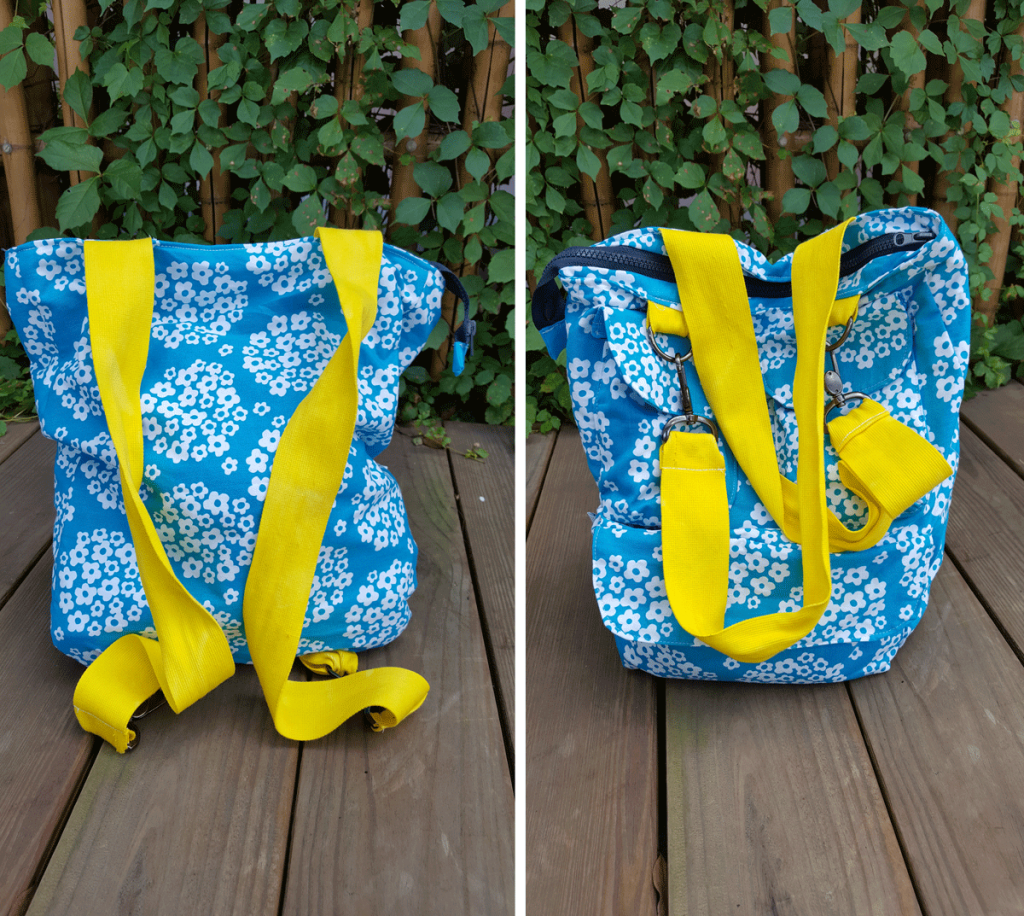
Convertible Backpack/shoulder bag
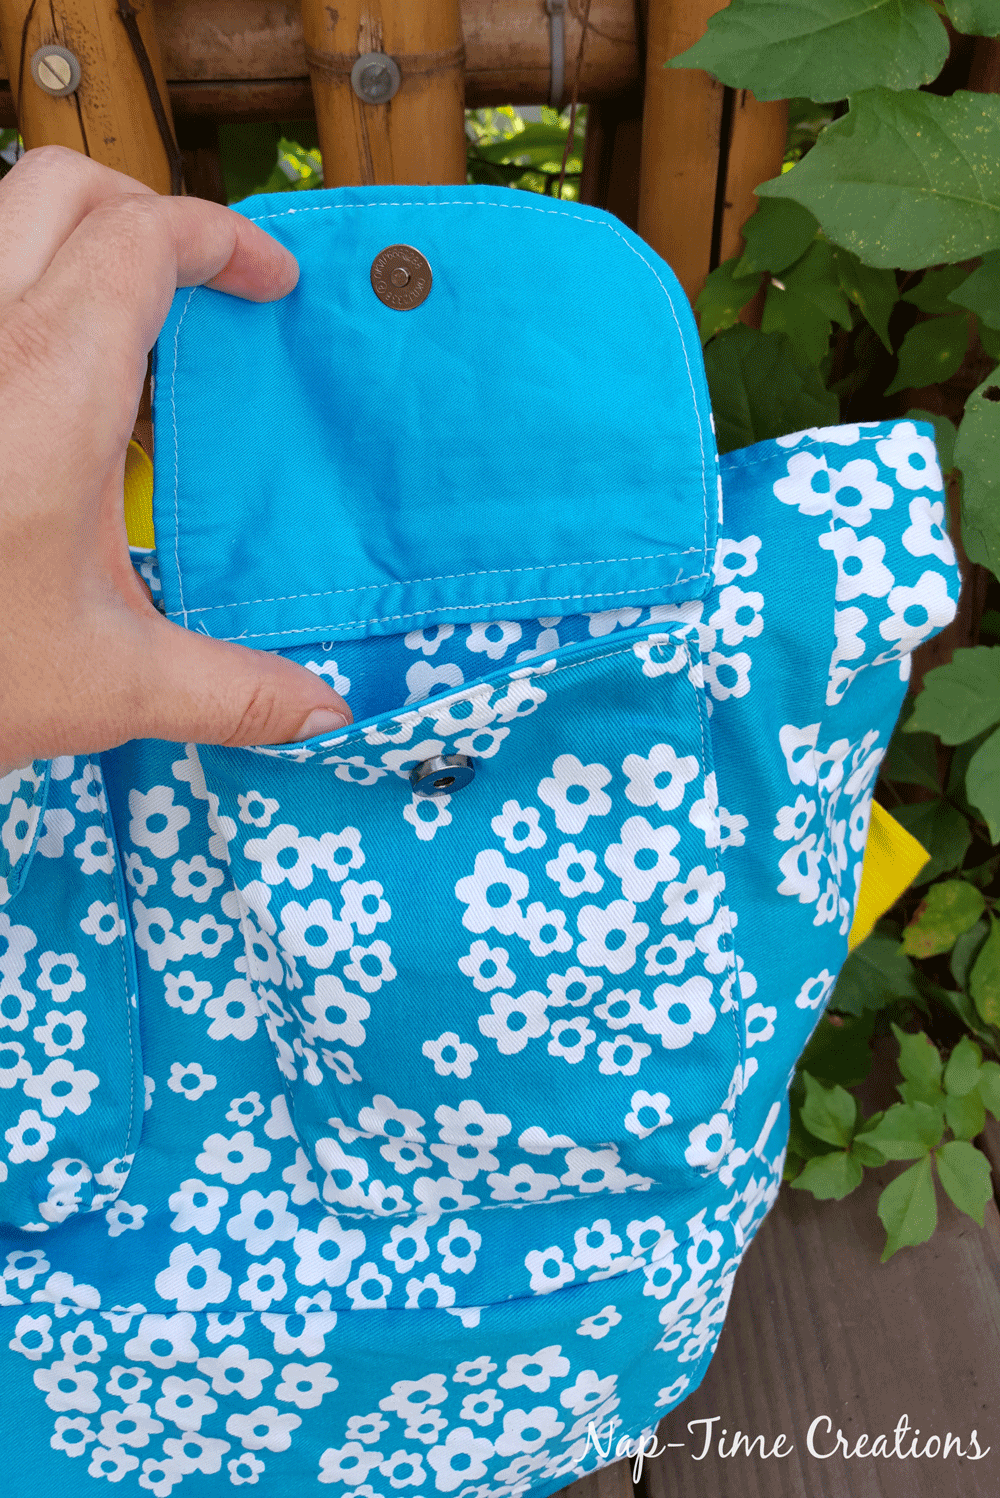
As I’ve mentioned with my other bag pattern, I LOVE a bag with good pockets! And this one has them! Three magnet pockets on the outside, and two pockets inside as well.
The newer version was made with velcro closures and buckles. I love both versions!
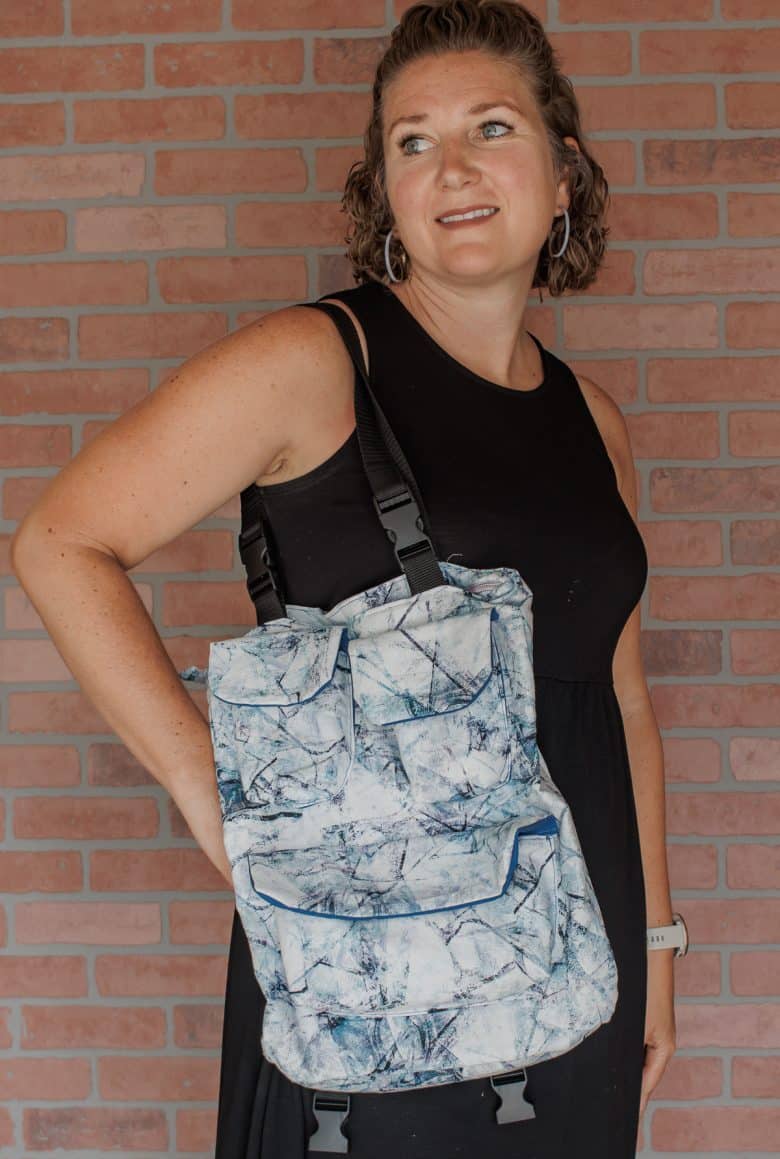
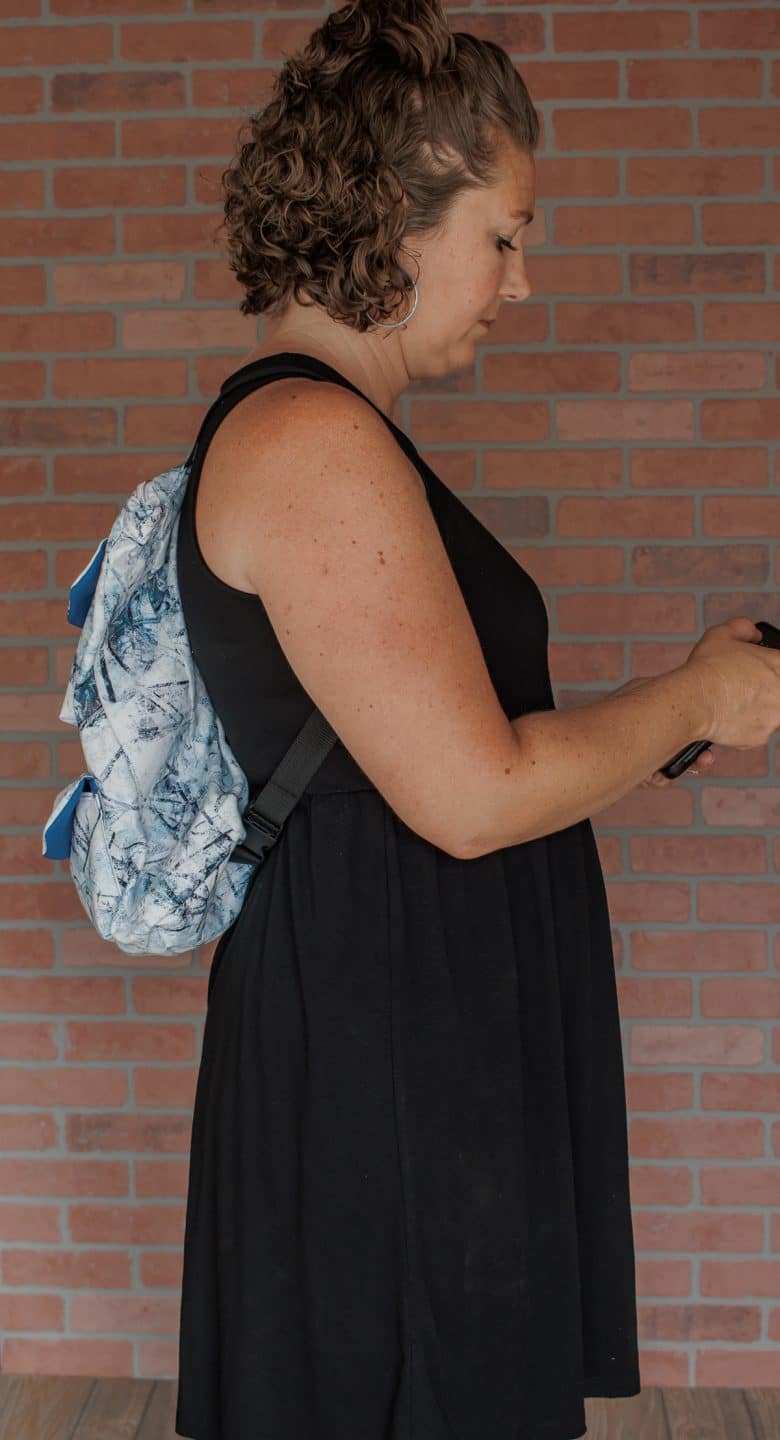
Here is the bag with the straps configured for a Backpack on the left and the over the shoulder on the right. Using the bag clips I added to the end of the straps, it takes about 5 seconds to switch between the styles.
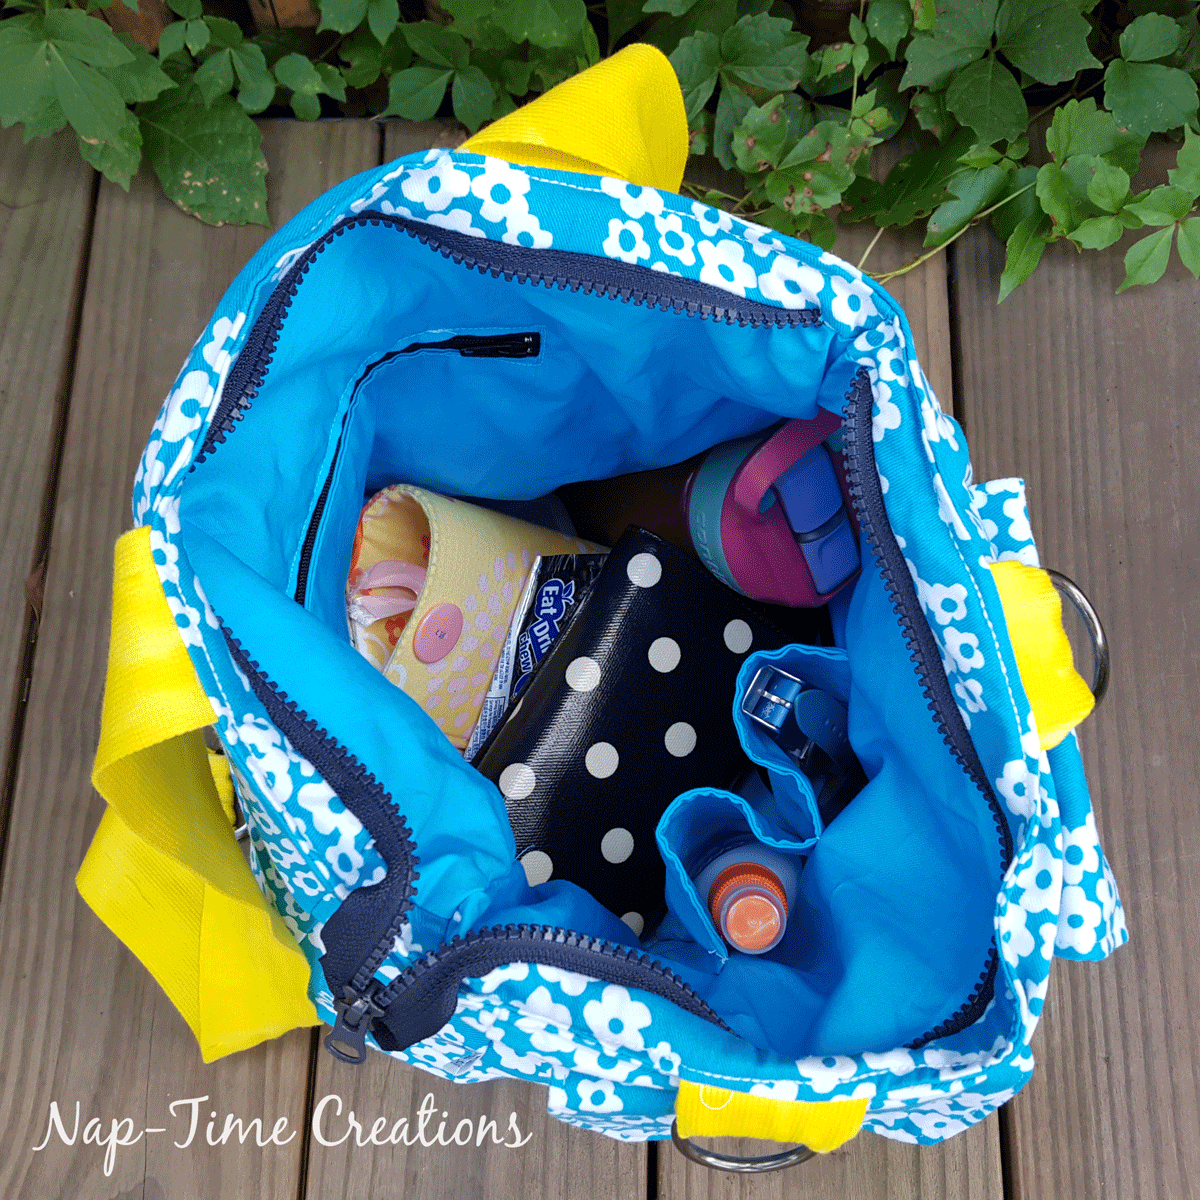
My top zipper is a two way zip, so I can open either direction, it’s been handy! You can also see the two inside pockets. A zipper one on the left and an open one on the right.
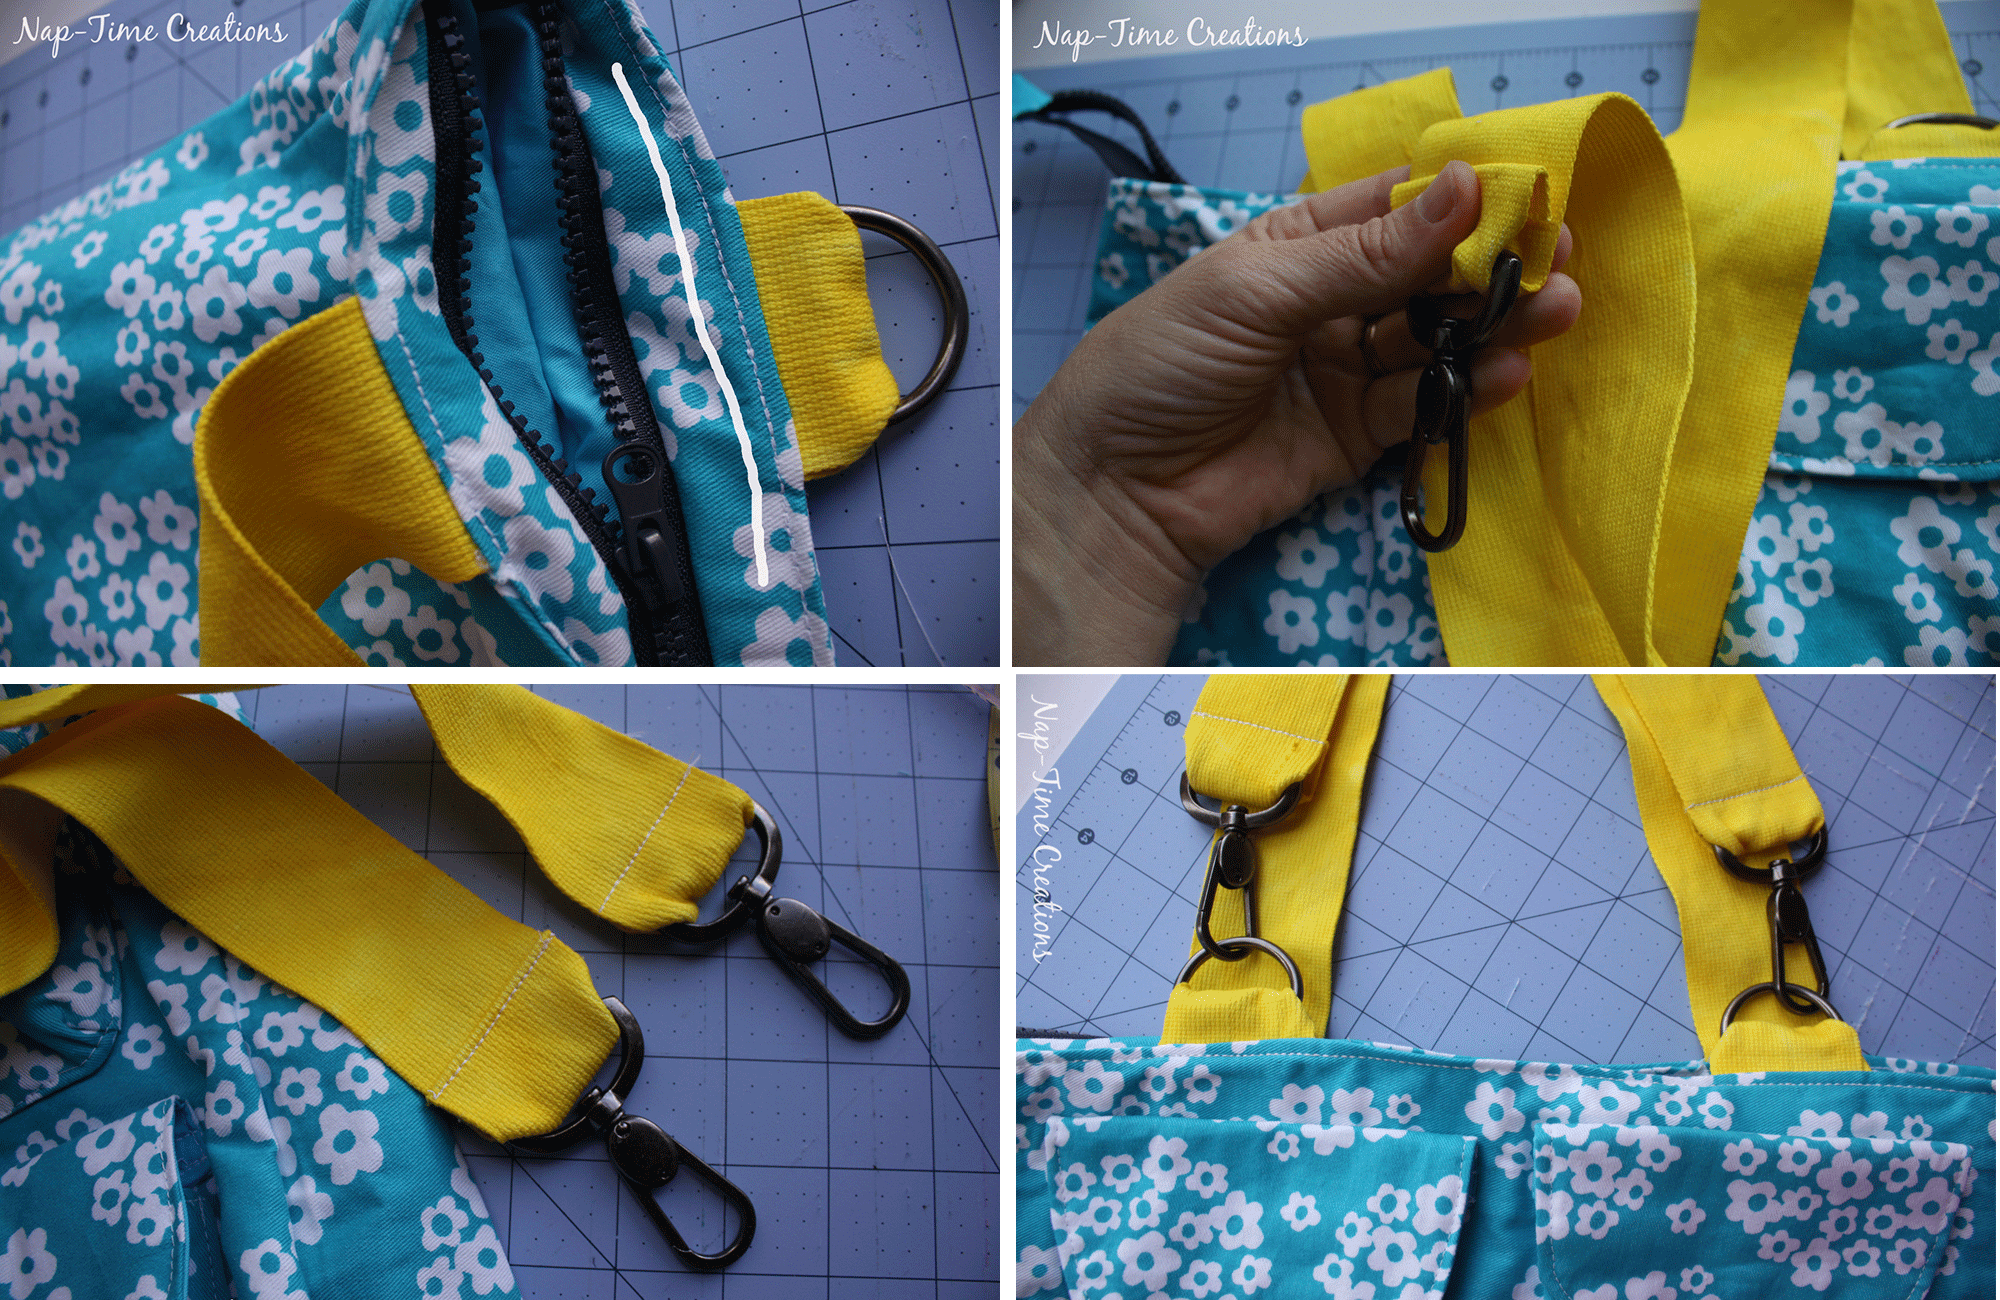
Here’s how I’m clipping the strap to the D ring for over the shoulder straps. I cross the straps for this back position to allow the back to hang on my shoulder. If you sewed this with buckles you just unbuckle and re buckle in the new position.
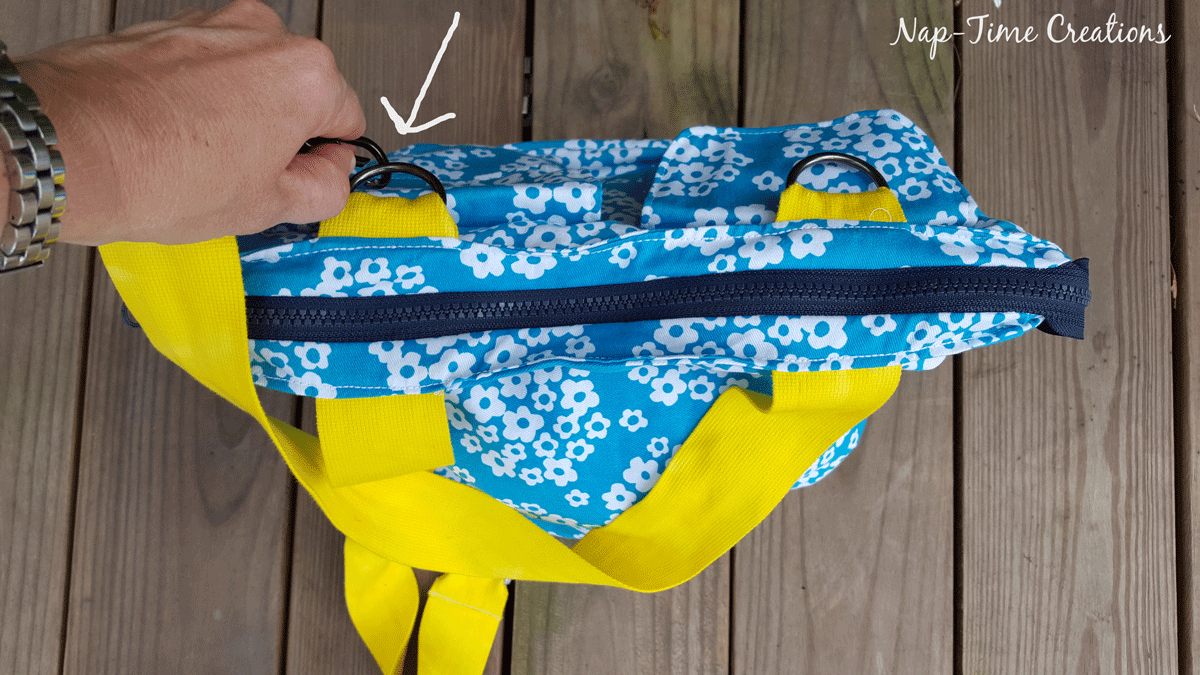
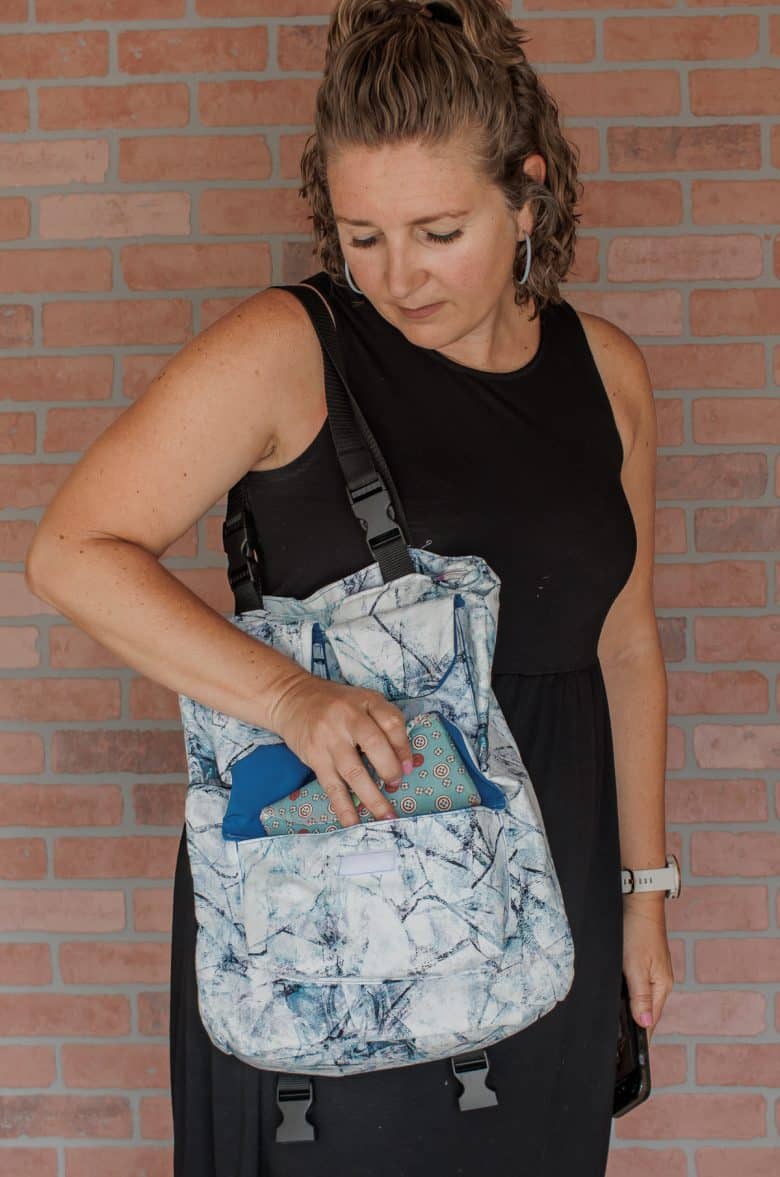
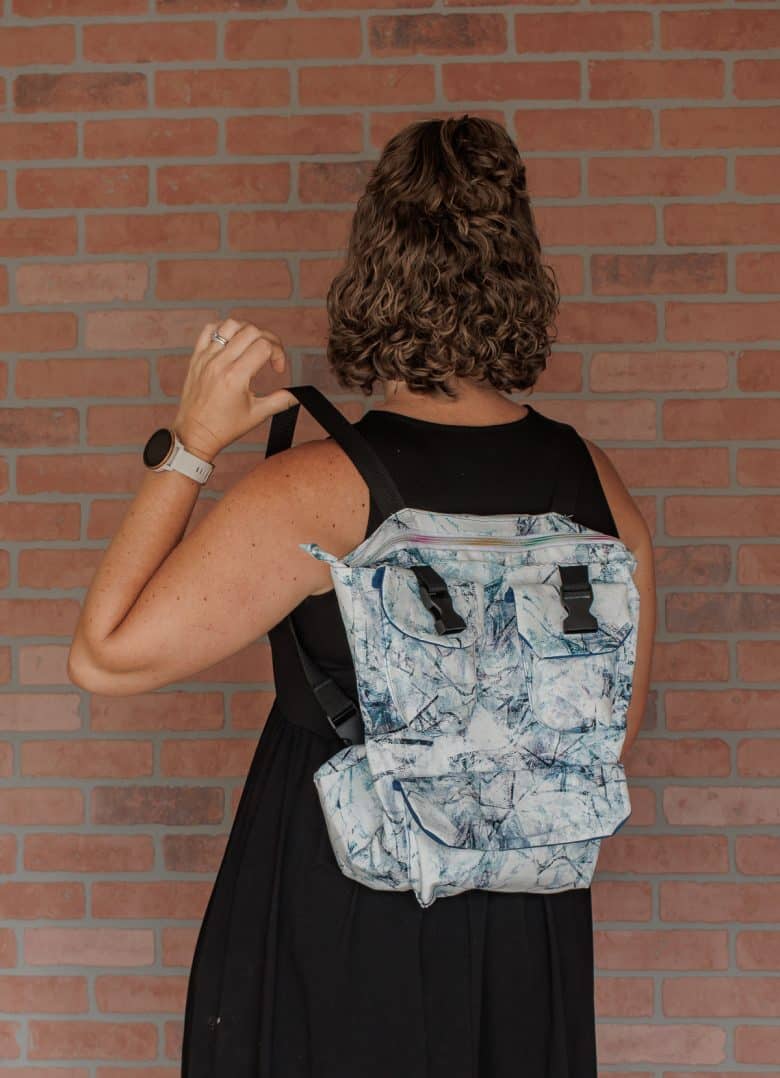
Then just un-clip and re-clip to the bottom straps and you can wear it on your back!
SO excited to share this with you this weekend! I hope you will enjoy making it as much as I did! Join my Facebook pattern group to show of your finished photos, or ask questions along the way.
More bag / purse patterns to try –
- Cross body Hip/shoulder bag
- Sling Bag
- Sling Backpack
- Wool Sack Purse
- Winter Purse
- Mesh Beach bag
- Convertible Bag/backpack pattern
- Small Faux leather purse pattern
- key fob wristlet
How to sew a convertible purse/backpack tutorial
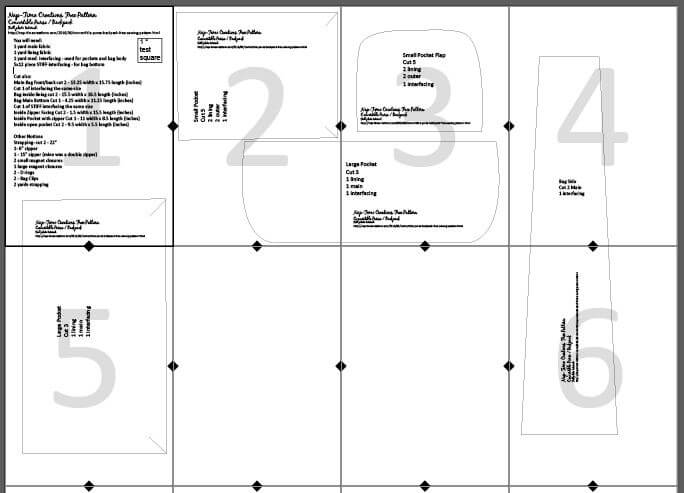
Okay, so this is the tutorial for the convertible purse / backpack free sewing pattern…Well, brace yourself!! This is a long tutorial, with tons of photos, but I wanted to make it super clear and the finished bag is SO worth it. Please let me know if you have questions about anything! Go download and print the pattern using the button below, then tape together. It should look something like this. You won’t have pages between 5 and 6.
NEW: Want to use a full video tutorial to sew every step of this bag? Use the button below to purchase the video tutorial for $3. This will give you access to a private YouTube video {with time markers for each step} So that you can watch the whole thing or skip to the steps you need.
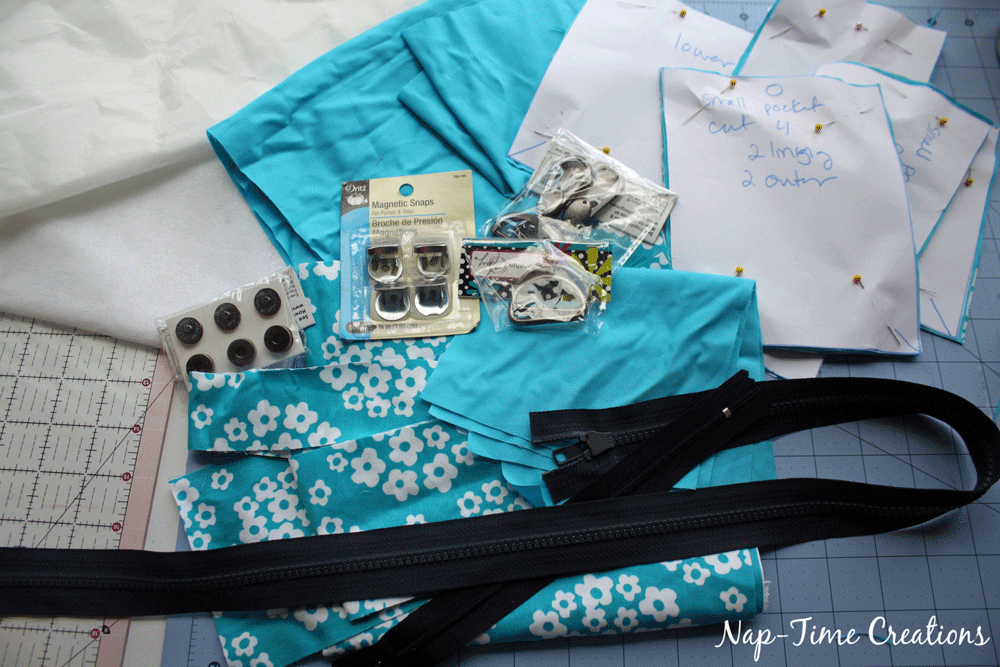
Here’s the pile of supplies I used. Also… I never buy all new supplies for a project so if you have something that you want to use that a little different, go for it! These are also listed on the printed pattern but here you go as well:
You will need:
- 1 yard main fabric {a thicker fabric like canvas, duck cloth, etc}
- 1 yard lining fabric { a thinner fabric}
- 1 yard med. iron-on interfacing – used for pockets and bag body {I don’t have the exact kind, just not too light or too stiff}
- 5×12 piece STIFF iron-on interfacing – for bag bottom
Other Notions
- Nylon Strapping- cut 2 – 22-30” cut the longer for longer backpack straps
- 1- 6” zipper
- 1 – 15” zipper {mine was a double zipper}
- 2 small magnet closures
- 1 large magnet closures
- OR Hook and Loop {velcro}
- 2 – D rings
- 2 – Bag Clips
- OR 4 Buckles
- 2 yards nylon strapping {1″ or 1.5″}
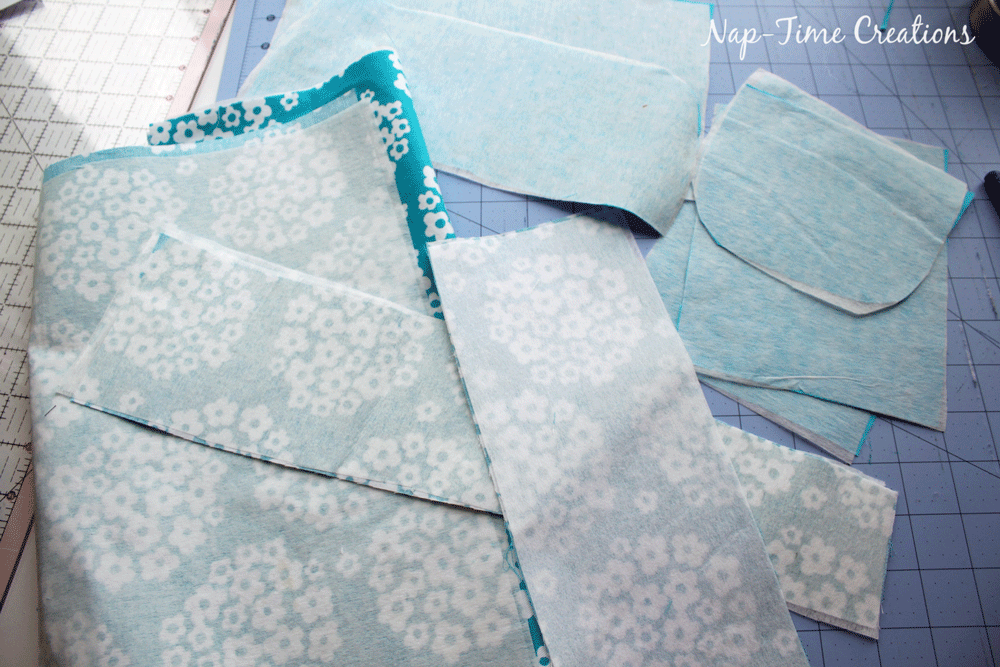
ALL seams are sewn with a 3/8 or less Seam Allowance…
Cut the pieces out and iron the interfacing to all the MAIN fabric pieces for the bag body and the lining for the pockets {although it doesn’t really matter for the pockets}
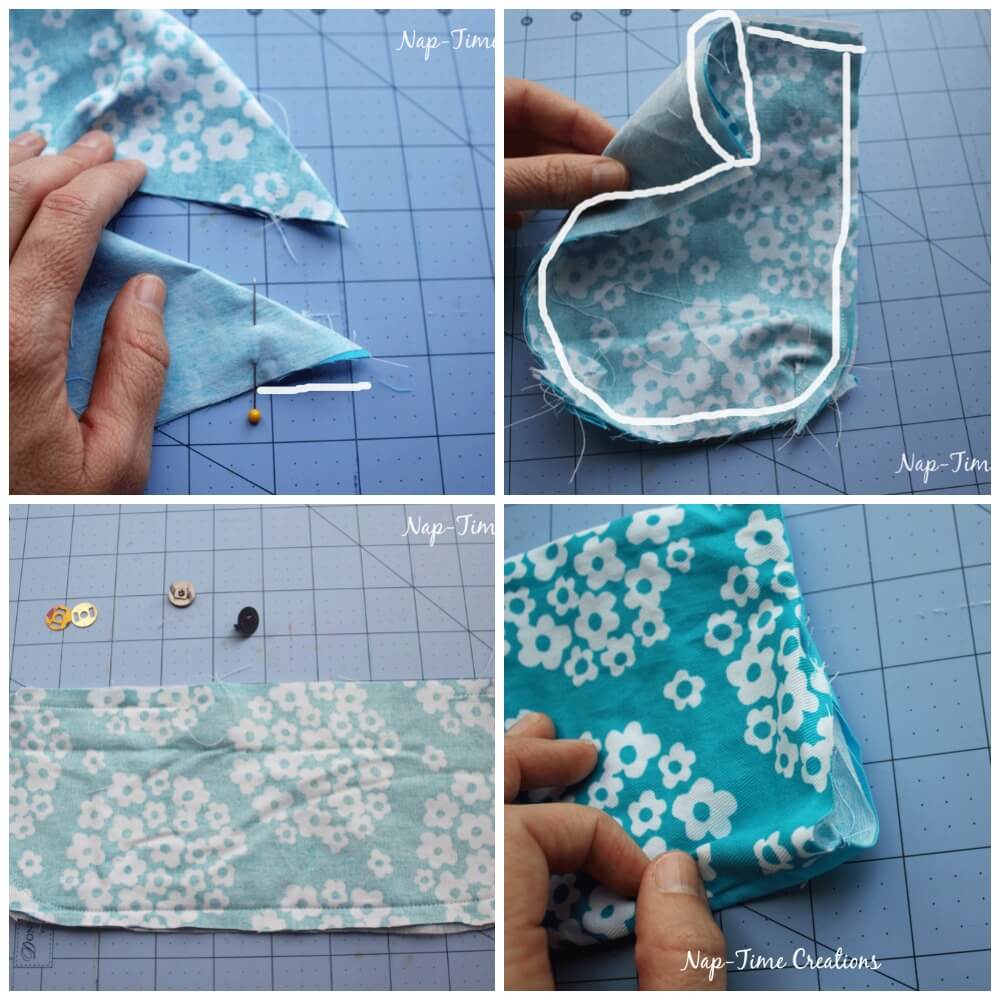
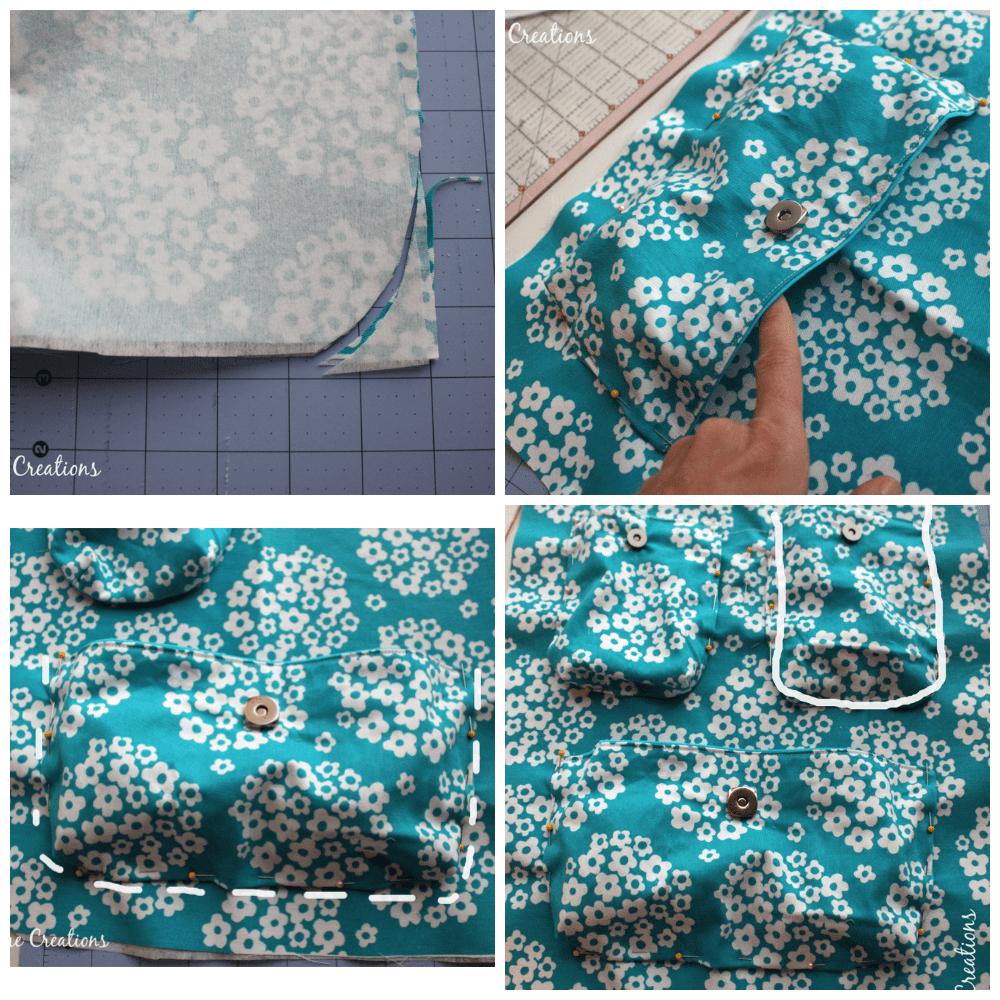
Start by shaping the outside bag pockets. Fold the bottom corners {marked on the pattern pieces} {right sides together} and pin about 1″. Sew straight down where my pin is in the first photo. Do for all three pockets and pocket linings. Place a pocket main and a pocket lining together {right sides} and sew. Leave an opening as show in the 2nd photo. You will curve the bottom corners. Prepare the magnet closures. The 2 small for the top pockets and the larger 1 for the bottom.
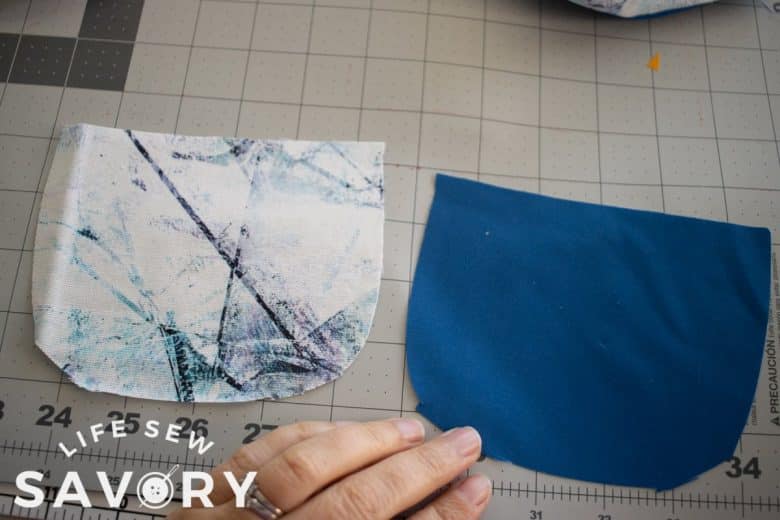
Sew the pocket flap lining and main together with right sides touching. Leave an opening for turning. Clip the corners and seam allowance.
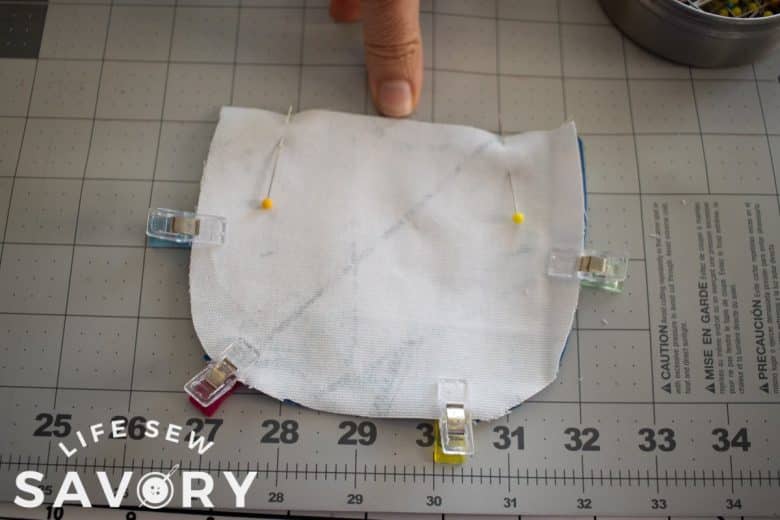
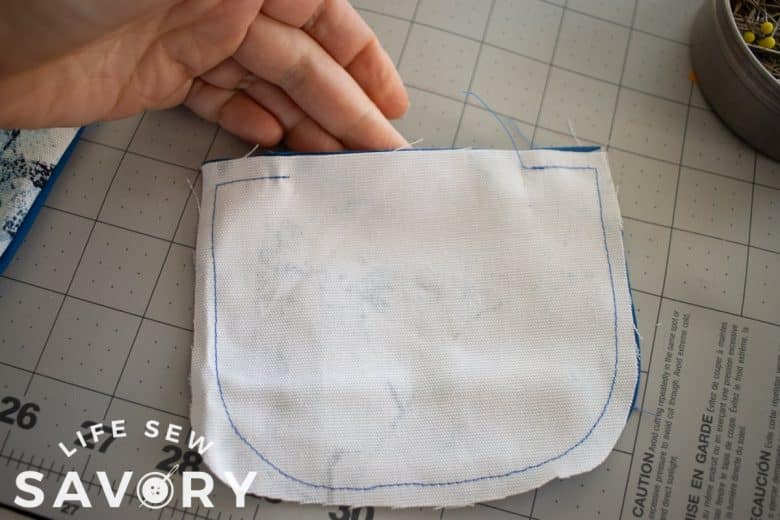
Turn open. If adding a magnetic clasp add it now before before closing the hole.
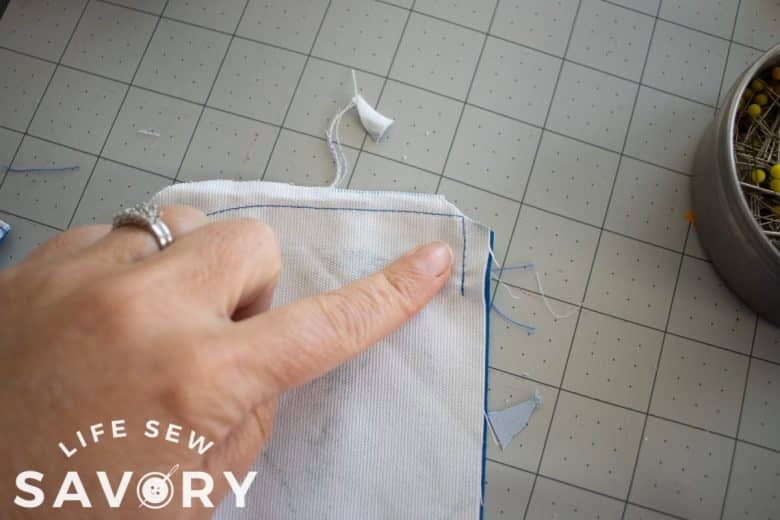
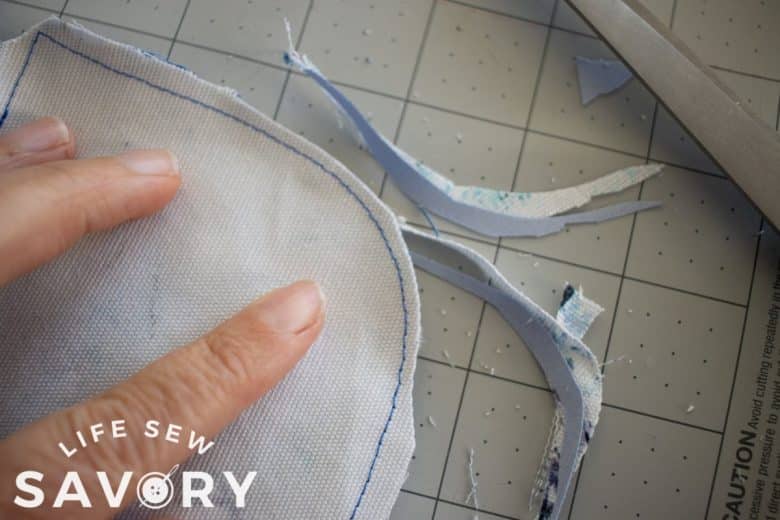
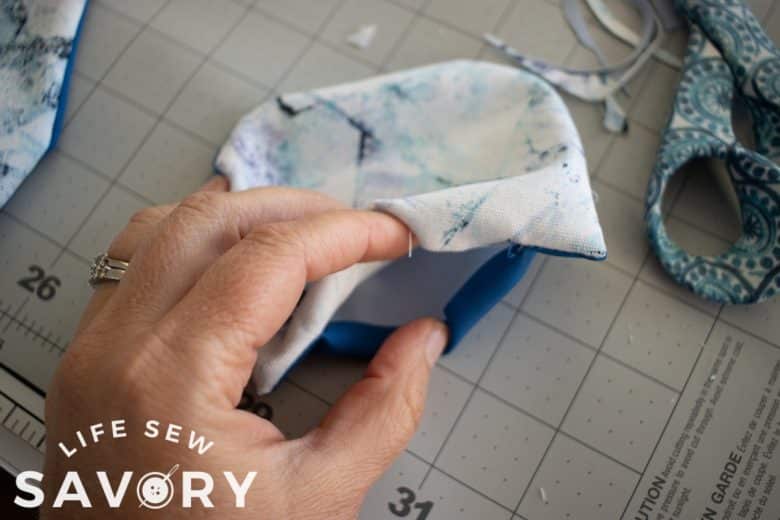
Fold the seam allowance in for the turning hole and then top-stitch the top edge of the pocket.
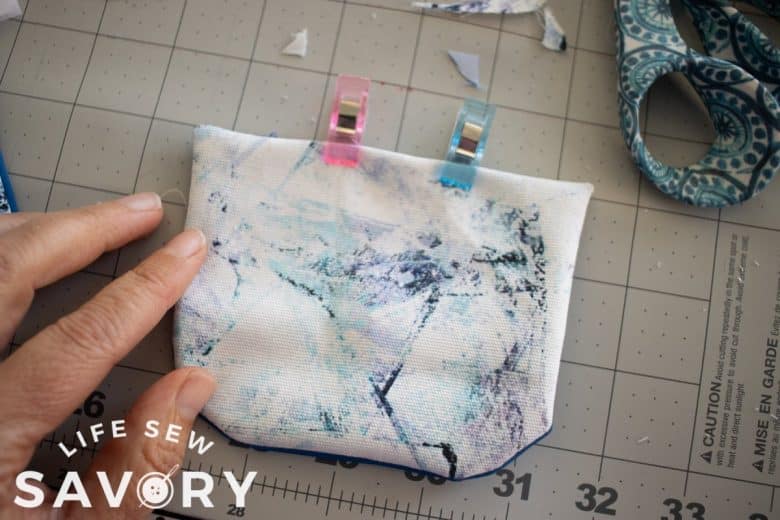
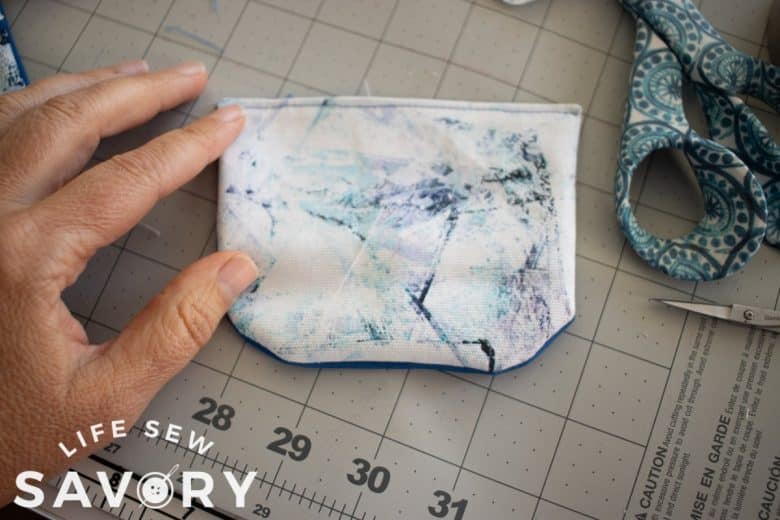
Adding velcro closure
Sew a 2″ piece of velcro on the pocket, 1″ from the top edge. Sew the closure in the center. Place the flap at the top of the pocket, use your thumb or a weight to hold down the 1/2″ of the flap. Fold the flap over. Mark exactly where the velcro lines up and then pin in place on the flap.
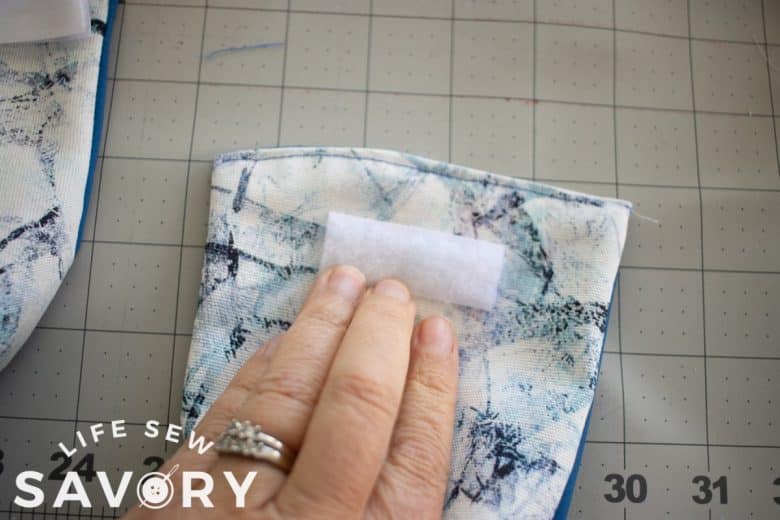
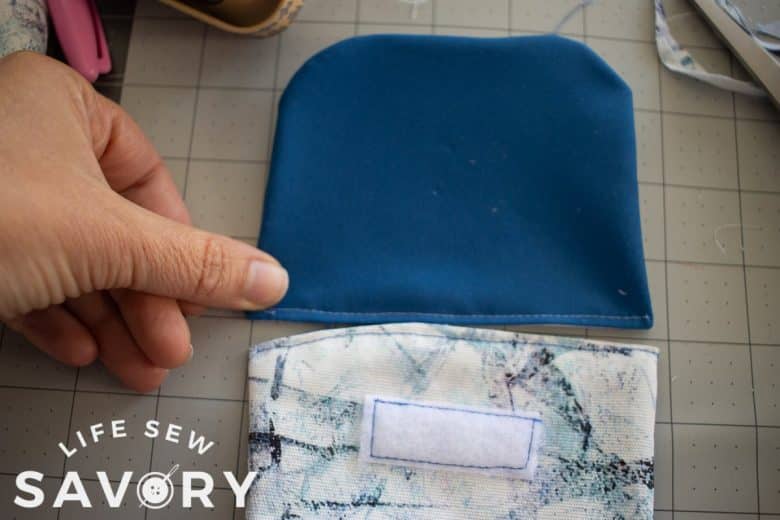
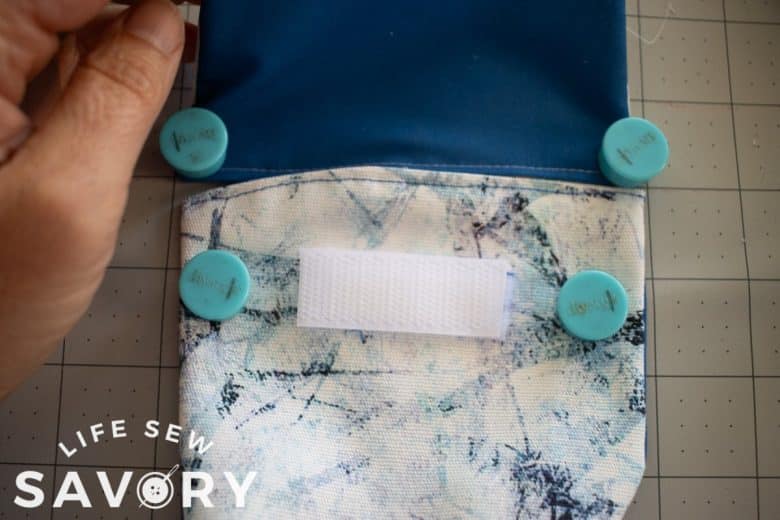
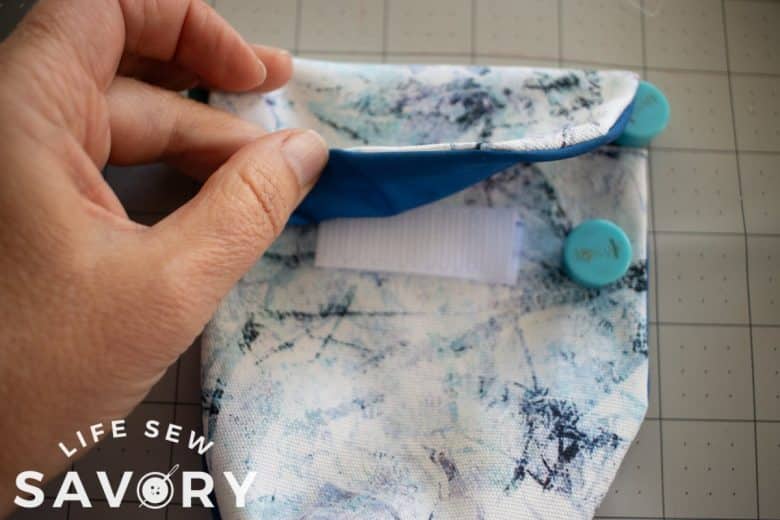
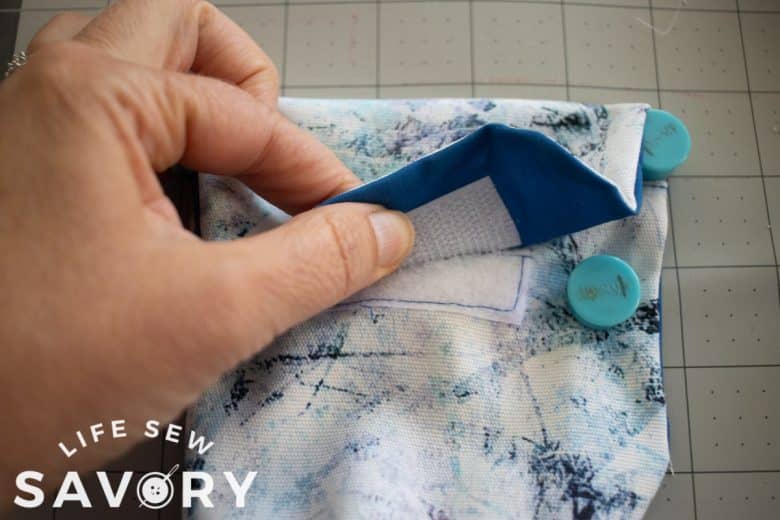
Stith the velcro in place. Make sure to use a thread that won’t show too much on the outside of the flap.
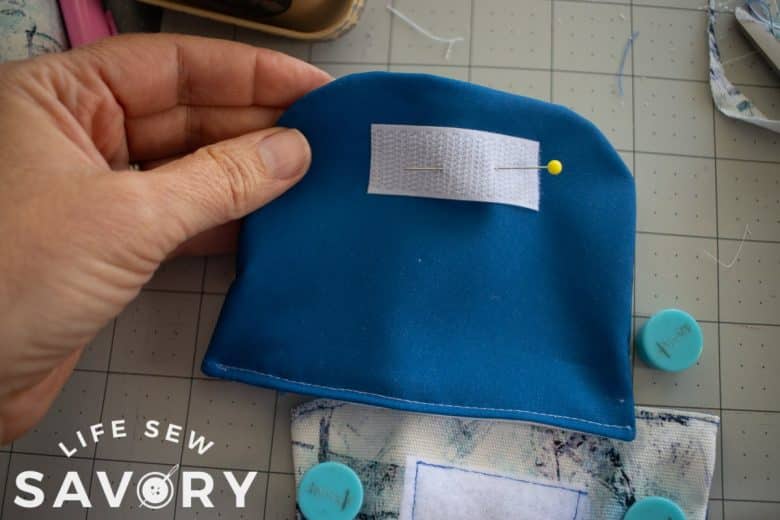
Adding magnetic clasp closure
ADD MAGNETIC CLOSURES BEFORE CLOSING TURINING HOLES.
Turn the pocket right side out, but before you sew the opening closed, attach the magnet to the OUTSIDE center of the pocket with the back of the magnet being inside the two layers. I placed my magnet about 1″ down from the top of pocket. The magnet on the flap should be only on the lining. You can reinforce the clasp with some interfacing if you think the fabric needs. Top-stitch the top of each pocket to close the opening. Repeat with the other two pockets.
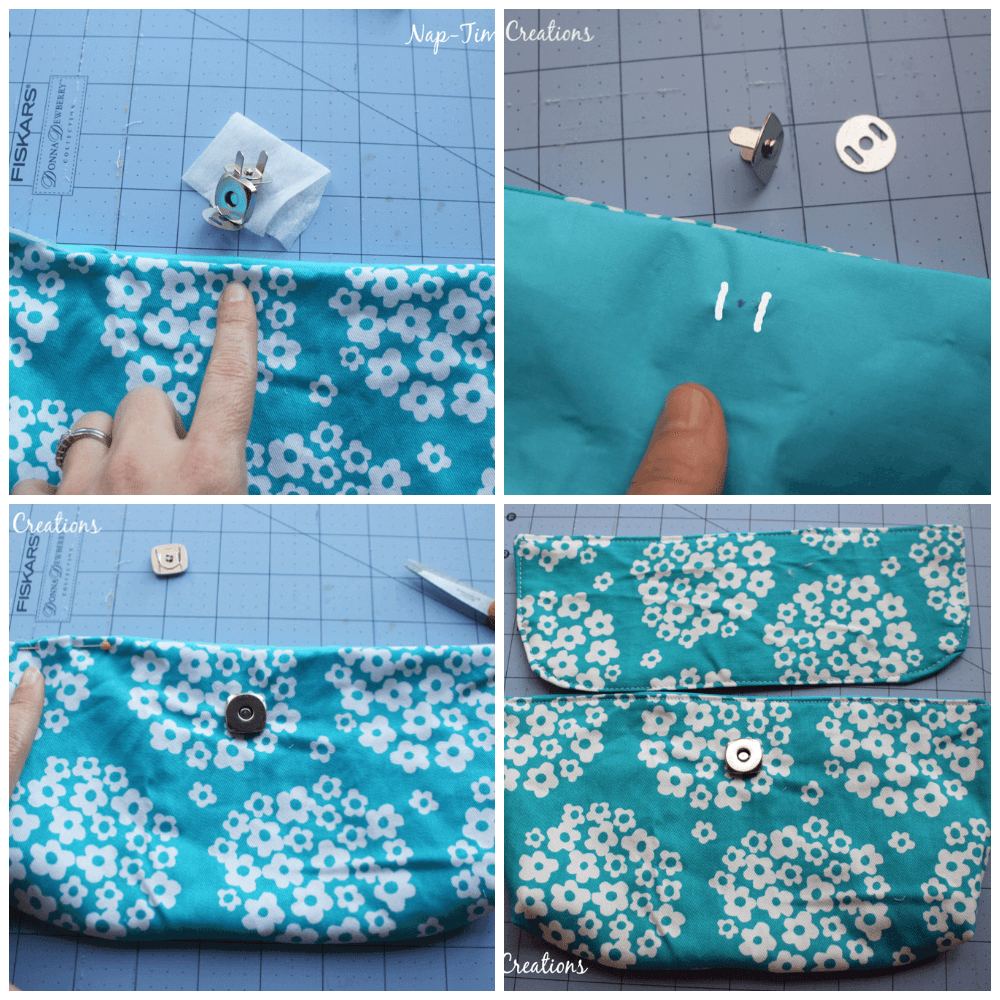
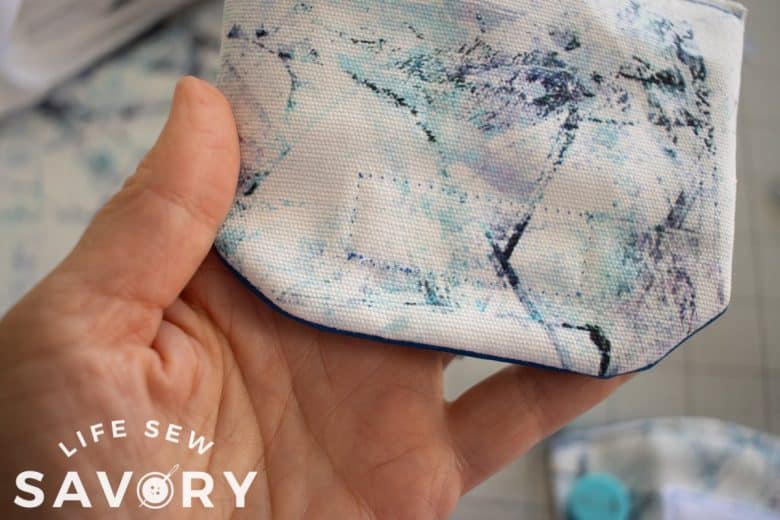
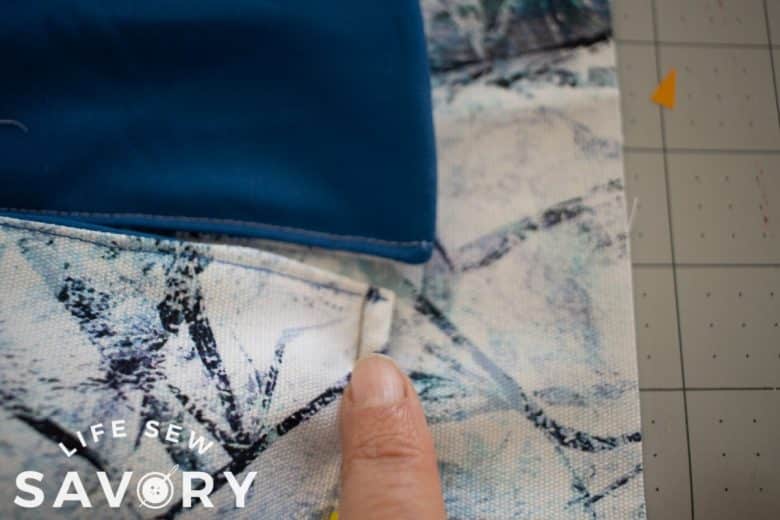
Line up the flap and pocket. Pinch at 1/2″ {my thumb} and fold over. This is the same method as shown above for the velcro instructions. Find out where the clasp will line up and mark it. Install the clasp through the opening. Top-stitch the flat edge of the pocket closed. The bottom right photo shows how the bottom pocket corners are rounded.
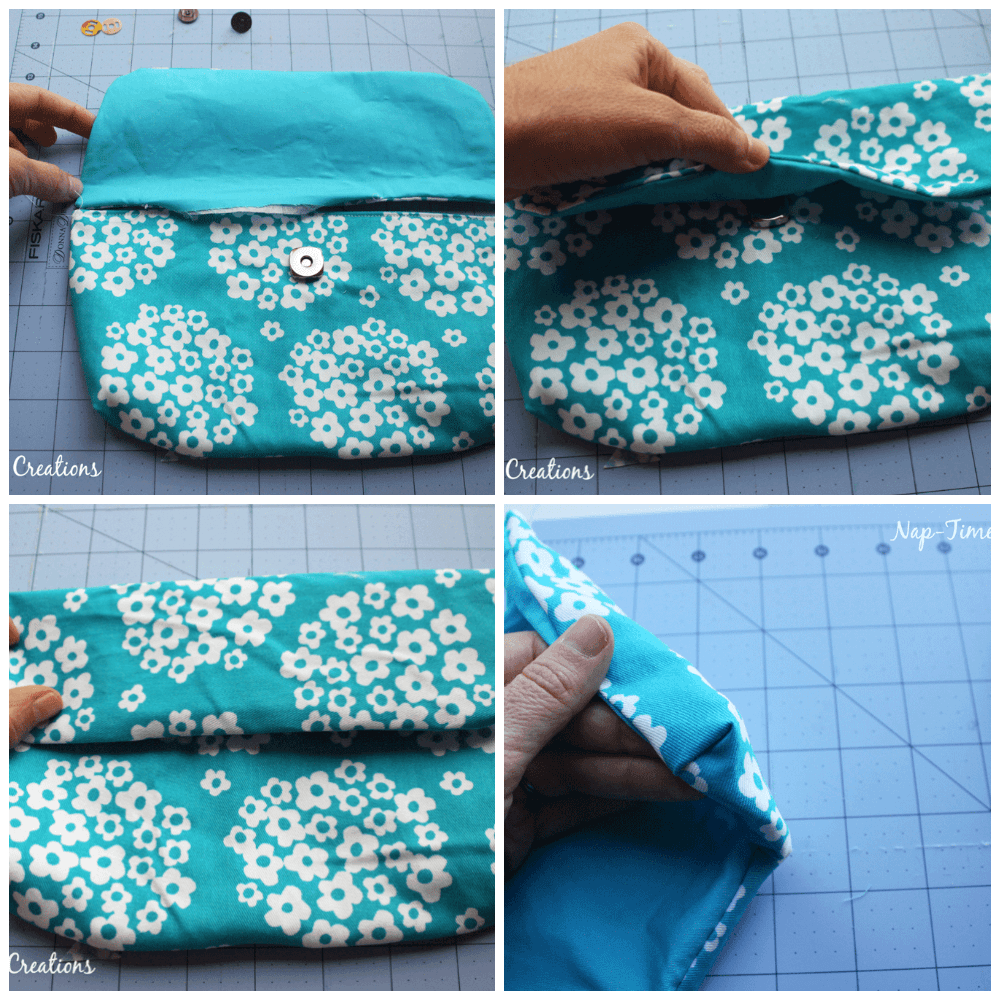
How to sew outside pockets on backpack
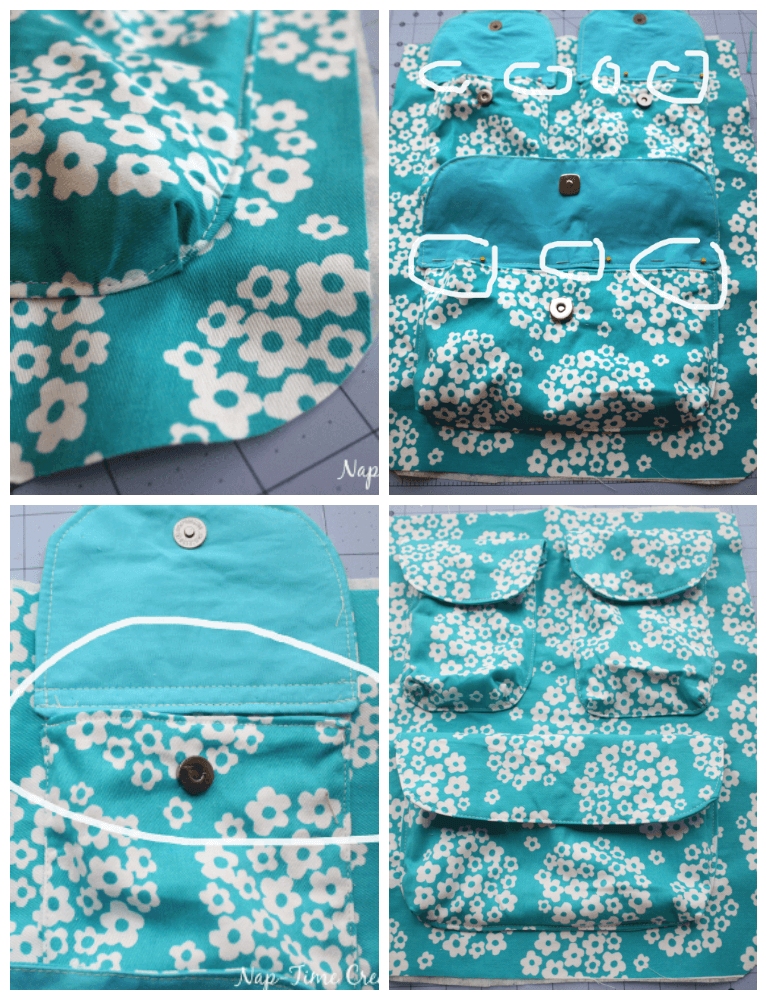
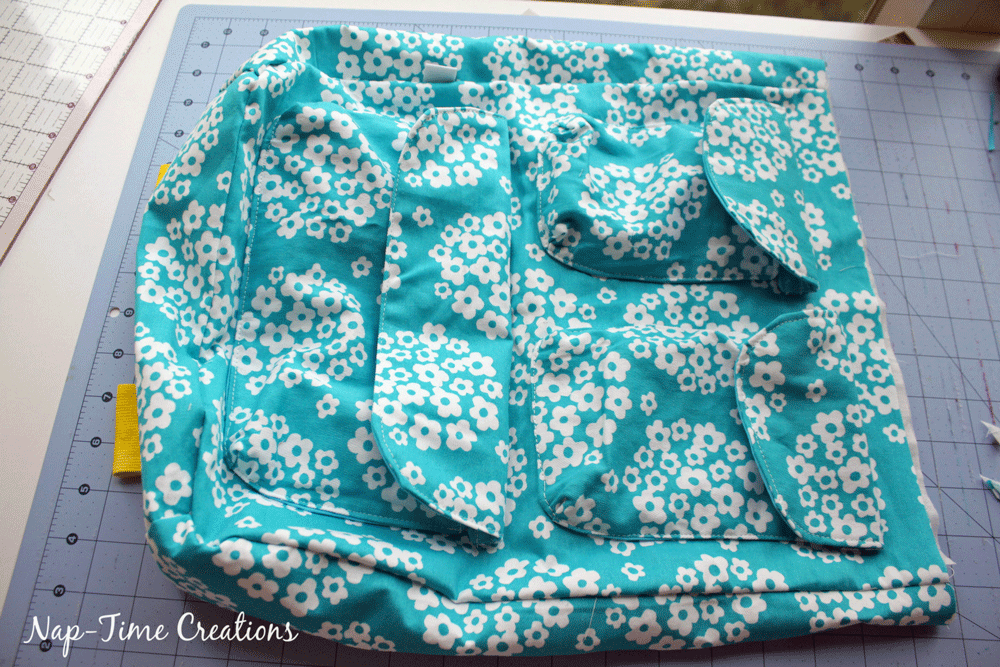
Take Main bag front/back and create curved bottom corners. You can see my curve. Pin the bottom pocket 2″ from the bottom of the bag. The top of the pocket will not be flat on the bag. It should be open and loose, pin the sides of the pocket straight up from the or just slightly from the curved bottom. Pin the top two pockets another 2″ up from the bottom pocket. Pin all pockets and make sure they are centered /aligned on bag. Sew around the sides and bottom of pockets. You will curve the bottom corners. Sew close to the edge, catching both layers of pocket.
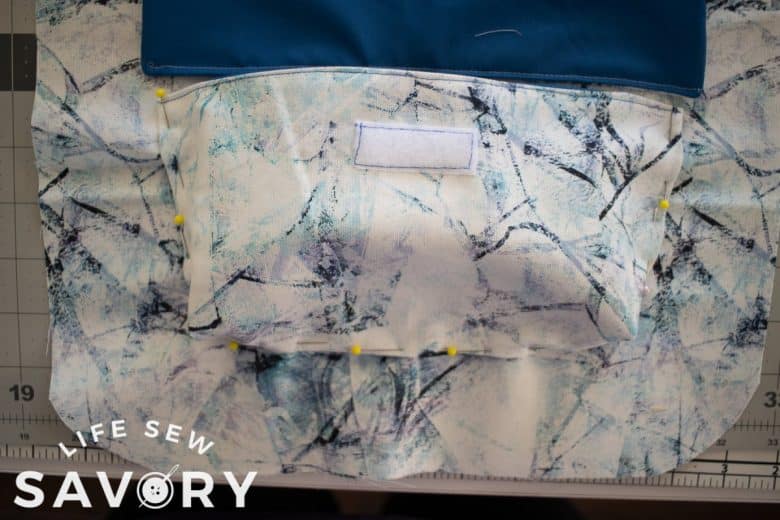
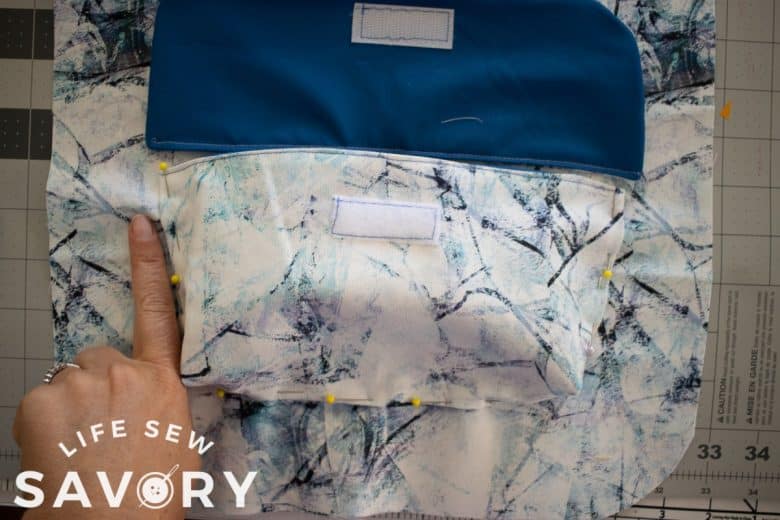
Before sewing the pocket in place, make sure the flap will line up with the edges. There should be no more than 1/4″ of the flap extending out from the pocket edges. You may need to spread of the sides of the pocket just a bit.

Pin the pocket flaps right above the pocket. You will sew the very edge of the pocket, then another line 3/8″ from the first. Sew other pockets too. Outside pockets are now complete.
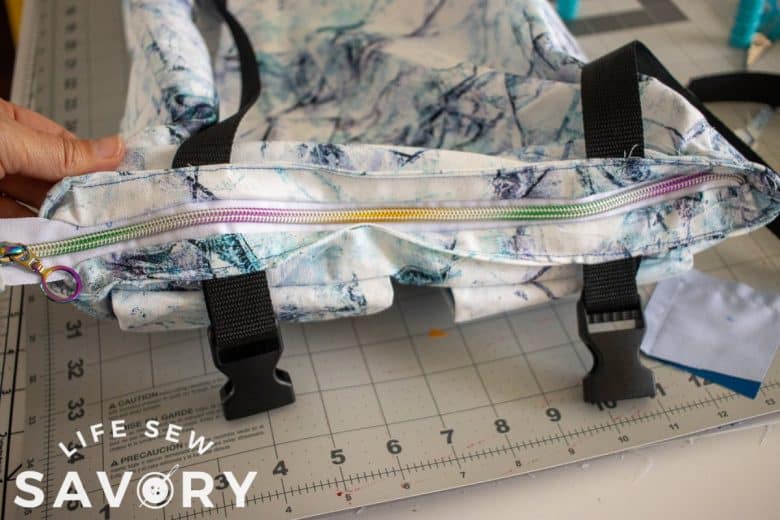
Take the Main bag side and bottom. Sew the wider short end of the side to the short side of the bottom. Repeat with the other side. You now have the side and bottom together in a long piece. Pin and sew the sides and bottom to the bag front. You may have a bit extra from the side piece to trim. I added my tag in this seam as well. Before you sew the back to the sides cut 2-3″ pieces of the strap. Fold in half and pin 2″ from the side of the bag on the bag bottom. . They will be pointed towards the bag side as shown. Stitch in place… Pin and sew the back of the bag to the bag sides. NOTE: you can add D rings to the straps here for easy clipping, but I didn’t want them hanging off the bottom of my bag, swinging around… personal preference} BUCKLES: if adding the buckle option, loop buckle through strap before pinning/sewing in place.
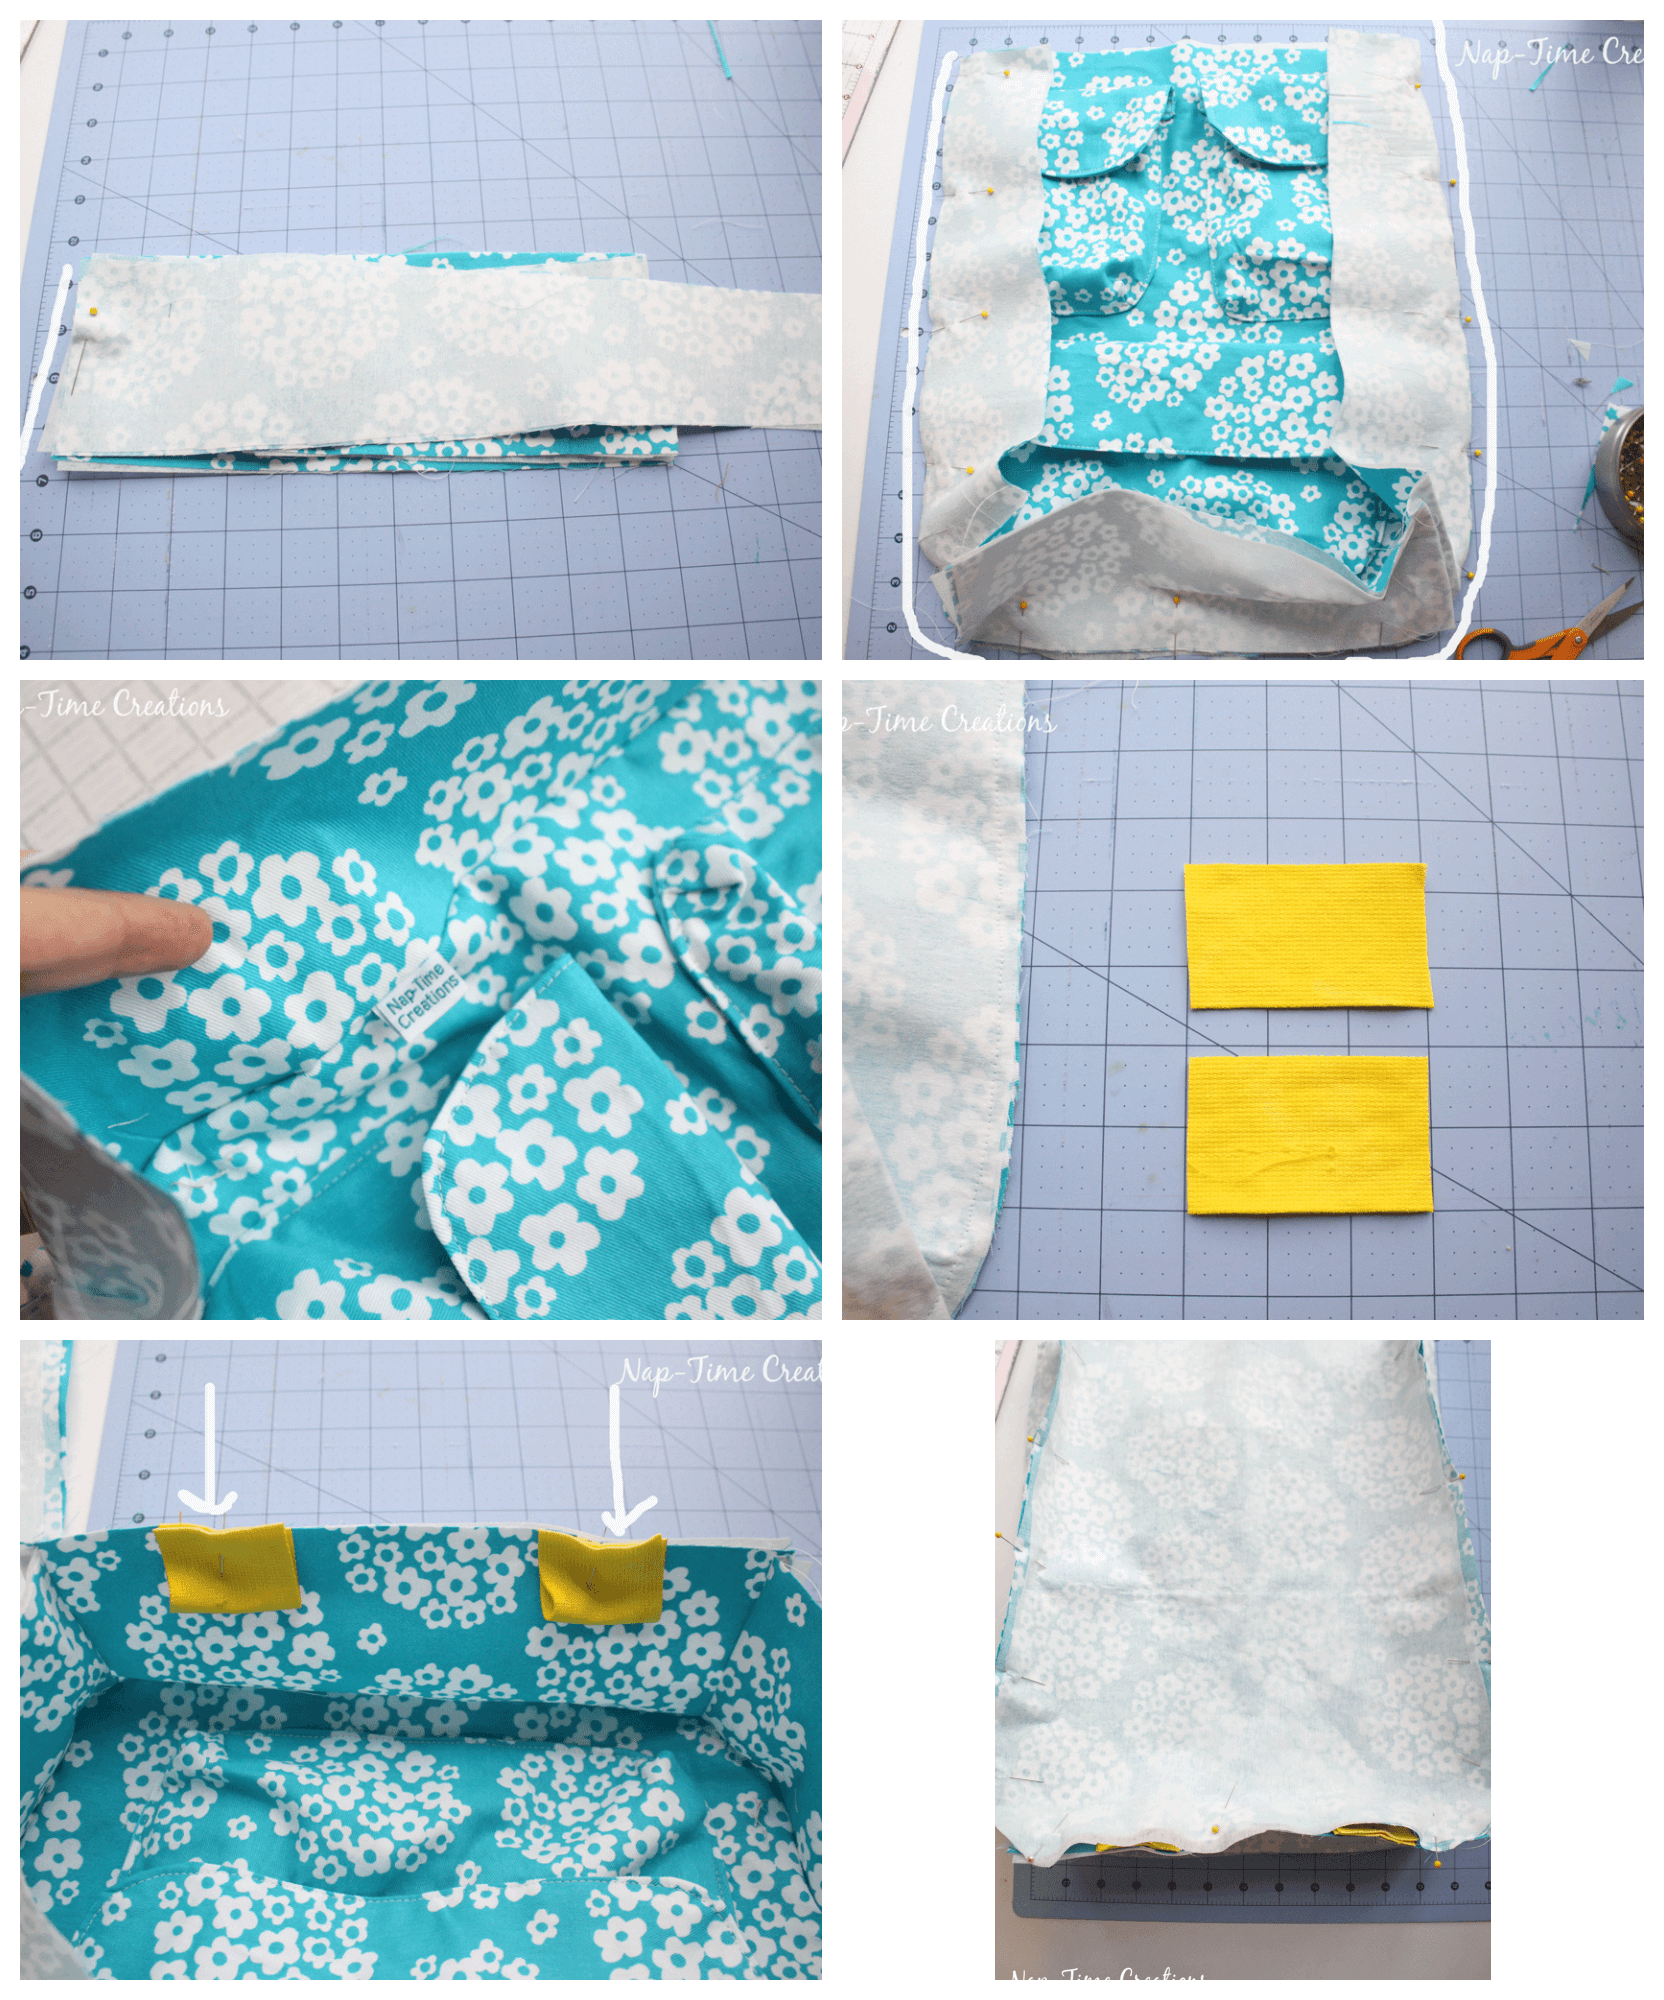
You now have a completed outside bag shell.
Instructions for inside pockets
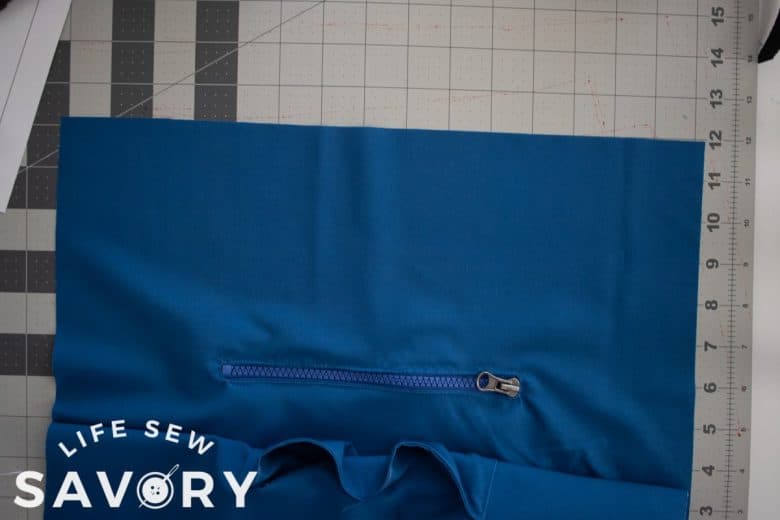
On to the inside pockets. We will start with the zipper pockets. Lay the pocket piece on right side of the bag inside. Position the top of the pocket about 3″ down from the top. Mark the ends of your zipper teeth and then draw parallel lines creating a rectangle 1/2″ tall. Sew around this rectangle on the lines. Clip the center and corners of the center. Pull the pocket piece throw to the back of the bag side. Press. Lay your closed zipper over the opening and pin. The pull tab should be right at one end.
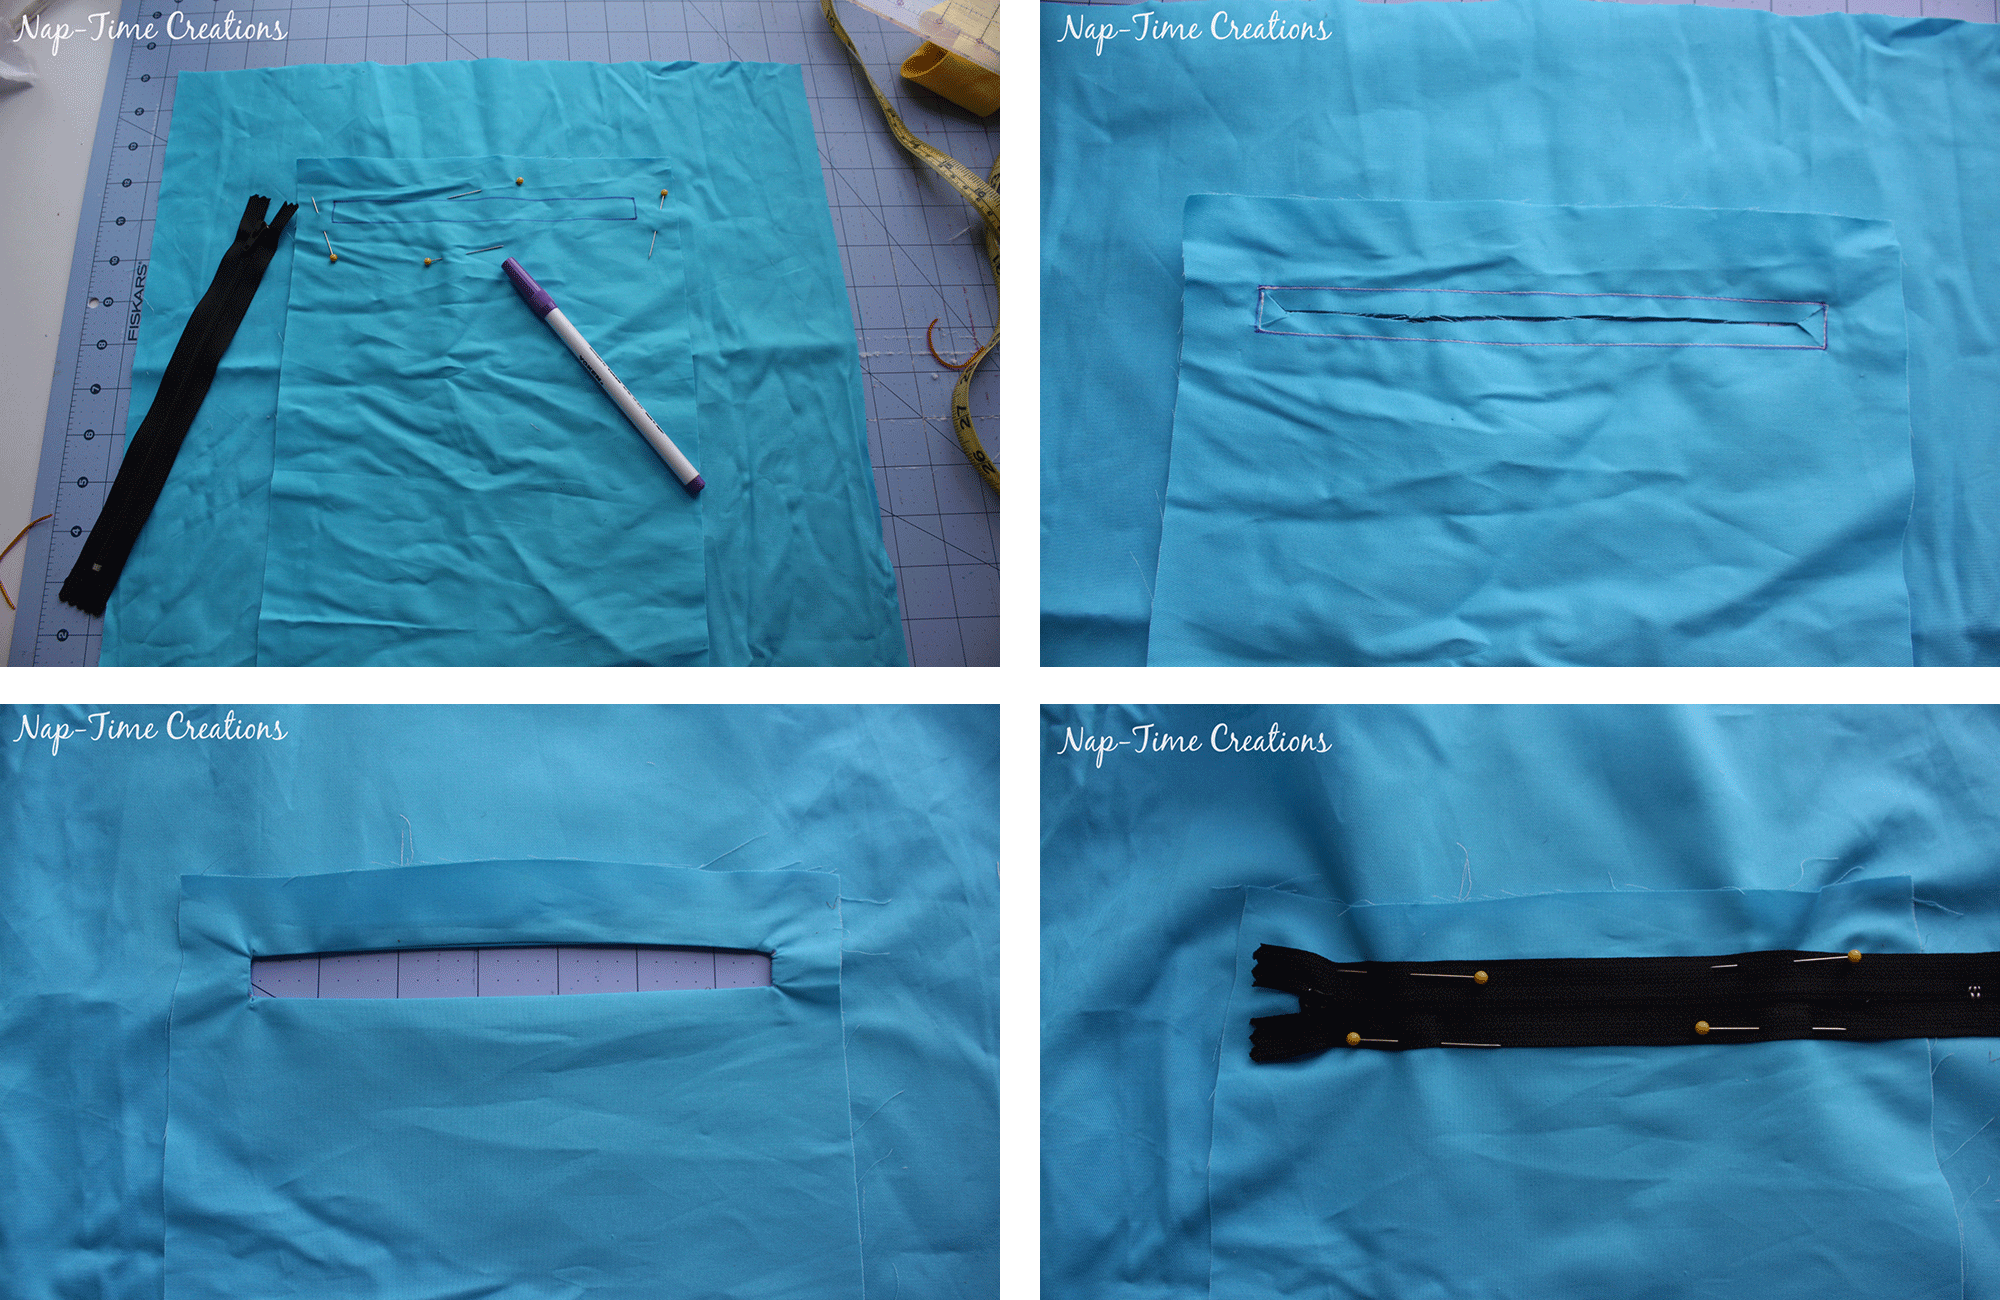
Sew around to attach the zipper to the pocket. On the wrong side, fold the pocket piece up and in half, enclosing the zipper and creating the pocket. Sew around the sides and top. You now have a zipper pocket.
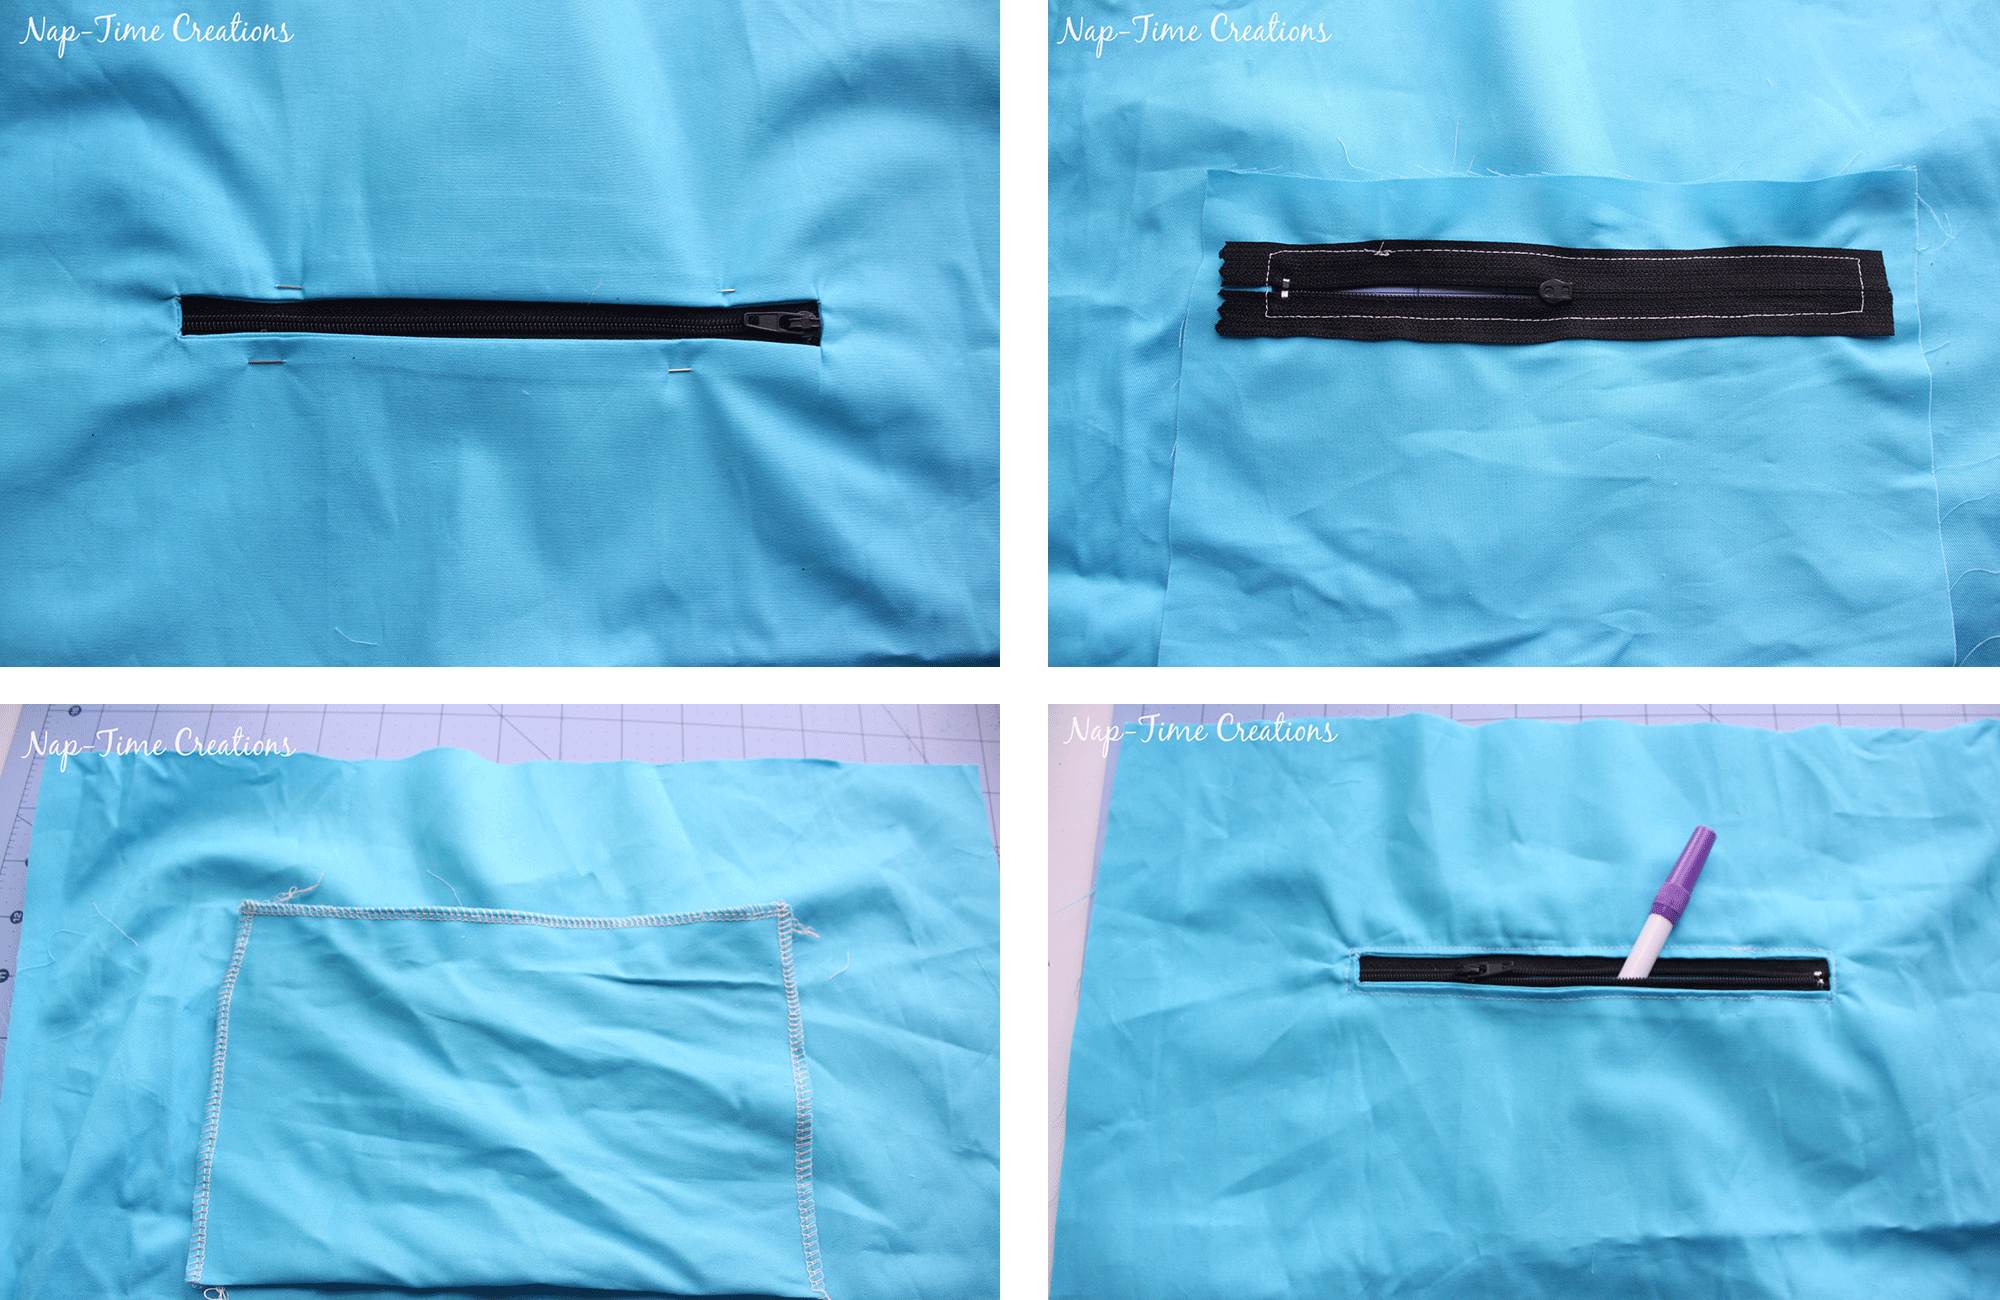
For the open-top pocket {for the other side of the bag sew the two pieces together, right sides touching. Leave an opening on one long side, turn and top-stitch that side. That is the top of the pocket. Put the pocket top 3″ down from top of bag liner {the other side from the zipper} and pin the center. Fold the two sides as shown to pleat and create pocket compartments. Sew sides and bottom of pocket to secure.
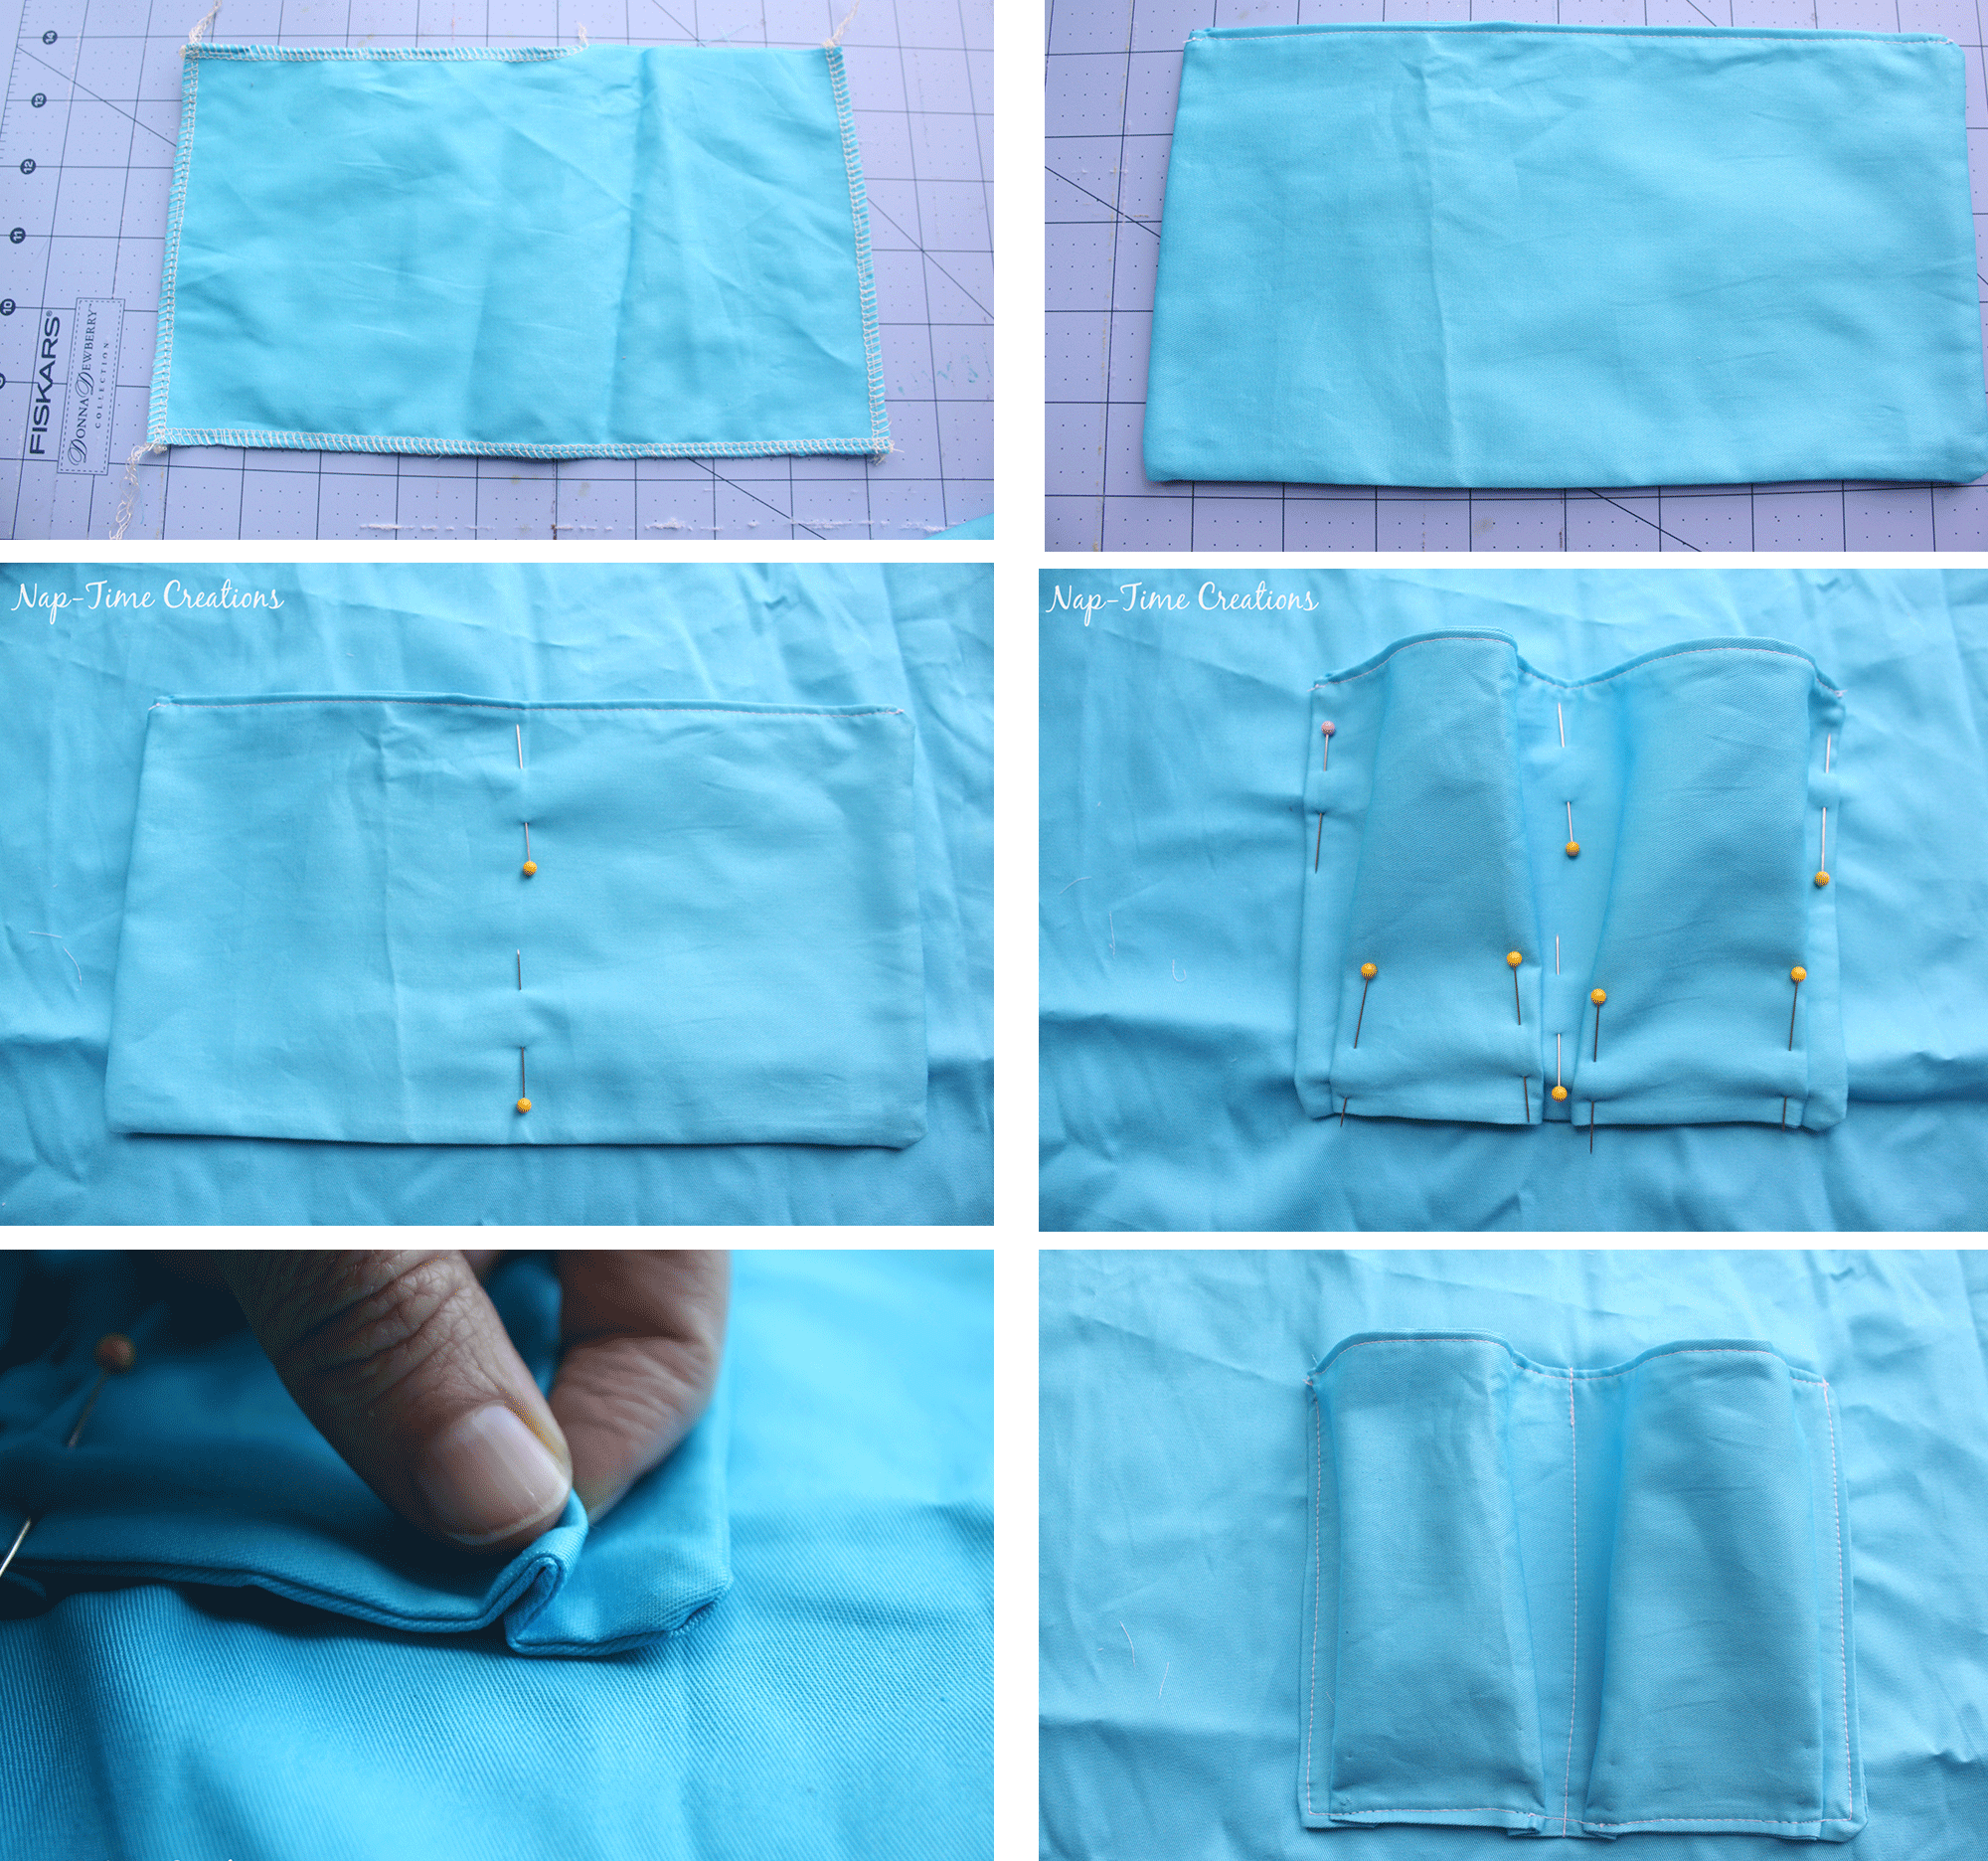
How to sew the bag zipper
Take the two bag lining pieces {with pockets} and the inside zipper facing pieces. Lay the zipper along the top of the one liner with the tab end extending 2″ from side. The wrong side of the zipper should be touching the right side of the lining.
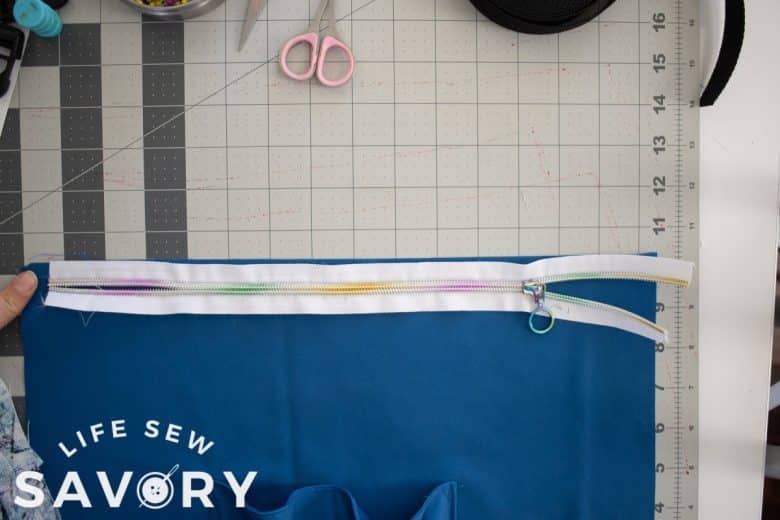
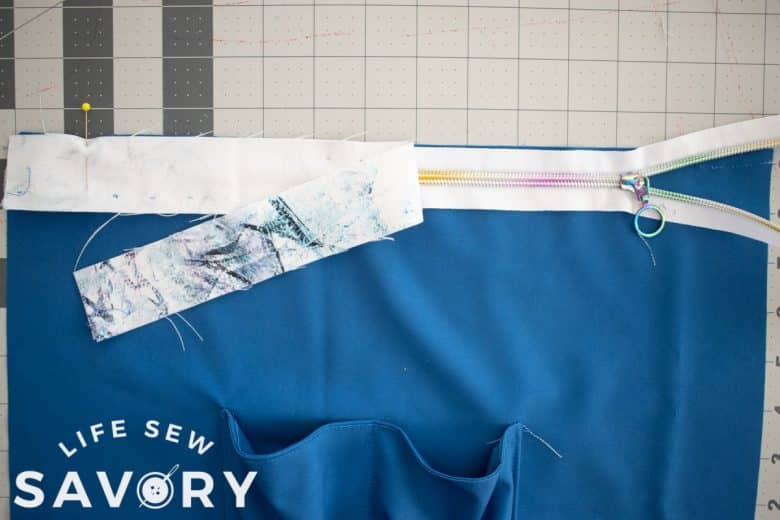
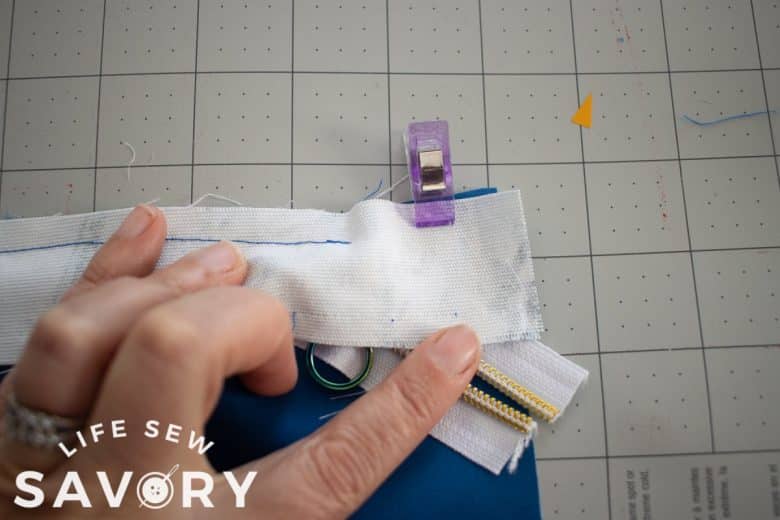
Cover with facing fabric. Pin and sew all three layers starting and stopping 1.5″ from either side. DO NOT sew to the edges.
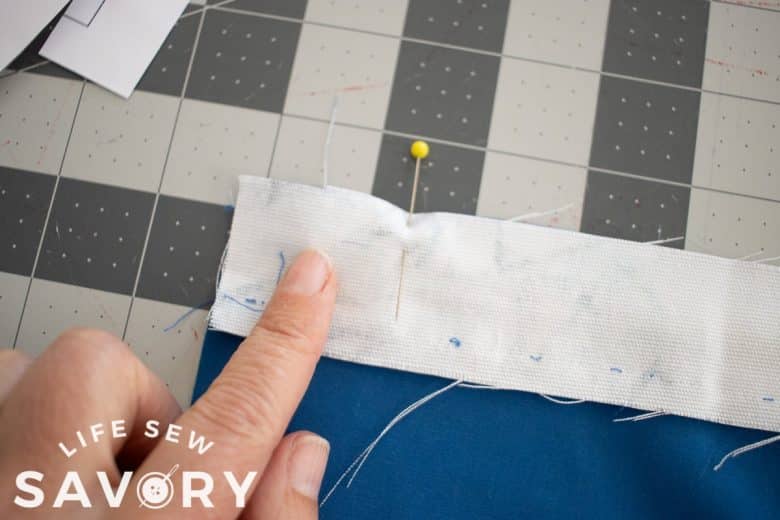
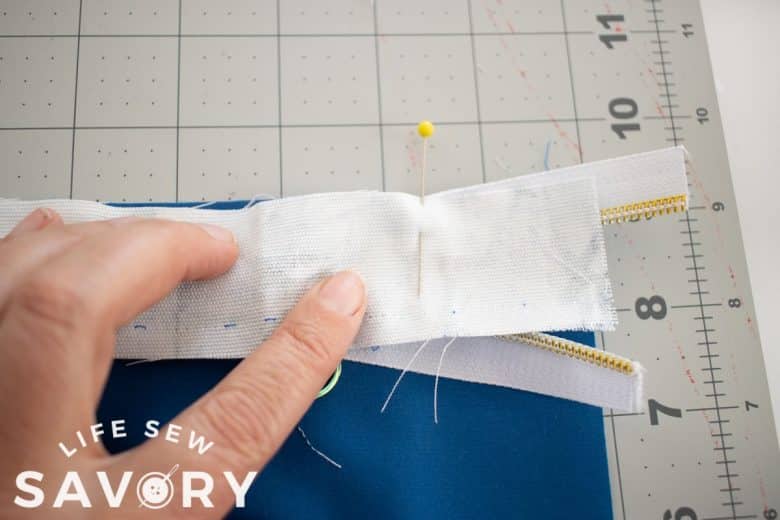
On those open ends you will pull up the end of the zipper without the pull tab {trim if necessary}
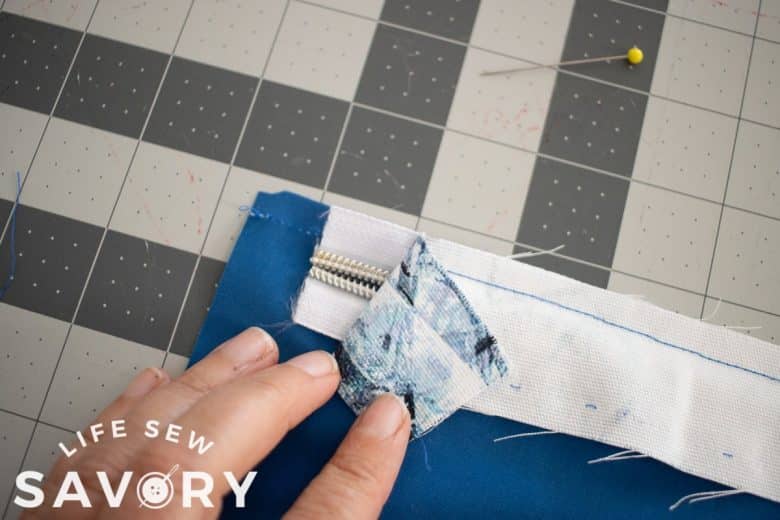
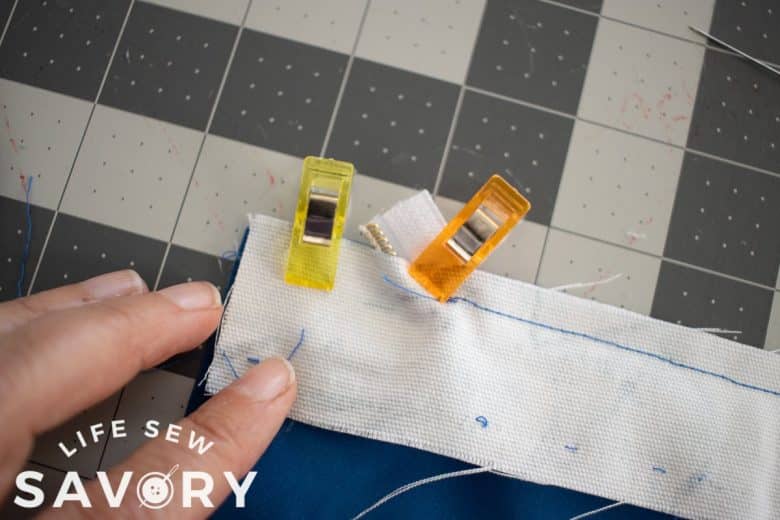
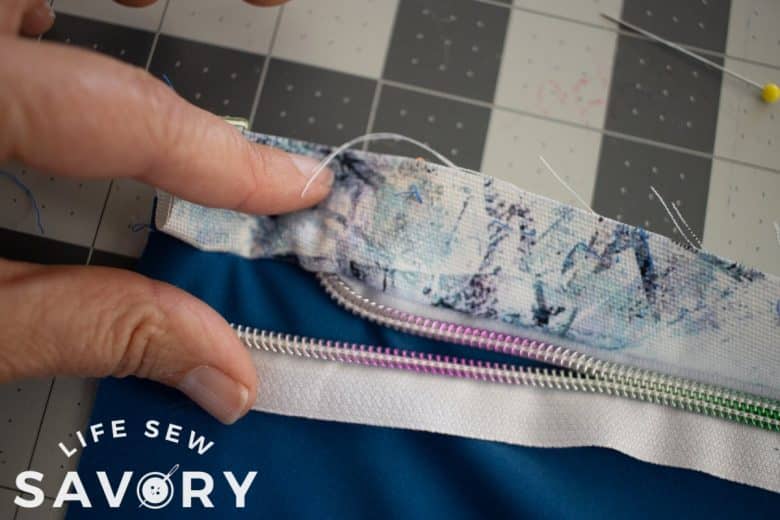
On the side with the pull tab, pull the zipper down and out of the seam. Sew the ends closed. Be careful when sewing over zipper end, I broke a needle… go slow!
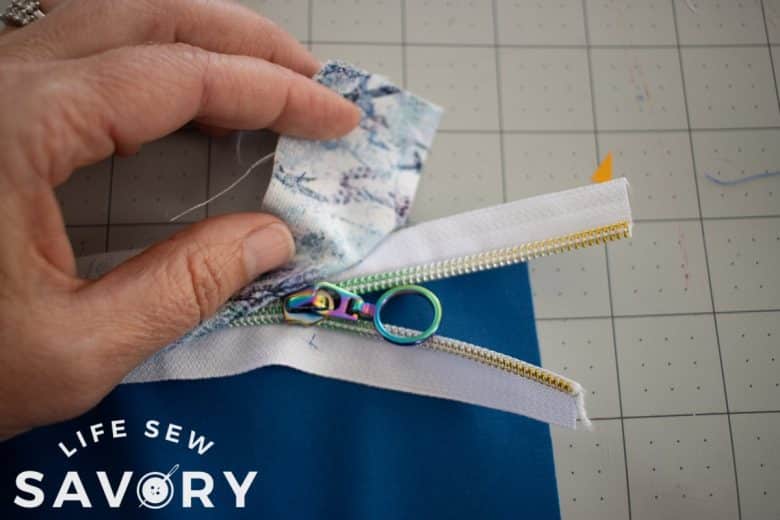
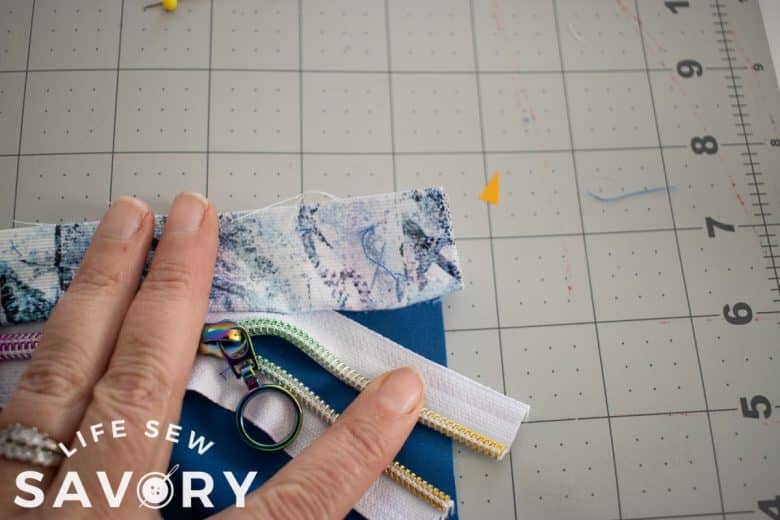
Now that this zipper facing is completely sewn on fold it back away from the zipper and pin to the lining. This will keep it from getting in the way. Take the second side of the bag lining face up and place the zipper also right side up and line up the top edge of the zipper AND the sides of the lining.
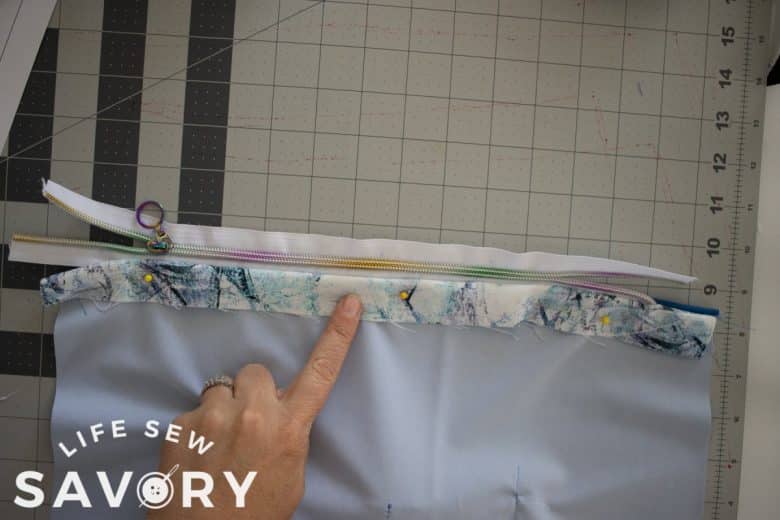
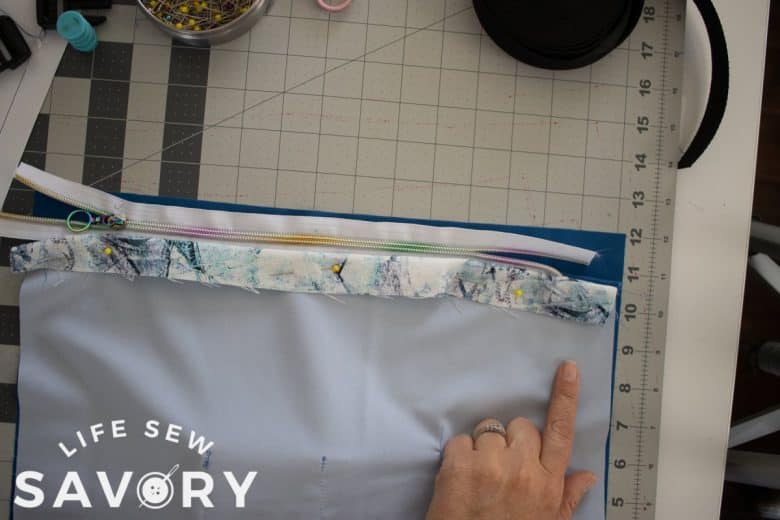
Place the zipper lining, right side down and sew the three layers as above. Again DO NOT sew the 1.5″ on either end of the zipper.
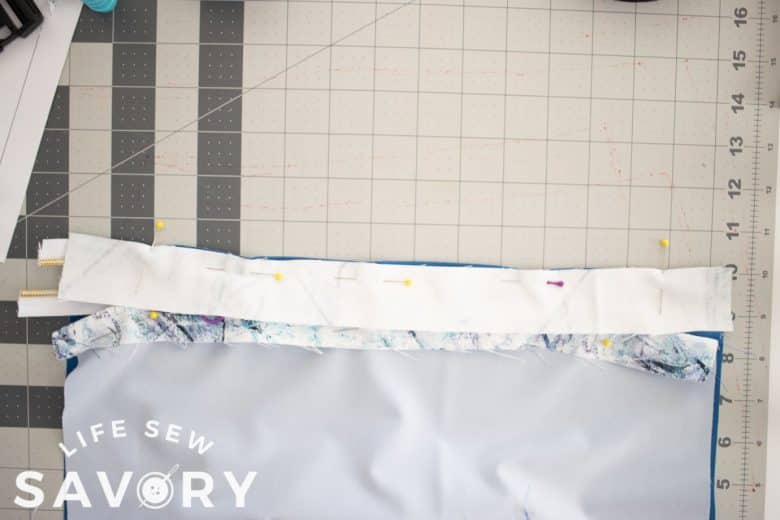
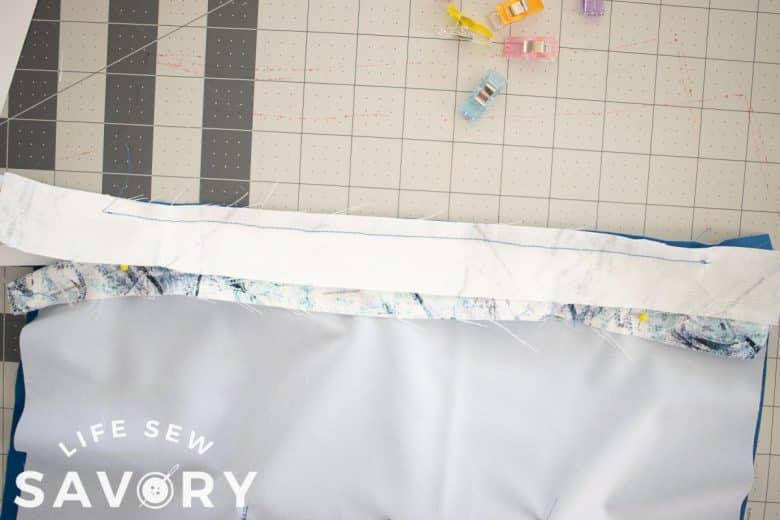
Fold the end up and the tab end down and the end up and sew the ends just as above. Sew the ends.
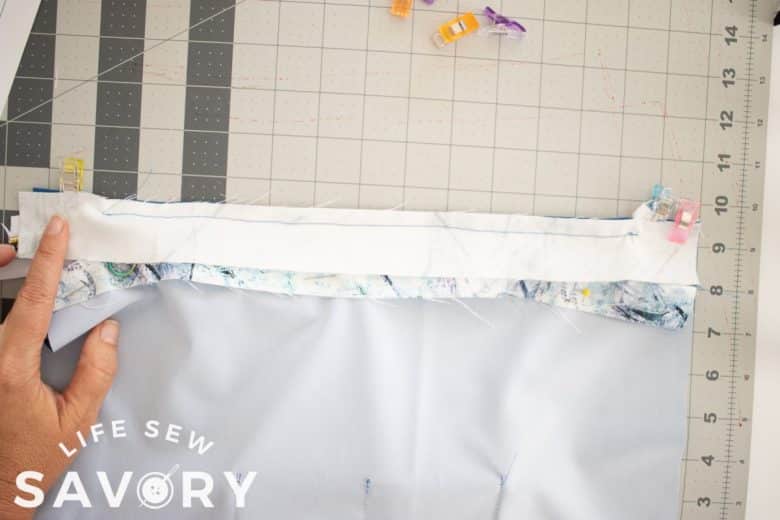
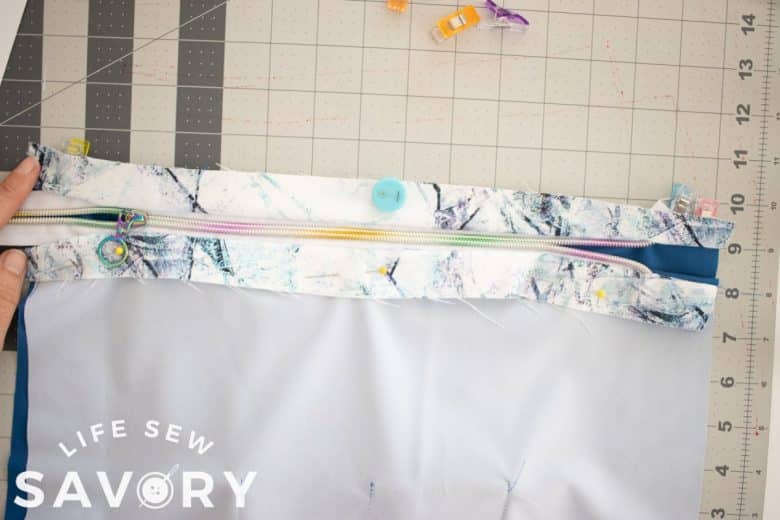
Here’s what the inside of the lining looks like, and the right side of the zipper looks like the second photo.
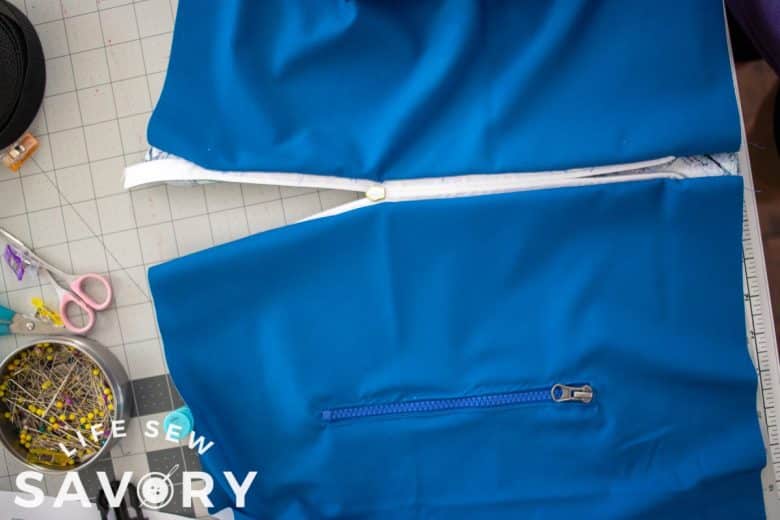
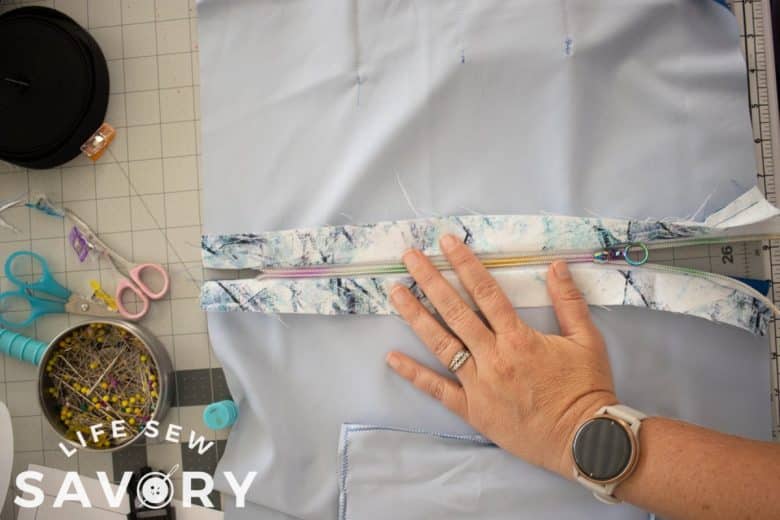
Create a simple tab cover if desired {no pattern piece} make a small rectangle, sew, turn, tuck in raw edges. Place over zipper end, and sew bottom edge to secure.
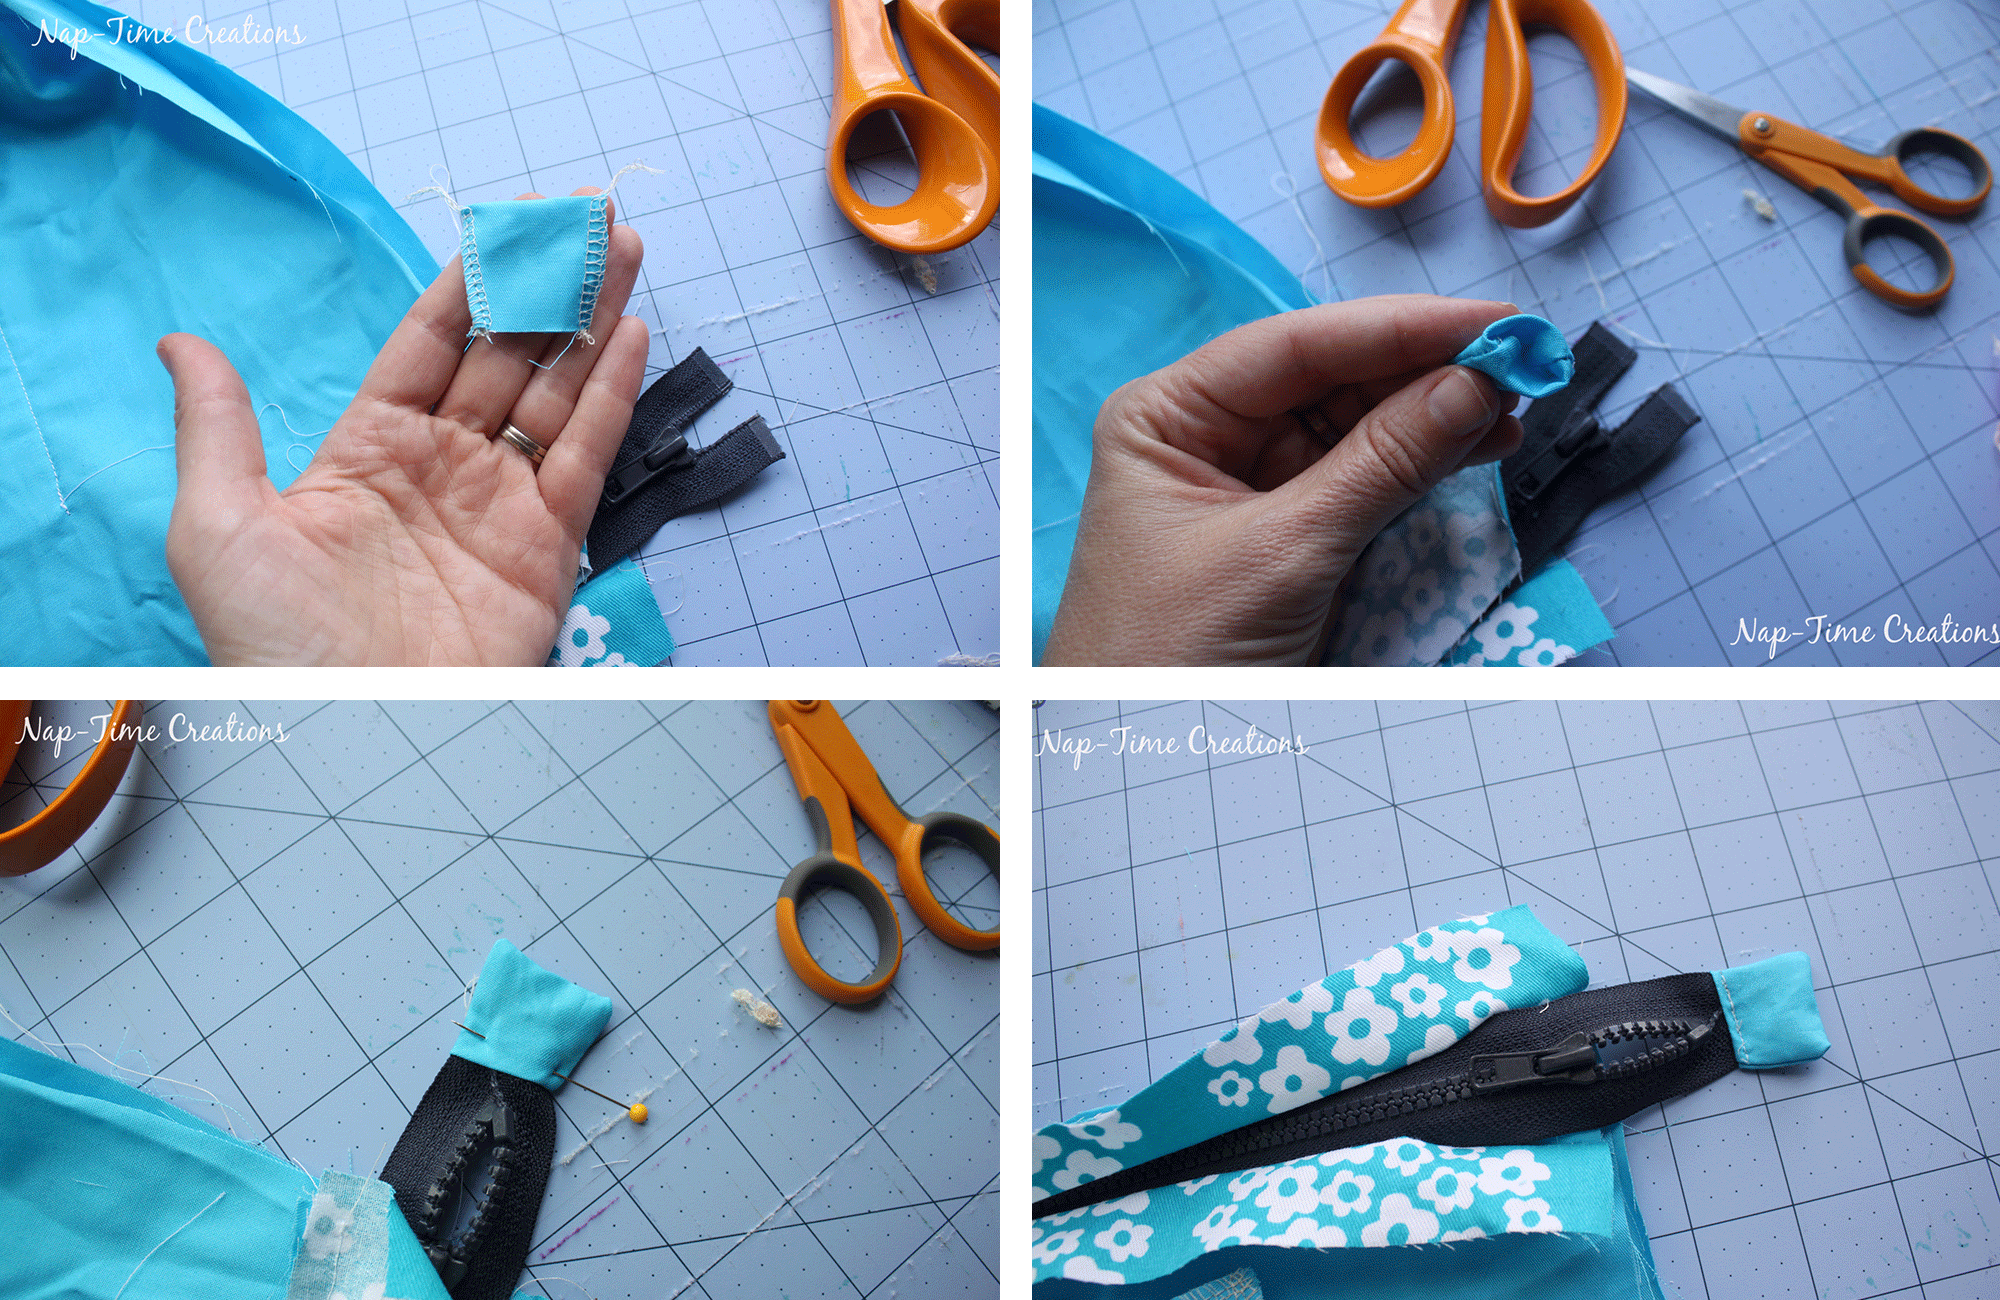
Now we will sew the sides of the liner together. With right sides together, place the liners on top of each other, and keep the zipper facings UP, fold the zipper down and inside the bag. Keep out of the way. Sew down the side and bottom edges of the liner.
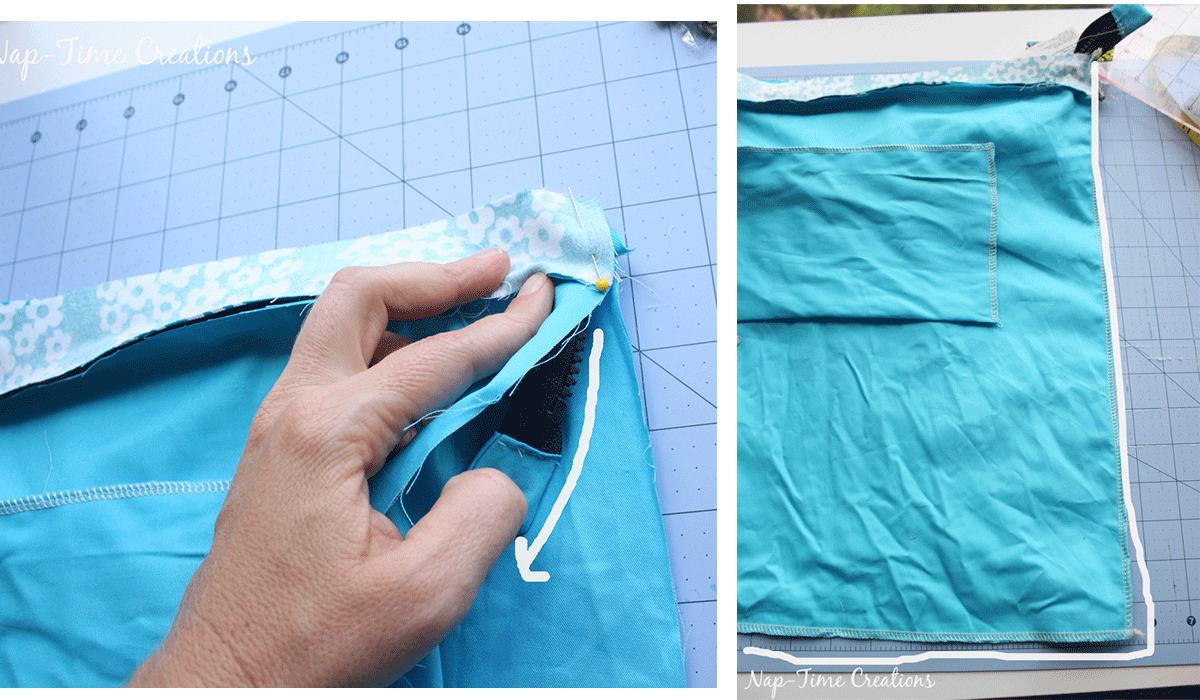
We need to shape the liner to match the bag outside. Fold the corners of the bag like this with the seams on the outside. Sew straight across the triangle, 3″ from the point. Trim. You now have square corners and this will fit well in the outer bag shell.
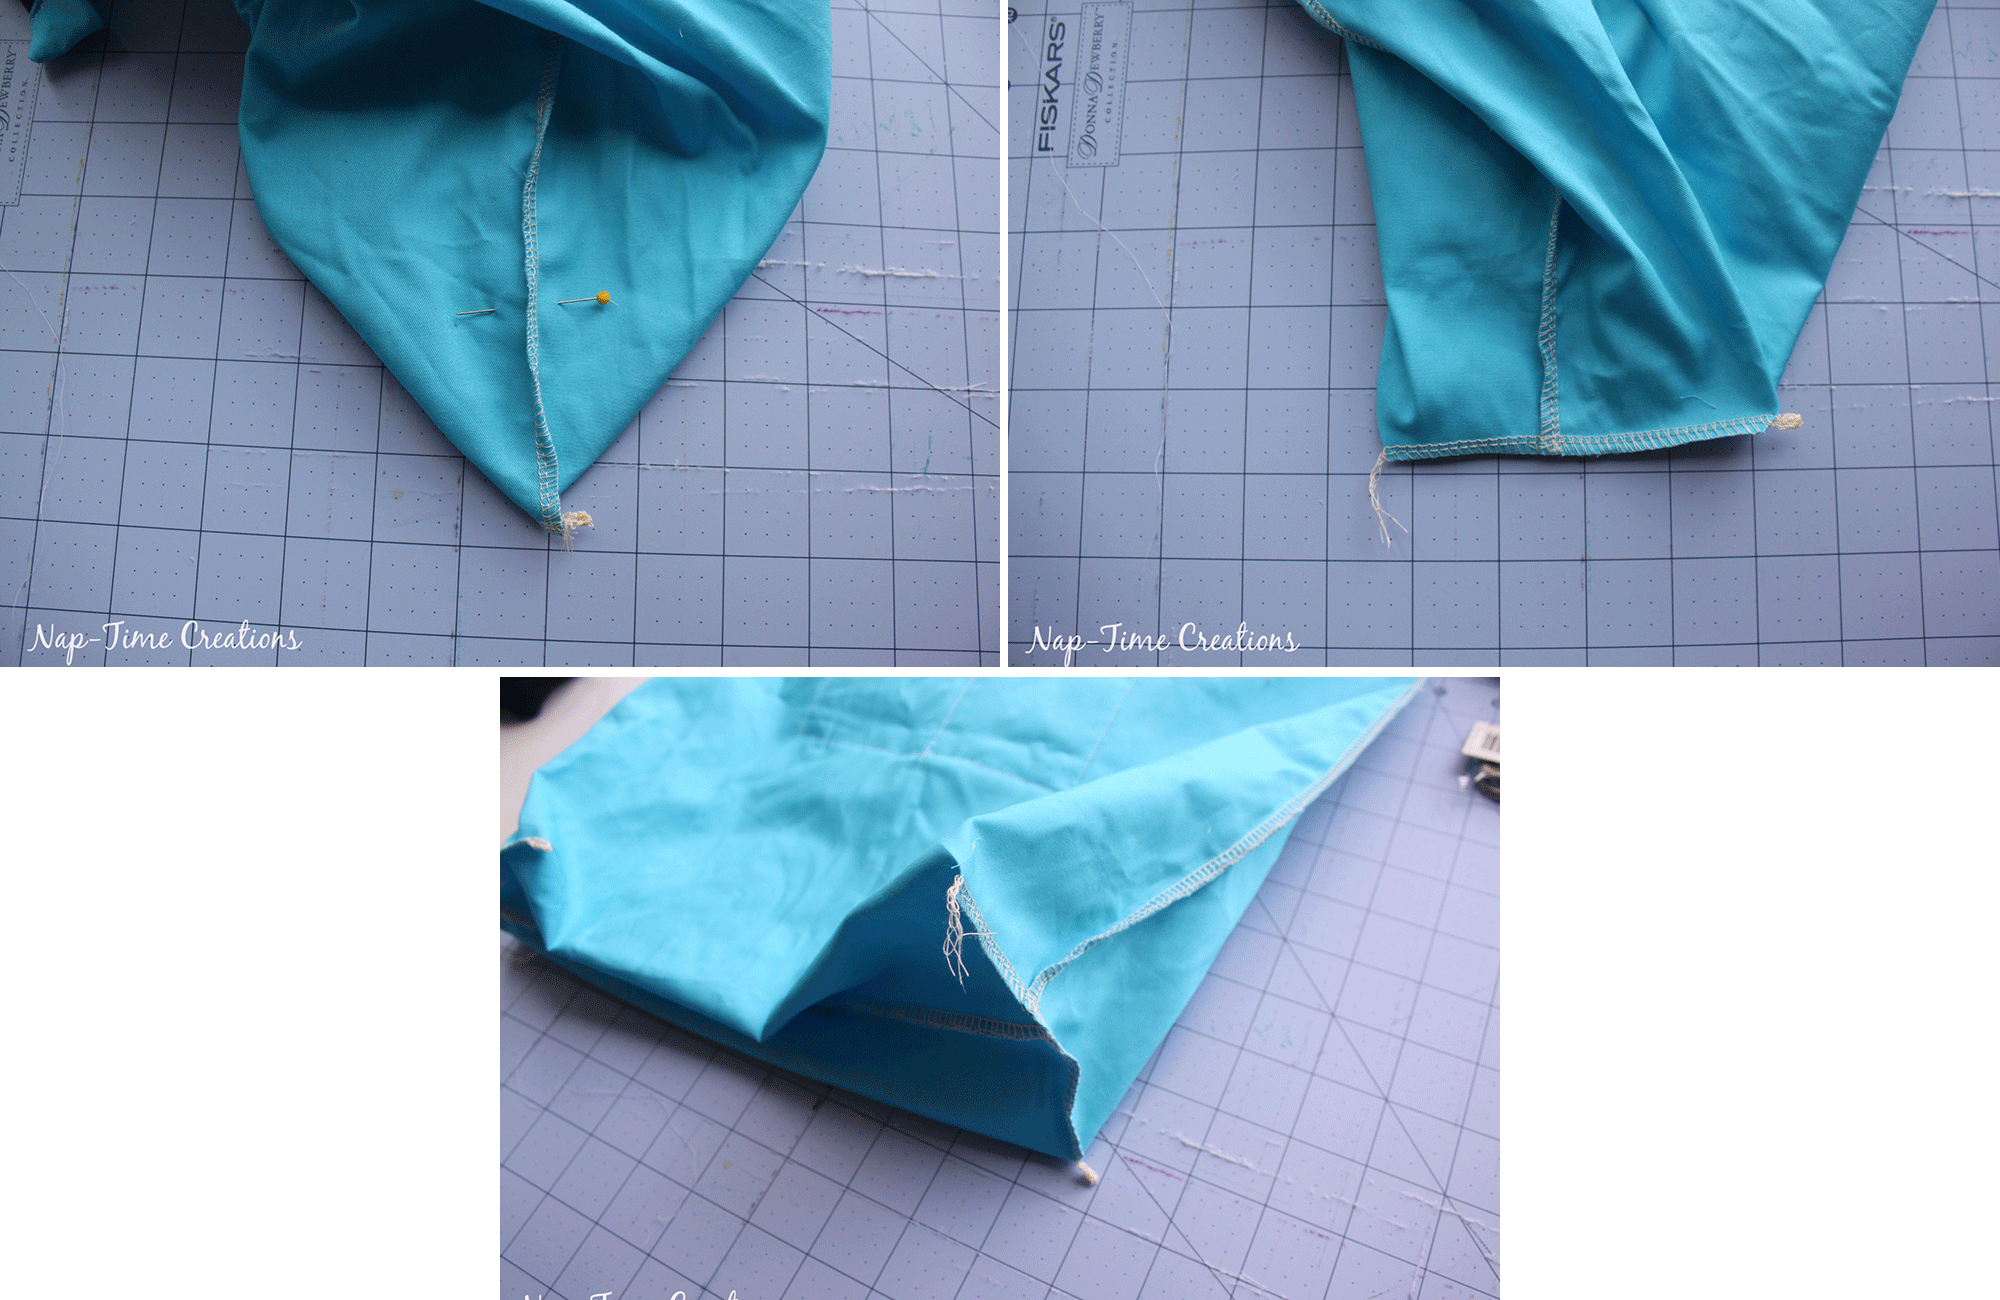
Finish the straps on the convertible purse / backpack free sewing pattern
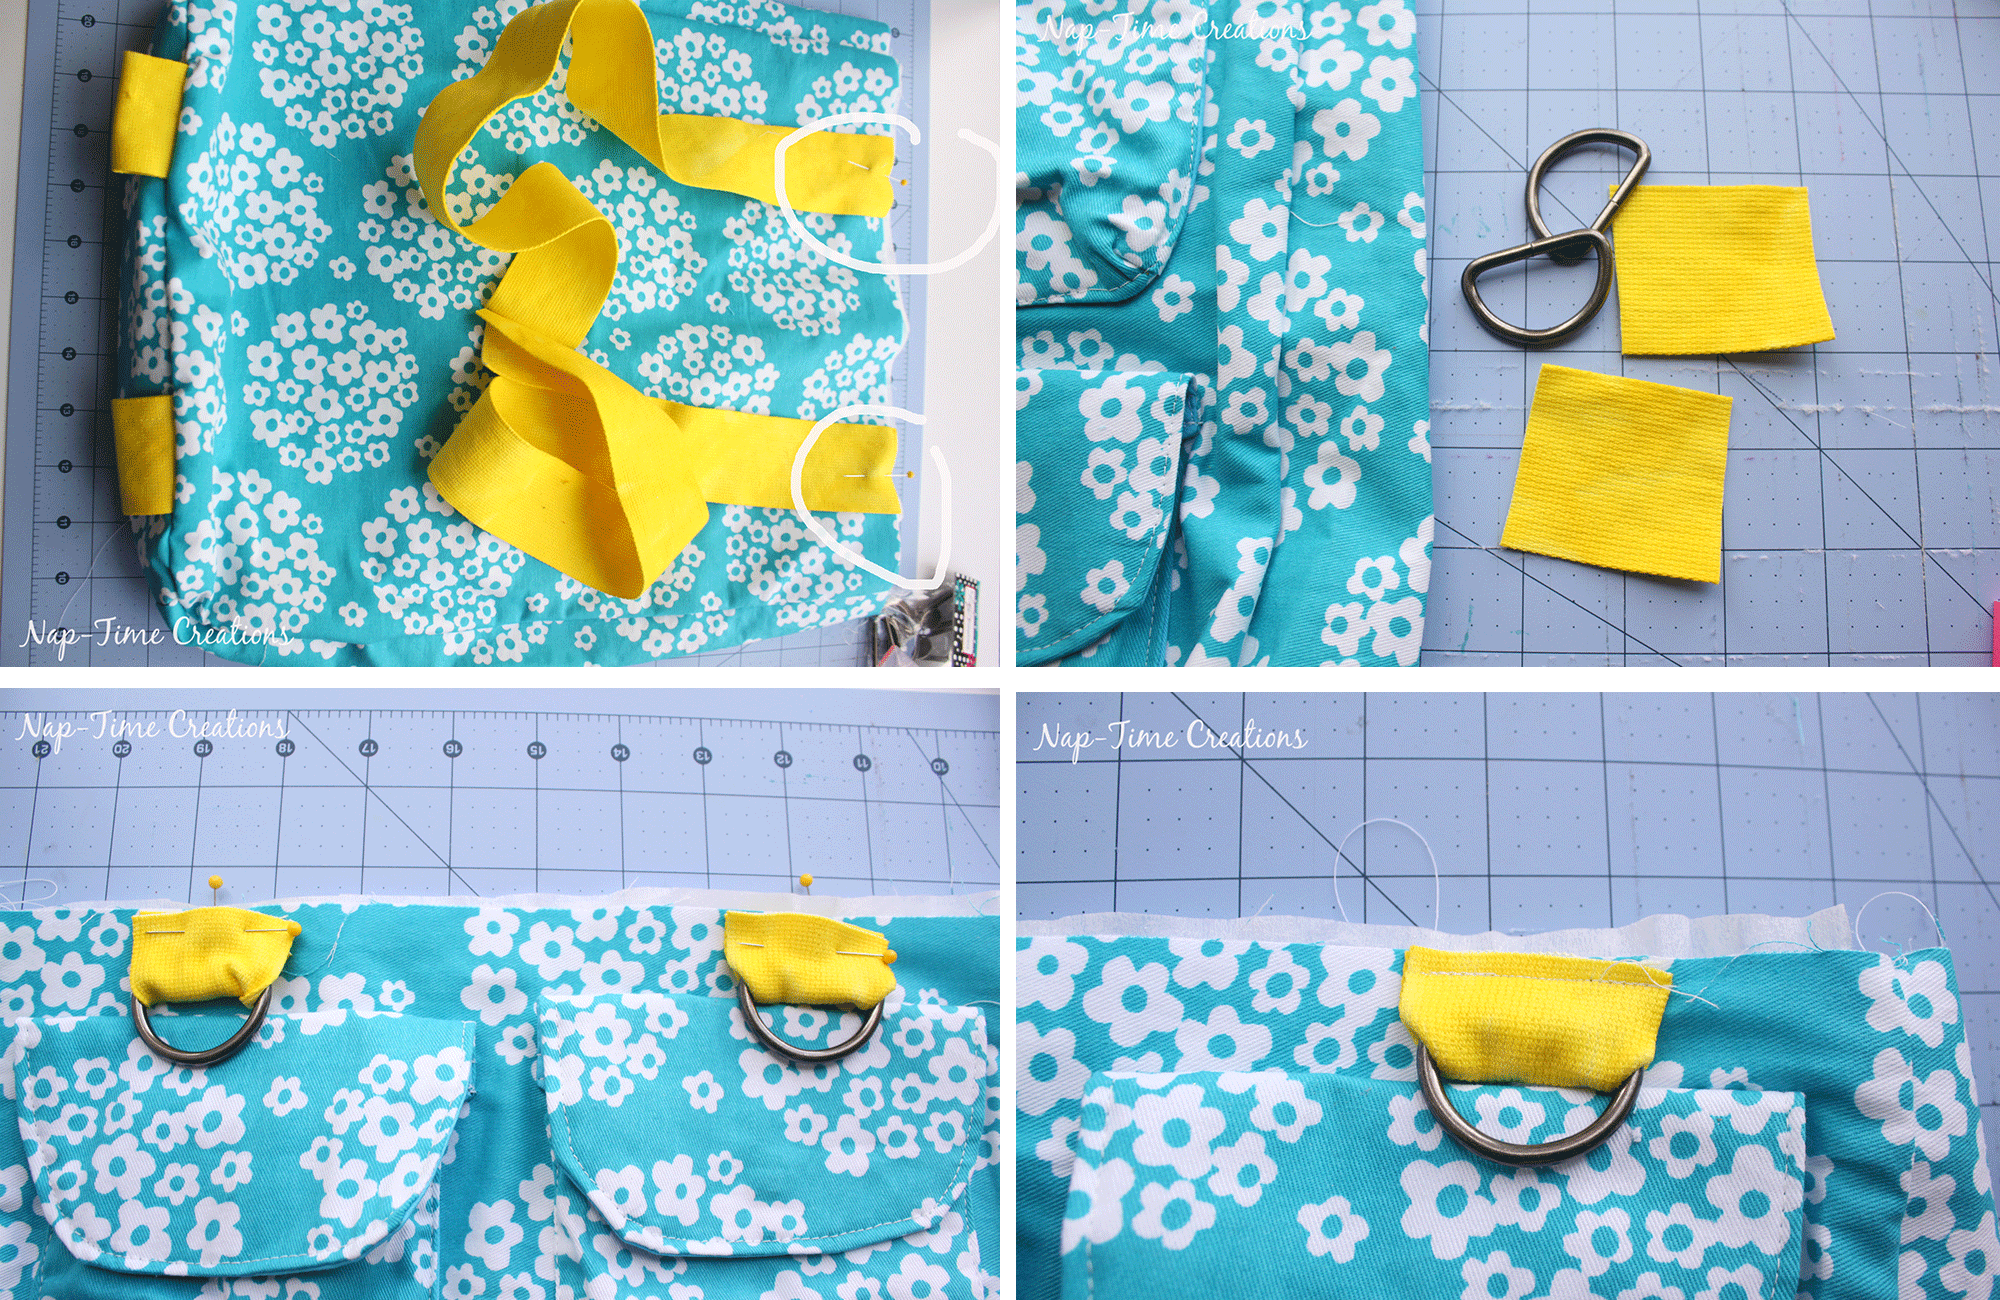
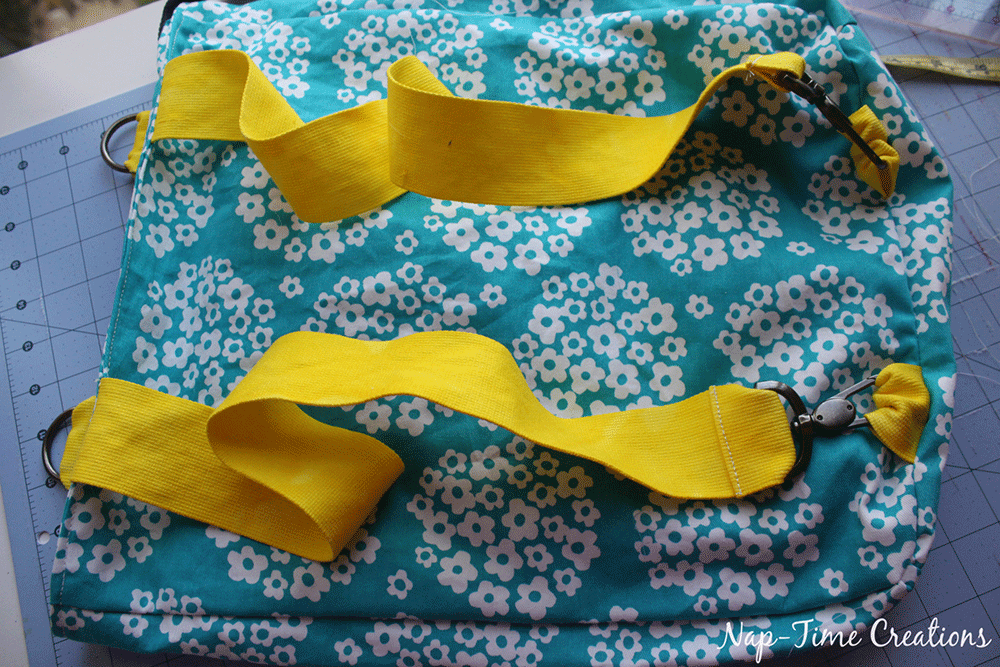
On the same side of the main bag where you have the bottom strap loops, stitch the long straps 2″ from either edge, with the straps going down the back side of the bag. These straps should be at least 22″ long, but You should make sure they are long enough for your back at this point. Cut 2″ long pieces of strap for the D rings. {or buckles}
On the front of the bag main, stitch the straps with D rings {or buckles} 2″ from the front sides. Stitch to hold in place.
Time to put it all together… Put the main bag inside the liner with the right sides together. Match the sides and pin around. Sew with a 3/8 seam around the bag leaving an opening between the two long straps to turn. Turn the bag and tuck the liner down inside the main bag. Top-stitch around to close the opening and reinforce the straps. Here’s a close up of the top-stitching.
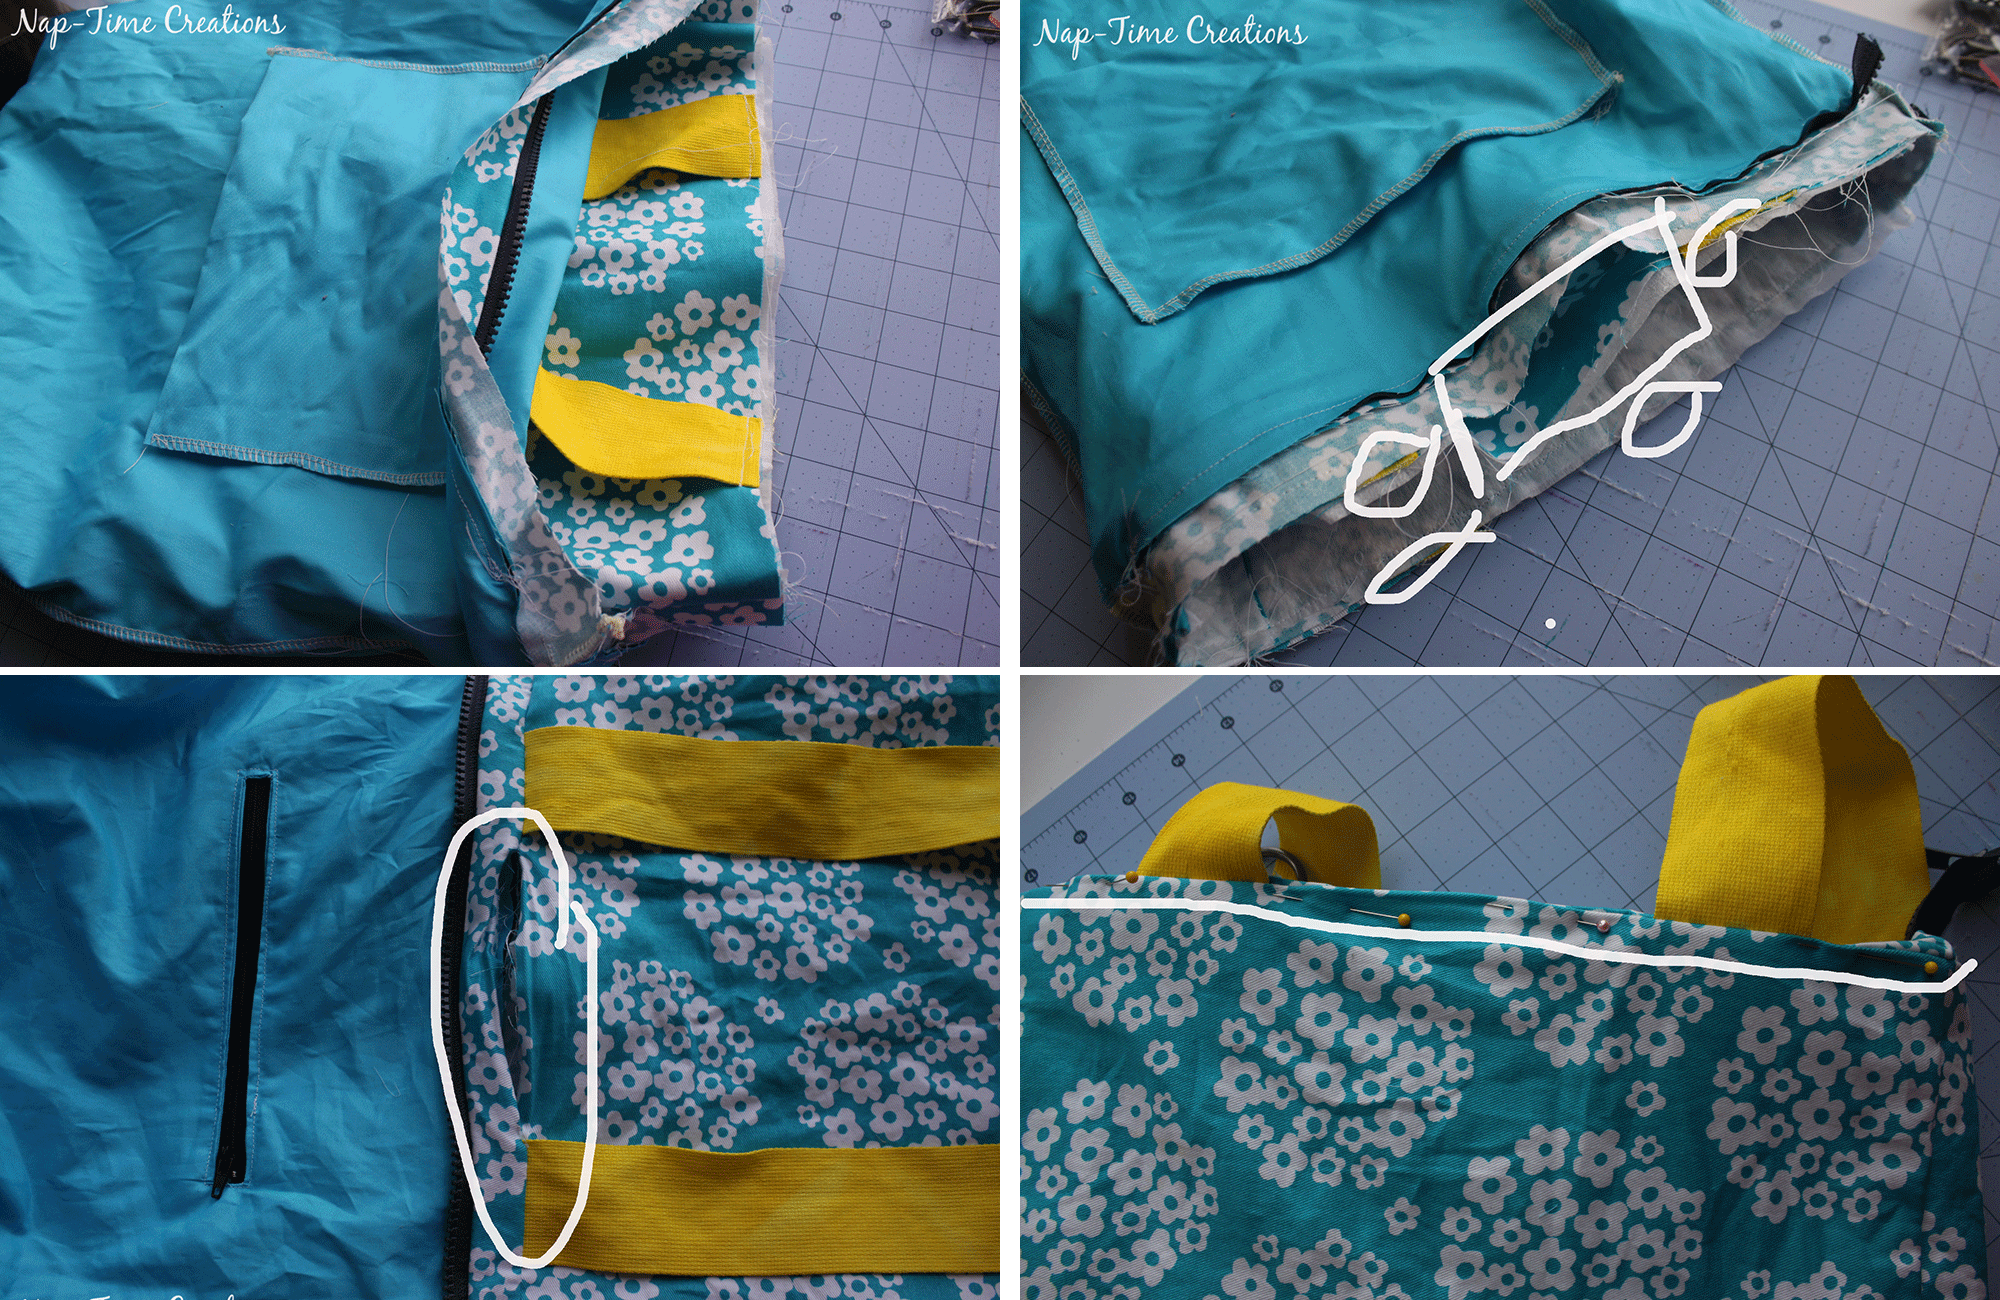
Sew the bag clips {or buckles} to the ends of the long straps. Thread through, then fold over twice to finish. Sew top of fold. Cross and clip to D-rings to have a shoulder bag.
OR, clip to the strap loops on the bottom for a backpack. YOU DID IT!
AND if you’ve read all the way through this and still haven’t gone to grab your convertible purse/backpack free sewing pattern here’s one last link to go grab it here.







Sheri says
Pinned! Thanks for sharing at the To Grandma’s House We Go DIY, Crafts, Recipes and More Link Party. Hope to see you again this week!
Jann Olson says
It’s so cute, I love it! Thanks for sharing with SYC.
hugs,
Jann
Susan says
Love this backpack. I know my teen daughters will enjoy making their own backpacks for the summer. Thanks for sharing at the This Is How We Roll Link Party.
Jennifer says
This looks like the perfect DIY to get ready for summer! Pinning to share.
anais says
I am really disappointed. I’ve bookmarked this lovely bag for ages, bought all the material one year ago and finally have started to sew it last week. I am not a beginner but I find the tutorial everything but clear.
Really difficult to understand the instructions.
Ihope to finish it tonight.
Teresa says
Thank you so much for this tutorial! I made the bag a few weeks ago and took it on a trip. It fit my small travel purse plus a rain jacket. I love it! Now I am going to make a bigger one. This was the most complicated bag I have ever made so I had some issues. But I was able to figure them out and ended up with a great bag.
Thanks again!!
Katie says
Love this. In the process of making it now, but did notice a small error on the pattern pieces. If you are going to do the interfacing, then you need 2 of them for the small pockets, the small flaps, and the sides, not just 1.
Emily says
ah this is a great catch!
Mya Smith says
yes thanks. i was super confused. this comment saved me a lot of headache
francis says
hello, I am attempting to make this bag and I am so confused. I am not a beginner but i’m having a hard time understanding this tutorial. I have already wasted so much fabric and would really appreciate some help. I could be misreading something but am at the point where I keep going around in circles:
1-the pattern doesn’t have measurements for the the bag bottom; if I’m missing it, could you please advise?
2-the pattern doesn’t have measurements for the bag body/shell; if i’m missing it, could you please advise?
3-the small pockets: shouldn’t there be 2 pieces of interfacing cut instead of 1?
4-the bag side: shouldn’t there be 2 pieces of interfacing for this? what about lining?
thank you for taking the time to read this. I really really hope you can help me
Kim Parks says
Hi Francis
Hope you haven’t given up on this. I’ve got all y bits and ready to start sewing up today.
The dimensions for the pattern pieces you mention in your points 1 and 2 are on the pattern – page 1 – before you cut the pieces of the pattern out for the pockets, flaps and side. The bag bottom is 4.25″ length x 11.25″ width and a piece of stiff interfacing cut the same size. The dimensions for the back and front are 13.25″ width x 15.75″ length in the main fabric with the same in interfacing (I’ve interfaced both pieces). And the inside back and front are 15.5″ width x 16.5″ length.
And you’re right, someone else mentioned that above, there should be 2 x small pocket, small pocket flap and bag side pieces should be cut in interfacing.
The back and front lining pieces are wider than the main pieces as the lining has the side piece included in it’s width, so no side piece is needed in the lining fabric.
Hope this helps a bit more.
francis says
would you consider posting a sew along video for this?
Michelle says
Hello, I am currently working on this bag and was wondering what the dimensions are for the inside pockets? I read through the instructions very slowly, but couldn’t find any measurements.
Thank you!
Tracy A Fleming says
This was the first backpack I tried. I struggled a bit but it goes on my back so it works. Really pushed me out of my comfort zone. I made it in Disney material. Would love to share photos too!
Victoria Buckner says
Hi! Question- is the “large pocket” that’s split between pages 2 and 3 supposed to be the flap for the other “large pocket” that’s on page 5?
Emily says
That is very possible. The flap is a bit wider and shorter in height than the pocket. I will have to look at this
Jinx says
Do I need two pieces of interfacing for the main bag front/back? The written pattern says 1 but it appears you are using two. Also, the bag side pattern says cut 1 interfacing but it looks like you are using 2 or do I cut one or two? for some reason I ran out of fabric for the lining.
Jinx says
also do I need interfacing for the two pockets inside the bag? the zippered and open pocket?
Jinx says
lol sorry to keep harrassing you but I realized that I read the comments about the bag sides so you can ignore that question! just the 2 interfacing for the main front/back and the interfacing for the inside pockets
Sadye says
Could you also use a cotton fused to a stabilizer as the outer fabric? I’m assuming the idea of a heavier fabric is for durability. Thanks!
Emily says
yes of course!