


inside: Learn how to create a simple embroidered shirt with a flower bouquet design. Simple and elegant this flower bouquet on your shirt adds a fun and beautiful detail. Embroidery tutorial to create this look.
Last year I bought this super cute t-shirt with a flower bouquet embroidered on the left side. Of course as soon as I bought it I thought I could make it myself. At the time I didn’t have a bouquet design, but recently I opened up the Artpsira app and saw the PERFECT flower bouquet design. It was finally the time to recreate this most beautiful shirt.

Flower Bouquet Embroidered Shirt
Here is my inspiration shirt. The grey shirt is the one I bought last year, and the black one on the left is the one I’m going to use to recreate this look. I do love this shirt and now I’m excited to have two shirts with beautiful embroidery.
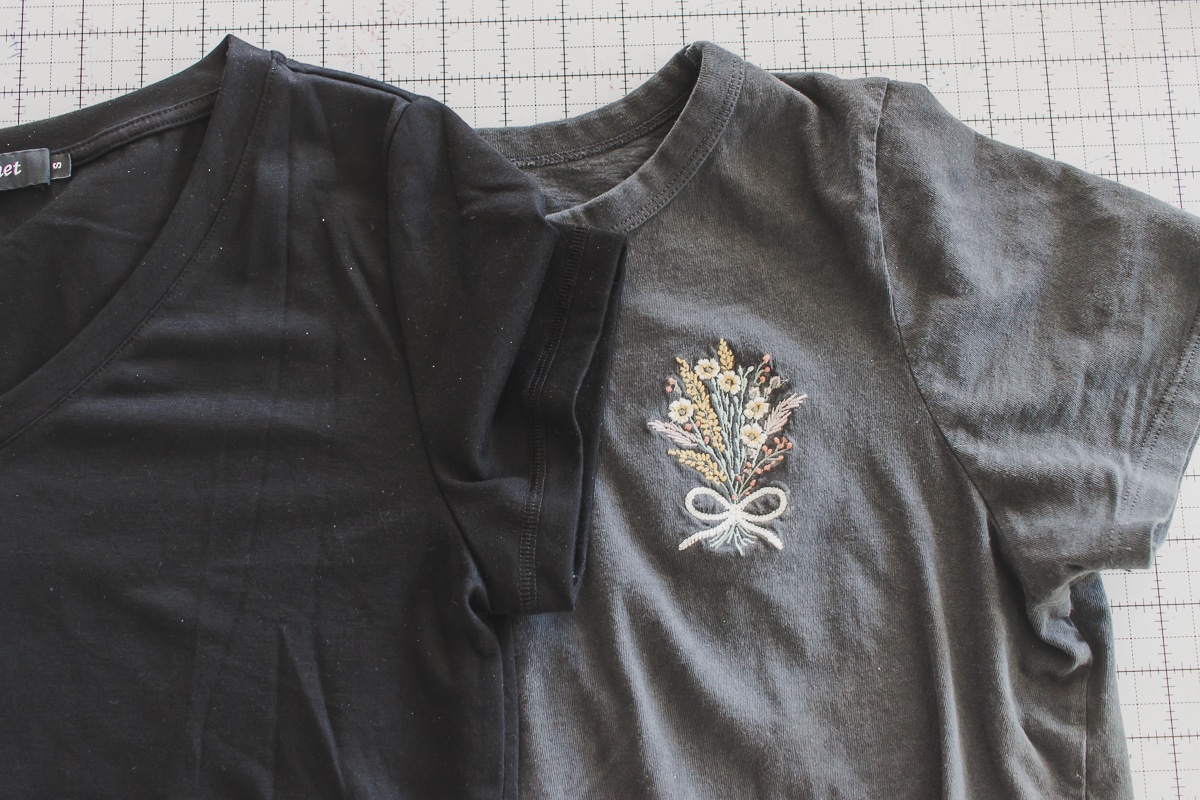
This shirt is going to be perfect for spring. I’m excited to make a few more with different color shirts and thread colors for the bouquet. There are also a couple different bouquet designs I want to try on the Artspira App.


Other Embroidery tutorials to try
Here are some other embroidery projects to try.
- Puffy foam Embroidery
- Shirt Pocket embroidery
- Double layer glitter embroidery
- Embroidery on cardstock
- Couching and Embroidery for clothing
- Fix a hole with embroidery


How to make an embroidered shirt with flower bouquet
Ok! Here’s what you need to create this fun flower bouquet shirt.
- Tshirt – any will do… or here’s my free tshirt pattern for women
- Artspira app or other flower bouquet design. Search flower bouquet in the app, or here another design that might work. Flower Bouquet design here.
- Embroidery stabilizer – use two layers.
- Fusible embroidery backing

Start by marking the center of your left upper pocket area, then a top and bottom marker. Hoop this area. Make sure to use two layers of stabilizer under the knit fabric to keep everything in place.


Transfer the design to your machine and place the hoop on the machine. Position the design over your markings, then remove the pins.


Stitch out the design.


When you finish stitching out the design, remove it from the machine and clip all the threads. On the back side, cut or tear away the stabilizer layers. You can add a layer of fusible embroidery backing if the stabilizer is scratchy.


I love how simple and quick this project was the sew. It looks so cute too!


Leave a Reply