
**The DIY Wallets for kids post – updated 2/5/2018**
I’m sharing a new step by step tutorial for making cute DIY wallets for kids, in addition to the photos of the original ones I made years ago.
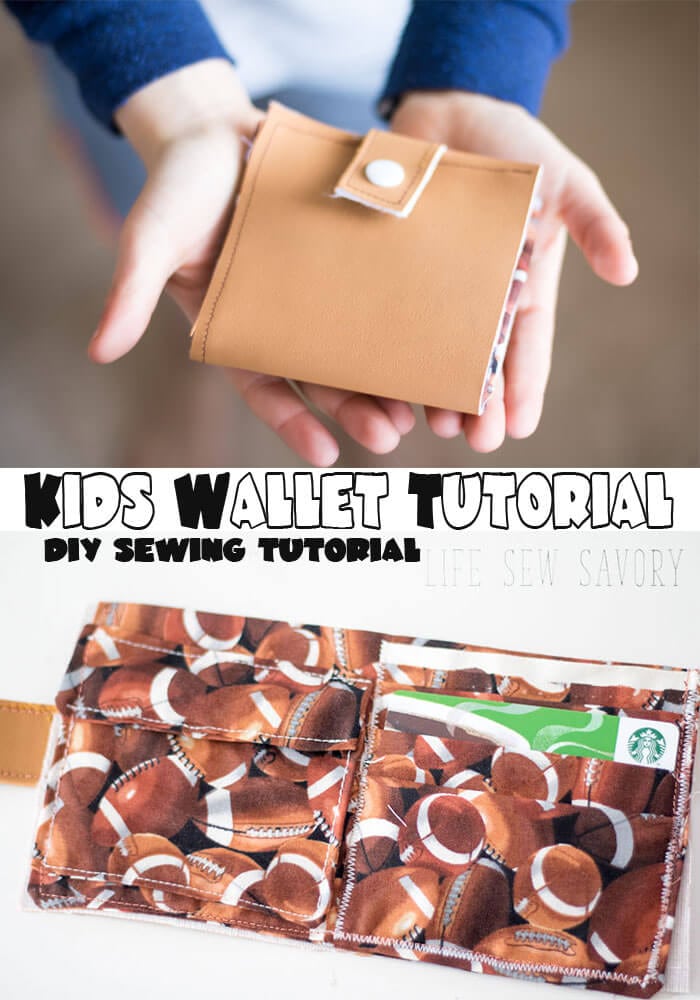
DIY wallets for kids – tutorial
I made these DIY wallets for kids when my oldest was younger… now my middle is asking for a wallet, so I thought I would make him one and give this post a little facelift. I’ve added step by step photos so hopefully you can make your own. Here are some photos of the original wallets. I made a bunch for birthday presents…

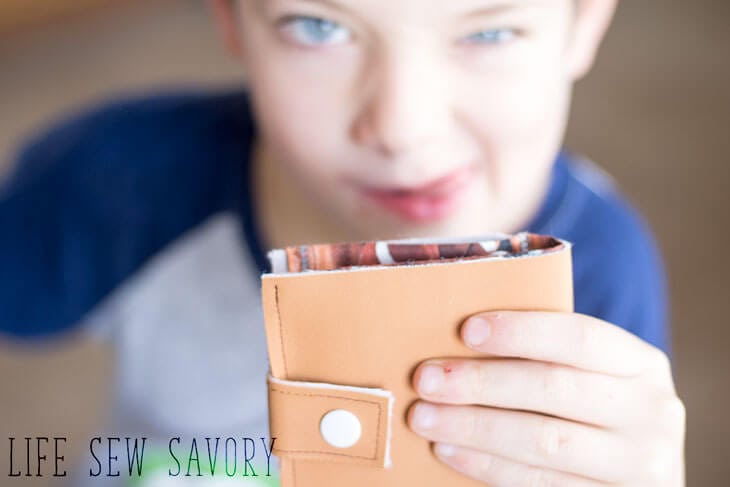
And here is the latest version! I love them both so much {and the kids I made them for love them more!!}
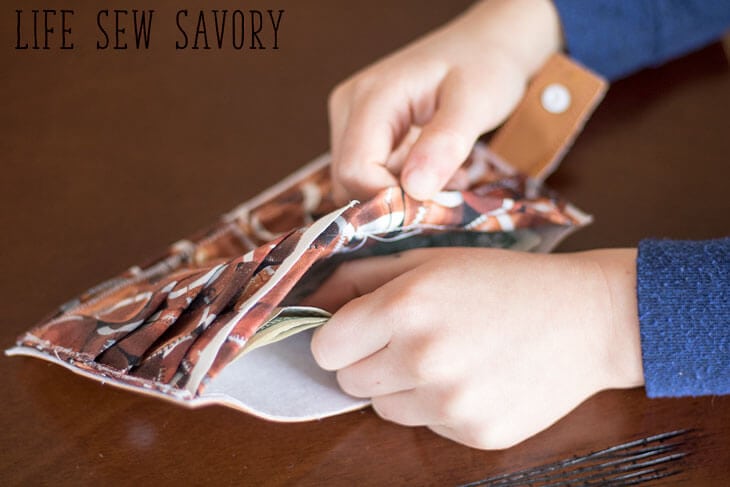
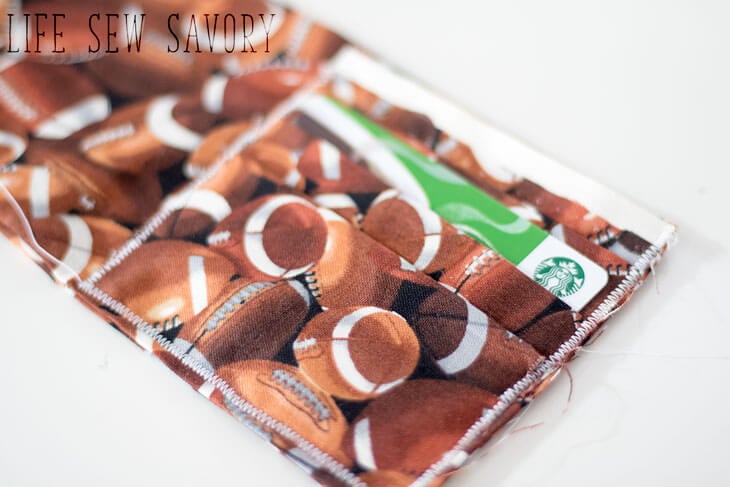
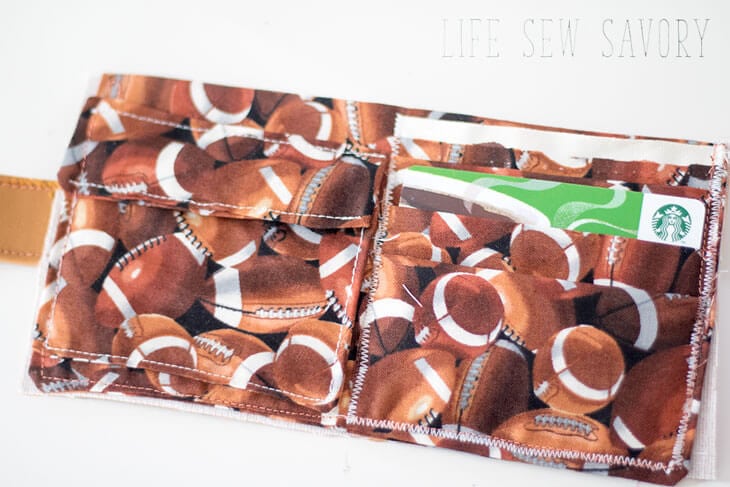
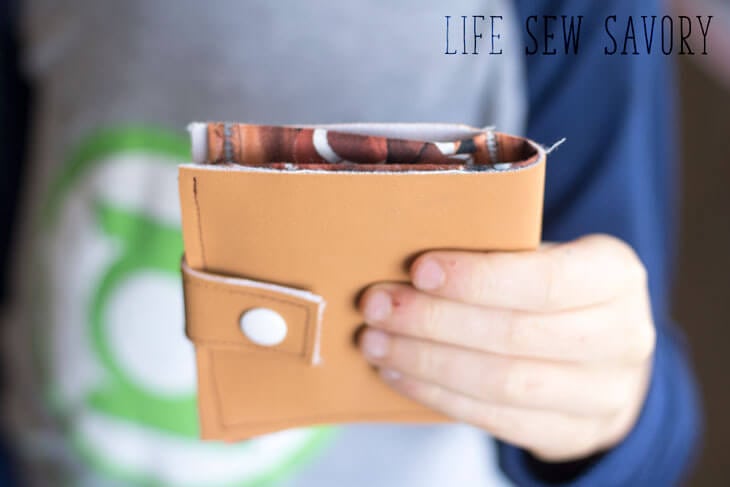
The inside of the wallet has a few slots for cards and a coin pocket.
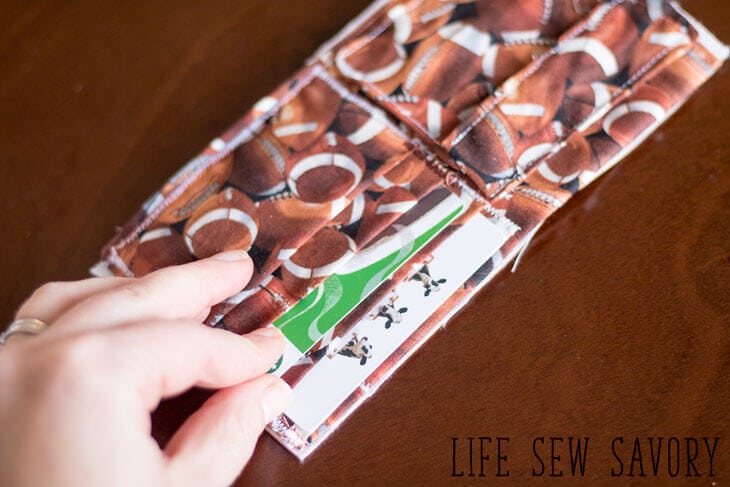
There is also place for bills. A great place to hold all your money and little treasures.
Ready to make some fun wallets for kids? here’s how I made mine…
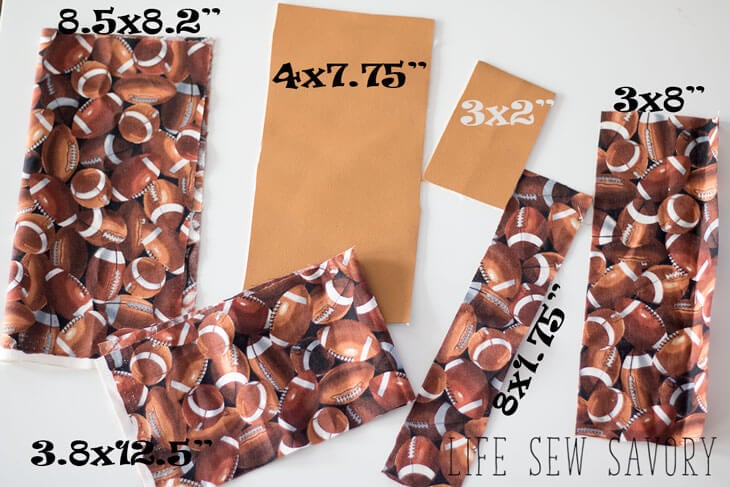
Here are the pieces you should cut:
I used a pleather for the tan and quilting cotton for the rest. You could also use a canvas for the outer layer {instead of pleather or leather}
With all your pieces cut out, let’s get sewing. Take your large lining piece and fold so it matches the size of the leather outer. Sew with right sides together then trim the corners. Leave a small opening to turn right side out.
Turn right side out, then sew the hole shut. This is now the main lining.

Take the long piece {12.5″} and fold it accordion style and line it up with the right side of the main lining. Use a card to test the depth of your folds as you go.
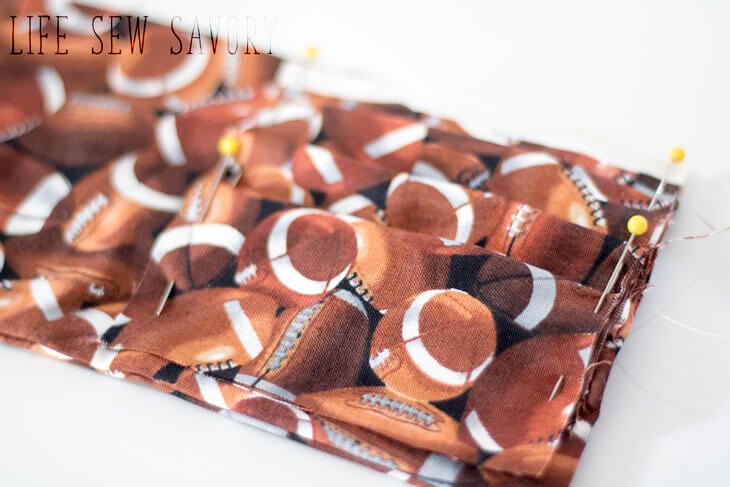
Sew with a narrow zig-zag stitch on both sides and the bottom of this fabric to secure the card slots.
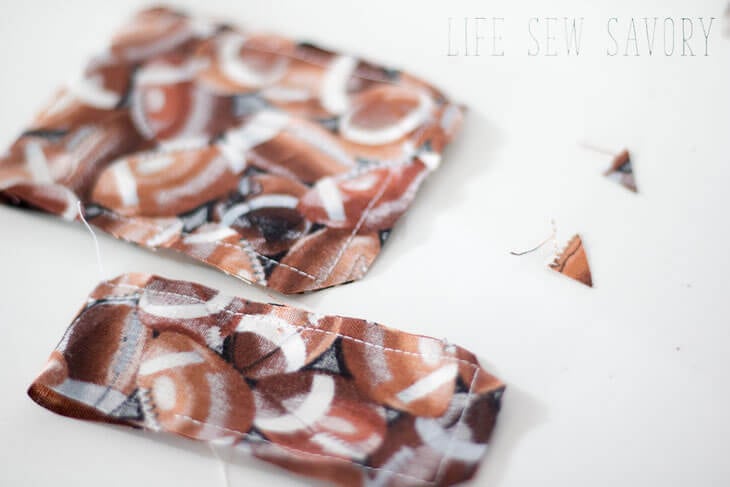
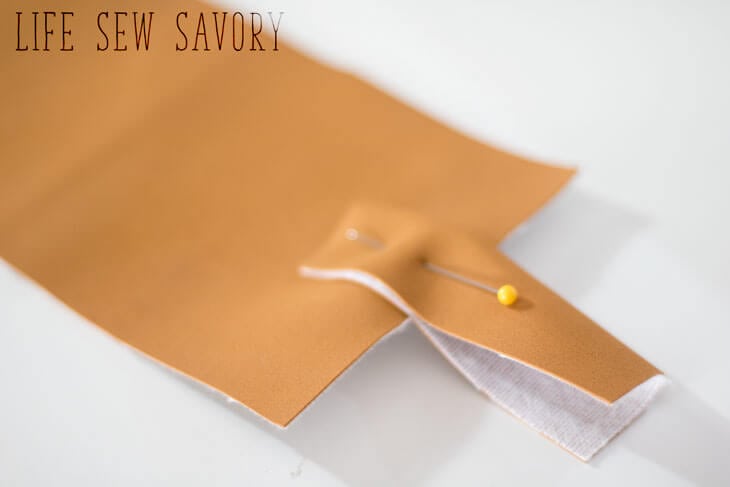
Take the two parts you have left of the lining pieces. Fold each in half to create the the coin pocket and flat top. Sew around each and leave a small opening to turn. Clip the corners.
Sew the pocket bottom along the bottom and left side of your main lining, The flap should should be about 1/2″ above the pocket.
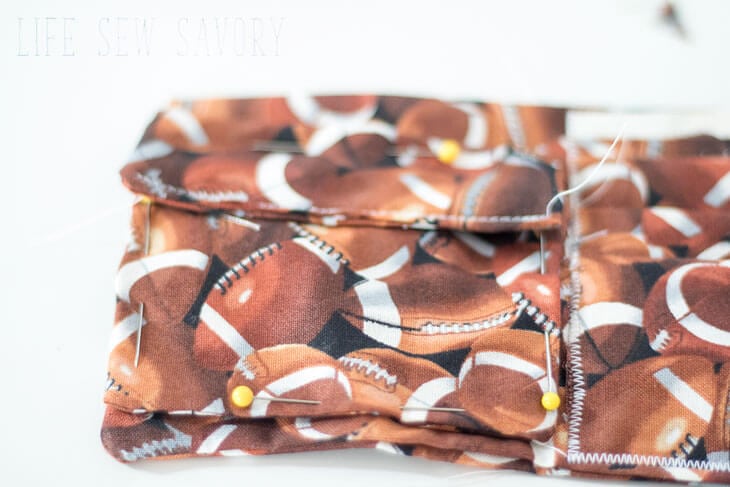
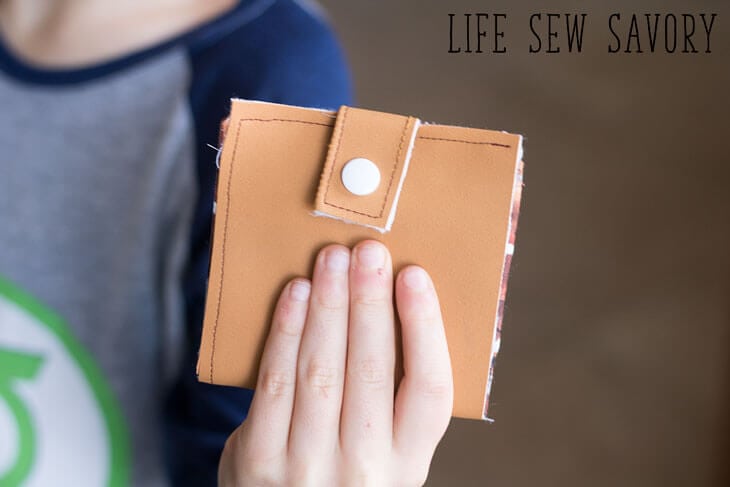
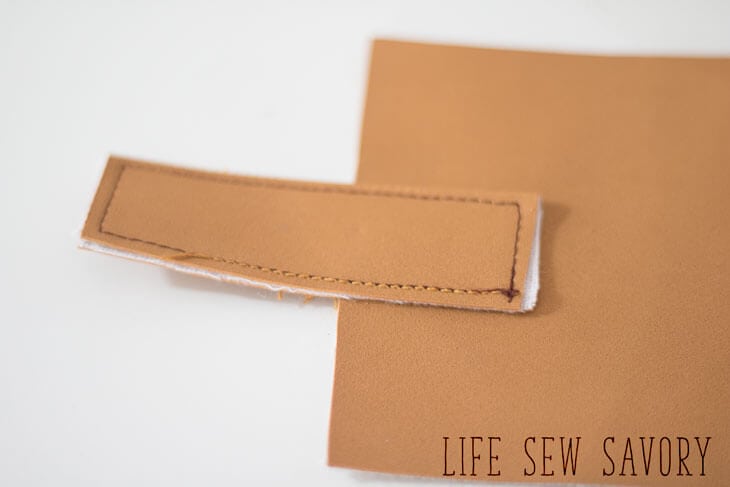
On the leather outer, position the flap folded over.
Stitch around the flap. You may need a leather needle to get through the fabric.
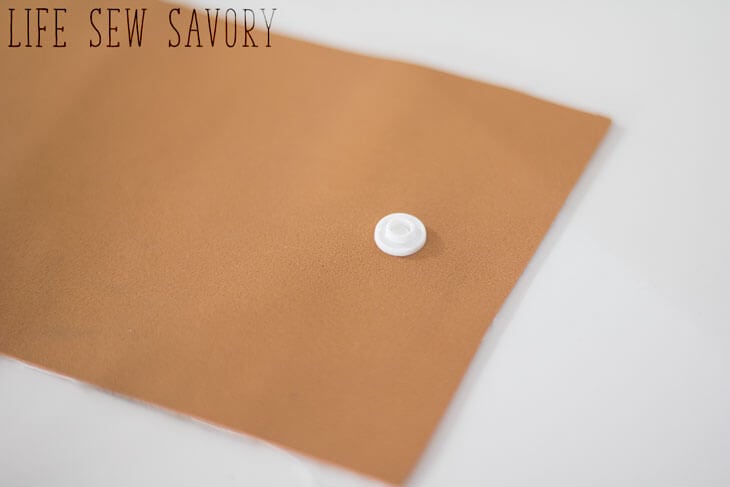
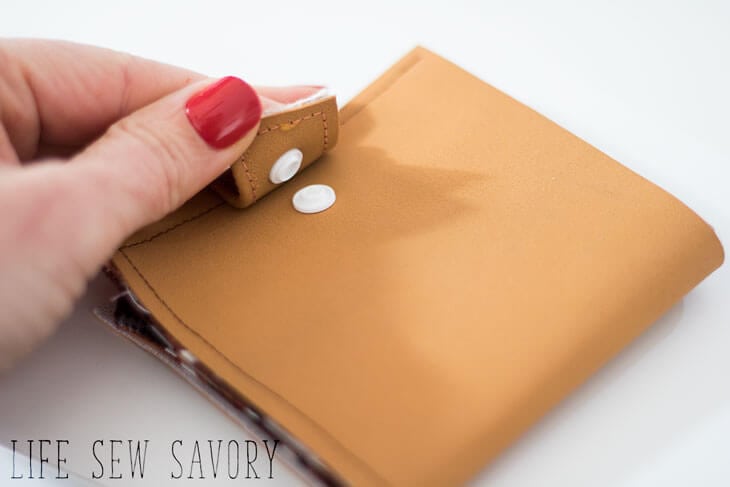
Attach a snap closure of velcro to the other side of the wallet and the flap.
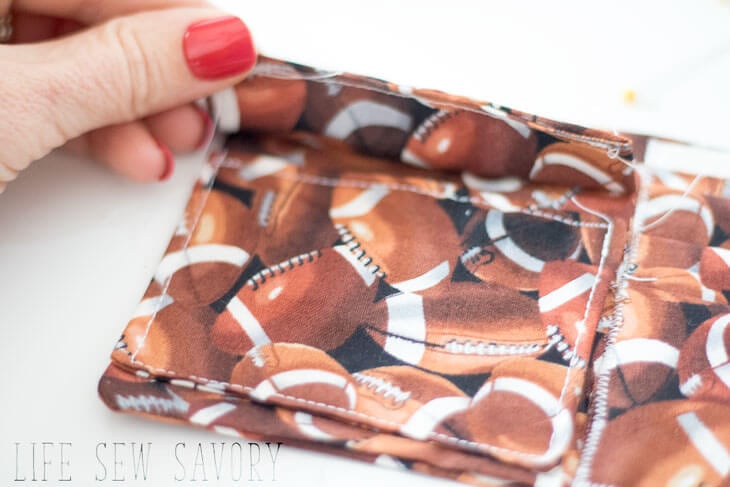
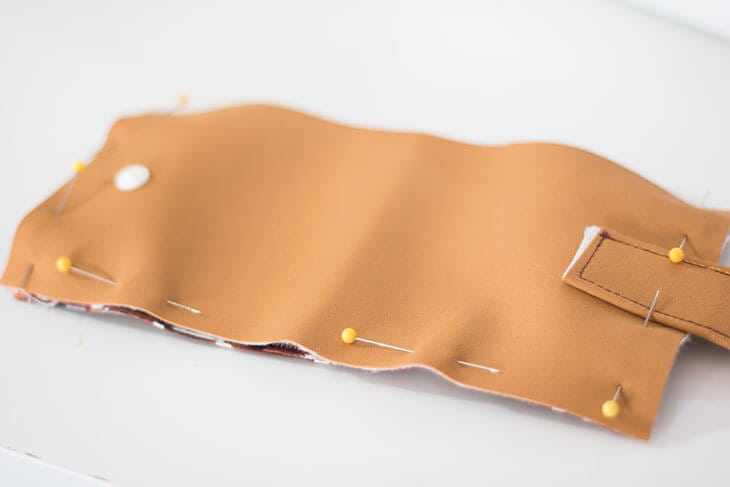
Pin the lining to the leather outer. I pinned and sewed on the leather side so I could make sure my stitches were straight. Sew around three sides, {NOT the top}
You will see the stitches a bit on the inside. The stitching tacks down the left side of the coin flap. This keeps the coins in without a fastener. Here is the finished inside.
And outside….
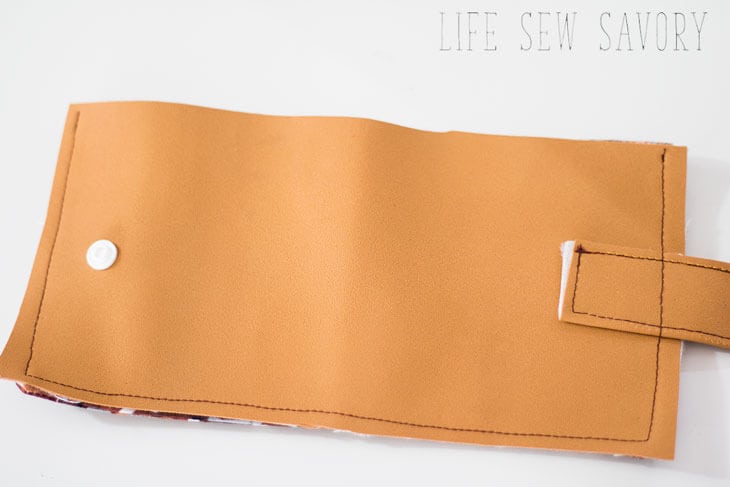
It folds in half and snaps shut…
And my son loves it {ahaha} This is a classic crazy photo when I just want one good one of the final wallet…
Here are a couple of other fun projects to make for kids…


Rose :: Fine Craft Guild .com says
Just how cool are these!! Come link up at our party http://www.finecraftguild.com/party/ Theya re worth sharing with others!
Kyle and Sarah says
soooooo cool Em! love those!
Melanie @ bear rabbit bear says
Super cool- my nephew would like this. So glad that you shared. Thanks for helping make Things I’ve Done Thursday a success!
Amy says
These are SO adorable…LC would think he was such cool stuff with one of these. Do you have a tutorial? Thanks for sharing at Shine on Fridays!
Becky@Beyond The Picket Fence says
Cute, cute, cute! What perfect little gifts these would be. Thanks for linking up.
Kara at Petals to Picots says
This is so cute! I need to remember this for when my little man gets a bit bigger. Thanks for sharing at my party! Have a great weekend 🙂
Katie @ Pincushion Creations says
These are too cute! Thanks for sharing at Homemade By You!
Highland Monkey's says
Nice and cheerful bet the boys love them.
Kadie says
How cute!! I can think of three little boys that would think they were pretty cool stuff with one of these.:) Thanks so much for sharing at Link It Up Thursday.
Rose :: Fine Craft Guild .com says
Thank you for linking it up at our link party: http://www.finecraftguild.com/party/
As always, I love your ideas! Don’t forget to link back to FineCRAFTguild.com
And btw. A brand new party will open today!
DIY Home Sweet Home says
My daughter loves making her own wallets out of paper but they never last long. I’ll have to show her these and see if she wants to try making one. Thanks for the tutorial.
Rhonda says
It’s nice to see an item geared toward a little boy. My grandson loved to cook and shop when he was little. I ended up buying him a wallet. Thanks for your creativity, and sharing on Sunday’s Best.
Nicole says
Yay! So excited to try this! My son has been begging for a wallet so he can be just like daddy 😀. He will be sooo HAPPY!!! Thank you so much for this😀💕!
flappy bird says
I have hand-made small products to give to my loved ones, but it is not as beautiful as the products you posted.